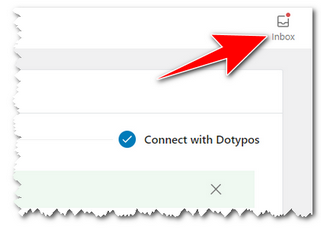
Following the procedure in the previous chapter, you have successfully run the WooCommerce Dotypos add-on on Worpress. Now we will show you how to properly set up two-way synchronization in the add-on. The add-on reports each activity to the "clipboard", which you can find at the top right as a Inbox icon. If you run an activity in the add-in, always check its completion in this report list. The first step is to synchronize the product categories.
Synchronising categories
|
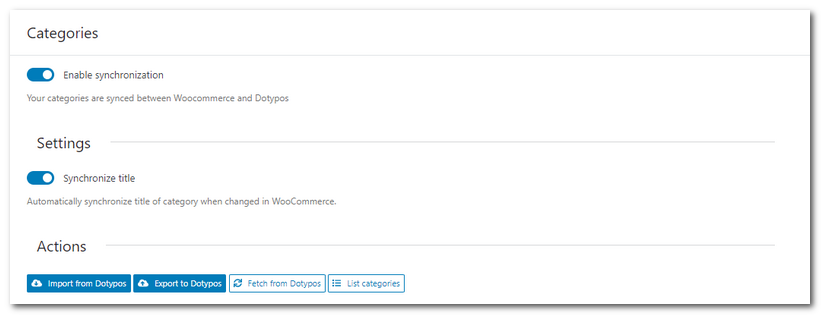
In the Categories section, activate the Enable synchronization and Synchronize title toggles. For now, the category name is only synced from WooCommerce to Dotypos and not the other way around. Two-way title sync will be added later. |
|
Watch out for duplicate words in titles. For example, if you have a Men's T-Shirts and Women's T-Shirts category in Dotypos, there is a duplicate word "T-Shirts" in both categories. So the second category will be created in WooCommerce with the name "Women's T-Shirts1". This is a standard feature of WooCommerce. |
|
Depending on whether you have created categories in Dotypos or WooCommerce, you can use the corresponding buttons to insert categories from Dotypos into WooCommerce (Import from Dotypos) or, conversely, transfer categories from WooCommerce into Dotypos (Export to Dotypos). This will create categories on either side and automatically pair them. |
|
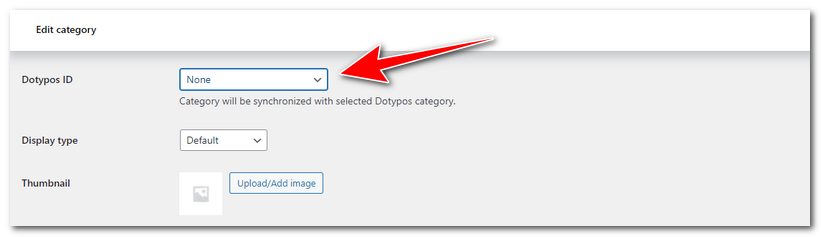
Categories can also be transferred from Dotypos to WooCommerce without automatic matching. The Fetch from Dotypos button is used for this purpose. If you go this route, you can then use the List categories button to view the categories in WooCommerce and edit their properties. In fact, you can assign the corresponding category from the cash register in the drop-down menu Dotypos ID in the properties of each WooCommerce category. The Upload button from Dotypos will populate this drop-down menu. This way you can have different categories paired on both sides. However, in this menu you will only ever find categories from Dotypos that are not already paired with any categories in WooCommerce. |
|
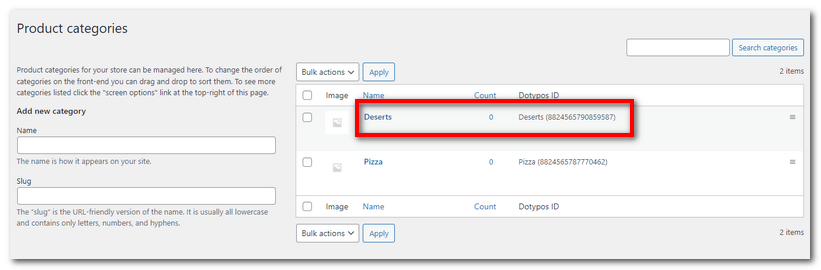
Paired categories in WooCommerce are assigned a Dotypos ID, which is actually the assigned category in Dotypos. |
Product and stock synchronization
|
As with categories, enable synchronization of product and stock movements. Then use the Select warehouse |
 button to open the warehouse selection window, click in the
  field to select it, and use the
  button to confirm.
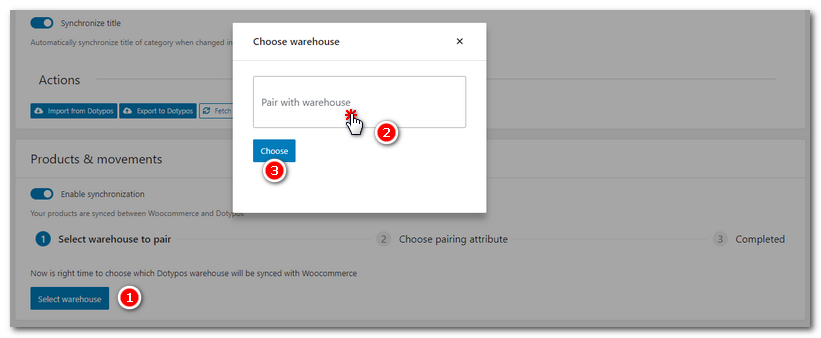
|
Now select which products will be matched on both sides. On the WooCommerce side it is by default the SKU (catalog number) and on the Dotypos side the EAN. Click in the |
 and
and  fields to select the pairing attributes and confirm with the
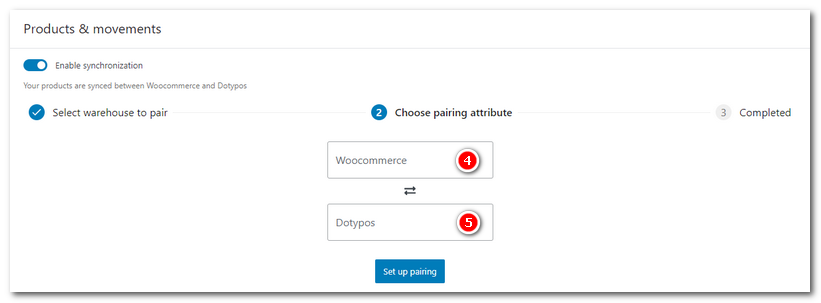
|
Pairing products between Dotypos and WooCommerce is done by default based on EAN codes in Dotypos and SKU codes on the WooCommerce side. The codes must be unique for each product on both sides. If there are multiple products with the same EAN code in Dotypos or the same SKU in WooCommerce, they will not be paired or duplicate products will be created. So before actually linking, we recommend to first check both sides for the correct product codes. |
|
The synchronization settings will now become available. You can then select which product attributes you want to sync |
 . As with the categories, products can be loaded from Dotypos or WooCommerce and paired. To do this, use the
  . When you use these buttons, the products will also be automatically paired based on EAN/SKU. The
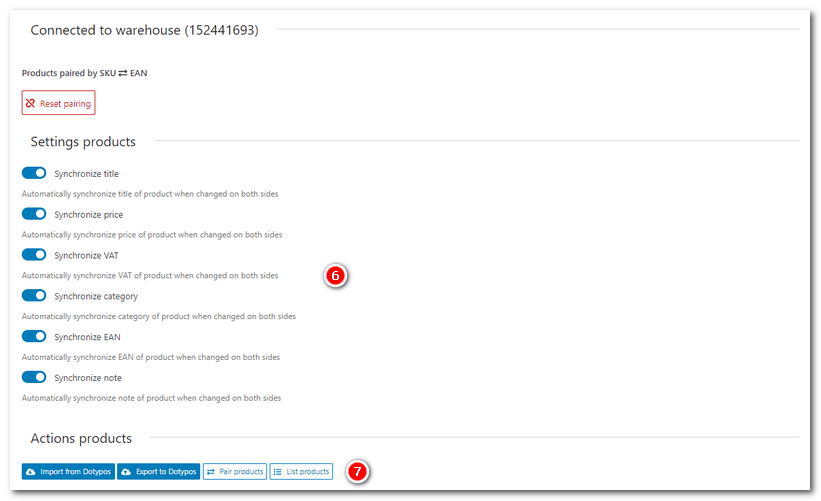
|
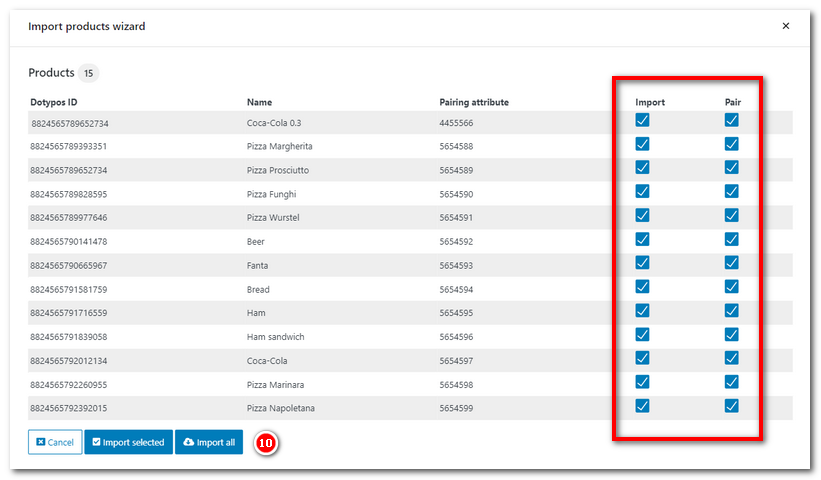
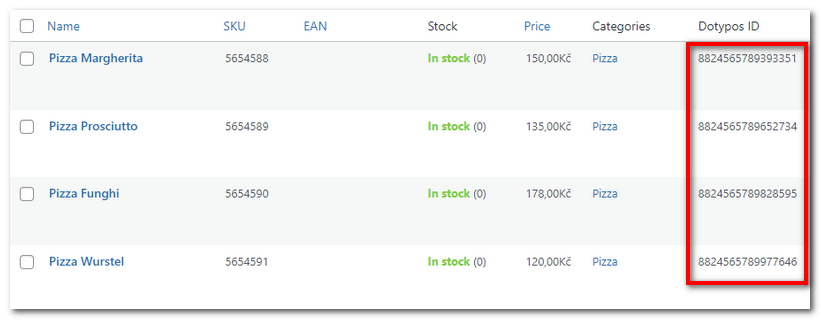
When importing from Dotypos, a window will be displayed with an overview of all products in Dotypos. Here you specify whether you want to import and pair all products or only selected ones. If you only import and don't pair products, you should pair them later in the WooCommerce product properties. Next, use the Import selected or Import all button. The products from Dotypos will be transferred to WooCommerce and possibly paired directly based on EAN/SKU. Depending on the number of items in your cash register, the report may take longer to load. Paired products in WooCommerce are again assigned a Dotypos ID, which in this case is the EAN of the product in the Dotypos. |
|
Once you have paired all the products, you can turn on the synchronization of stock movements. Alternatively, use the |
 buttons to load the current stock status from Dotypos to WooCommerce and vice versa. However, once you make changes to the product pairings again, we recommend temporarily turning off warehouse sync and turning it back on when you're done.
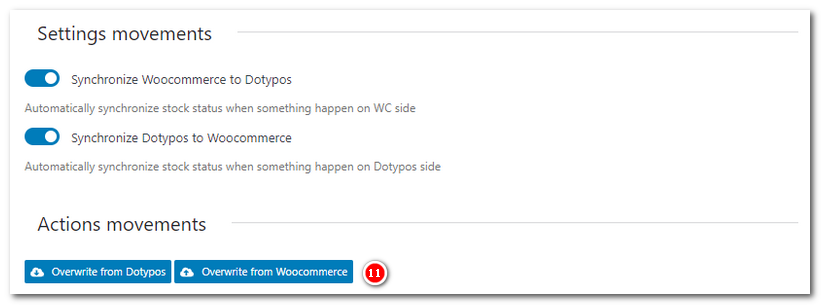
|
If you need to change the warehouse for synchronization, just use the corresponding button to cancel the pairing and then set up a new warehouse. Similarly, to change the connected cloud of Dotypos, you must first disconnect the add-on from Dotypos and then reconnect and select a different cloud. Note, however, that you need to re-enter the license key for this operation.
|
And you're done. Now everything is set up correctly. When you sell on the Dotypos or e-shop side, the stock is now synchronized, as well as newly created categories or products.