On the Daily menu  tab you can easily create a daily or weekly menu. The created menu can be copied to other days / weeks, exported to a PDF file and printed, or published directly on your Facebook page. The daily menu can also optionally be displayed on the main screen of Dotypos directly in the cash register. This enables the staff to post it to an order very quickly.
The daily or weekly menu can be displayed on the main screen of Dotypos on the so‑called Recommendation screen. Besides the menu for a specific day, it also displays the best‑selling products.
In the header you can switch to the QR codes page, which is used to display the daily menu of your business on customers’ mobile devices – the so‑called contactless menu. The menu is displayed to customers after they scan the QR code label with their mobile phone.
How to create a daily or weekly menu?
|
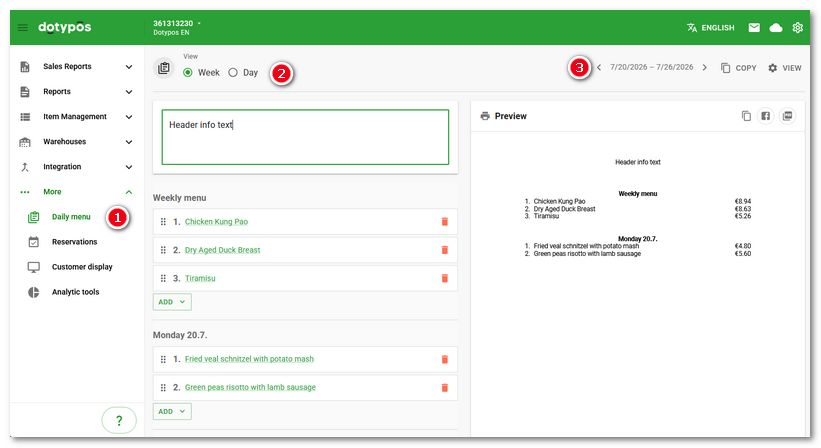
Go to the Daily menu |

 choose whether you are creating a weekly or daily menu. A weekly menu includes the same offer for each day of the week. A daily menu is an offer for a specific selected day / days. If you add products to the weekly menu, they will also be displayed in the daily menu as an offer for the whole week without being limited to a specific day. You can therefore create a menu for each day plus a separate menu that is valid for the entire week and does not change. Select the specific week or day for which you are creating the menu using the calendar
  in the top right corner.
|
For each menu you can use the VIEW |


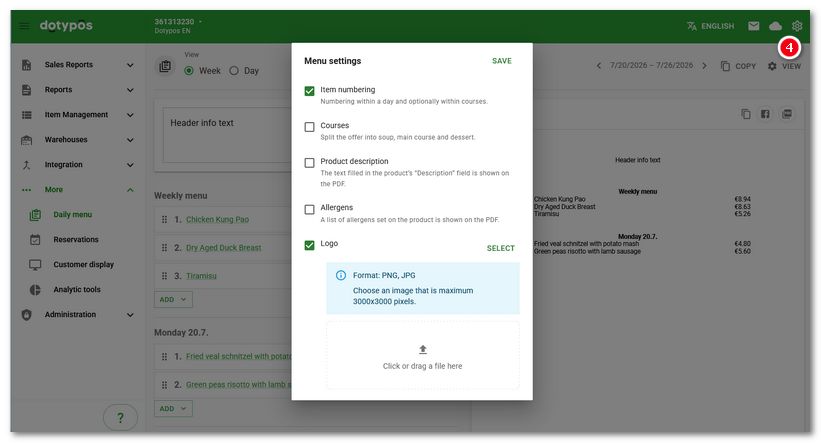
Numbering is displayed only if there is more than one product. For a single product it will not be displayed. Items in the daily and weekly menus are numbered separately. If you use courses and you have them active in the daily / weekly menu as well, the list of dishes will primarily be displayed on the cash register by course as follows:
1.(course) Soups
a.Soup in the weekly menu
b.Soup in the daily menu
2.(course) Main dishes
a.Main dish in the weekly menu
b.Main dish in the daily menu
3.(course) Desserts
a.Dessert in the weekly menu
b.Dessert in the daily menu
|
In section |

 you create the actual menu. With the
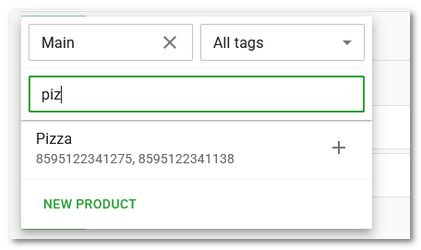
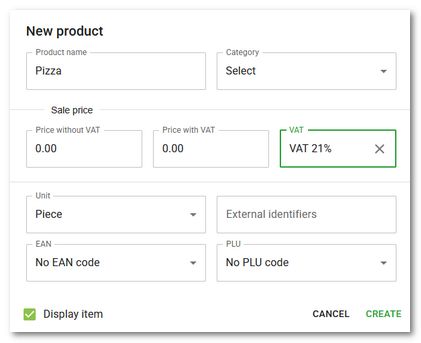
  button you open a dialog to add existing products or create a new one. Based on the entered characters or numbers, matching products are searched and offered. If you create a new product, it will be added to the menu and also saved to the cash register. By clicking a product in the menu
  . Use the bin icon to delete a product from the menu.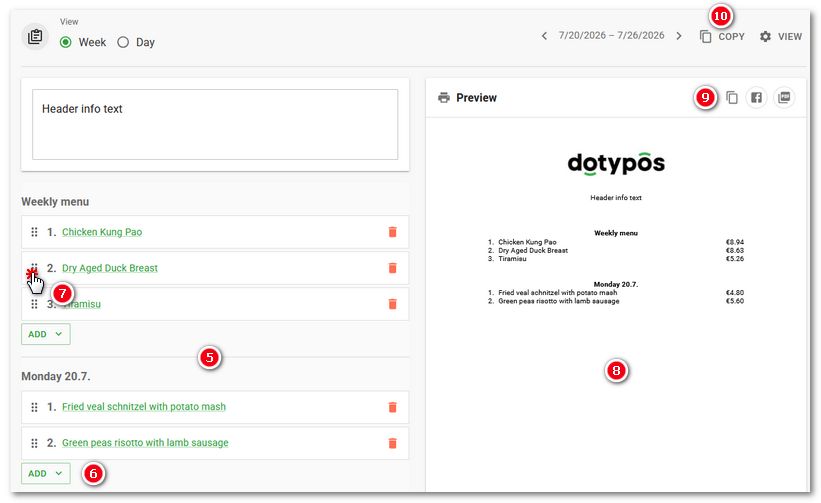
 |
 |
|
In section You can duplicate the created menu to another day or week, depending on whether it is a daily or weekly menu, using the COPY button in the header |

 (see
(see  in the header to save it to a PDF file in A4 or A5 format and print it, or share the menu on Facebook. For further work with the menu you can copy the text from the PDF file and paste it, for example, into your own document.
 .
.