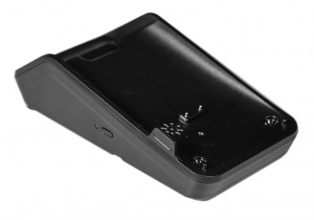
The docking base with Wifi can create its own wireless network for secure and stable connection of the Dotypay terminal. Connection of the docking base to the active element is provided via an ETHERNET network cable. The base is therefore connected to your network via cable and then distributes this network in the form of its own Wifi. However, the Wifi network generated by the docking base is only intended for Dotypay terminals, which connect to this network automatically. No other device can communicate with this network.
How to set up this base is shown below. The above procedure is based on the original English manufacturer's manual, which can be found in the package or downloaded in .pdf format from this link.
Configuring the docking base with Wifi
First you need to pair the docking base with a Dotypay payment terminal. In the second step you can then set the network parameters. Then the docking base will communicate with the Dotypay terminal (APOS A8). However, first turn on the base (insert the plug from the Dotypay terminal adapter into the POWER connector on the bottom) and after 30 seconds check the status of the indicator light on the left side. If it is red, it means that the base is available for pairing and connection.
If your router is running DHCP, just plug the network cable from that router into the Wifi dock and pair it with the Dotypay terminal. Nothing else is usually needed. The docking base will read the network parameters from the router and create a wireless network, which the Dotypay terminal will automatically connect to once paired. Optionally, of course, the network parameters can be displayed or set manually in the docking base. You will need to know the IP address that the docking base receives in order to set up the Payment Terminal Driver correctly at the cash register. This is in case you use the Dotypay device as an external payment terminal and run the cash register on another device. Everything is described below.
top

|
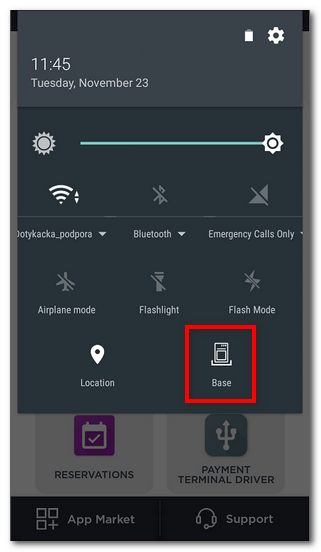
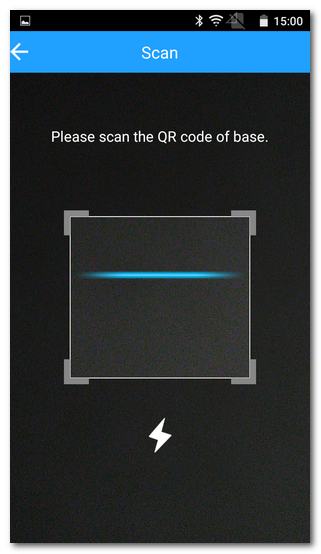
Place the base and the Dptypay terminal up to 5 meters apart. On the Dotypay terminal, pull down the top bar and tap the Base icon. A list of available docking bases will be displayed.
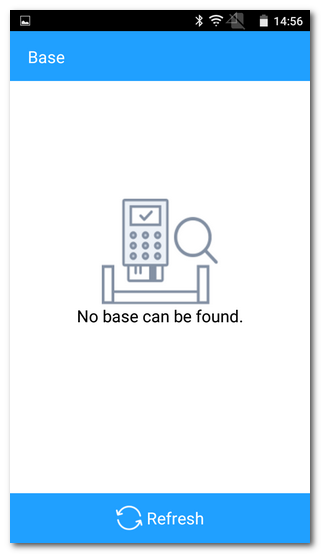
If no base is available (No base can be found.) or your docking base is not listed, check that it is properly connected and the pairing mode is set. Then tapthe Refresh button at the bottom. The docking bases that appear in the list will be searched again.
|

|
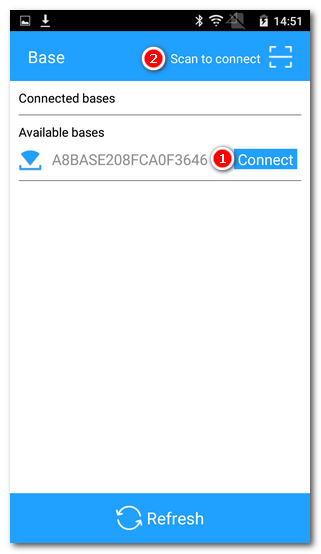
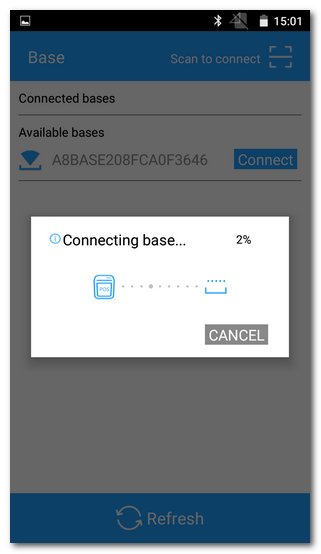
When the available bases appear, tap the Connect button next to the selected base. Another option is to use the Scan to connect button in the header to scan the barcode located on the bottom of your docking base with the terminal's camera.
|

|
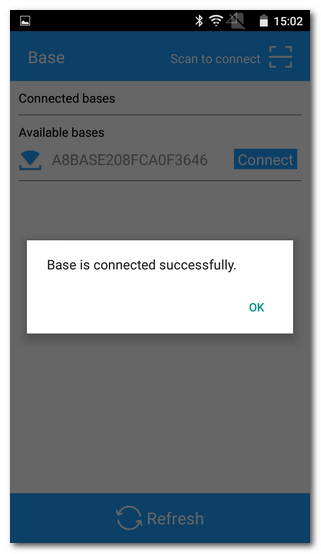
Once confirmed, the terminal will be paired and connected to the docking base. The connection can take 60-120 seconds. Successful confirmation is indicated by the Base is connected successfully dialog. In this dialog, tap OK.
|
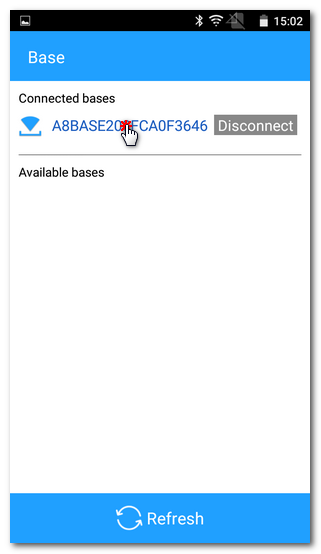
In the overview of the available bases, you can disconnect the base with the Disconnect button after connection.
top
|
|
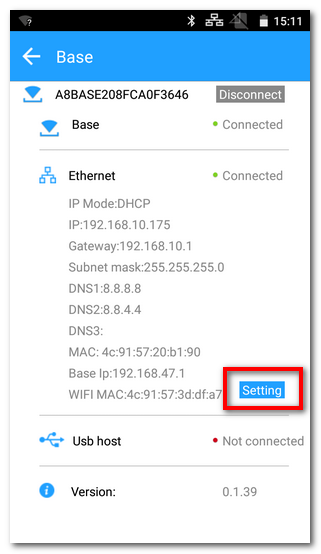
Connect the network cable (ETHERNET) from your router to the port on the bottom of the base. In the base overview, tap on the name of the paired base and under Ethernet, open the settings with the Setting button.
|
|
If the network parameters have not been loaded after connecting the network cable, use the Refresh button in the header to load them. After confirming the query, the base will attempt to detect the current network configuration from your network element. Successful retrieval is confirmed by the Retrieve base parameter successfully dialog. Close this dialog by tapping OK, note the displayed IP address in the IP field and save the settings with the Save button.
|
|
In some cases, not all network parameters may be retrieved correctly. Then it is necessary to enter the individual network parameters manually, including entering a static IP address, and save the settings with the Save button. However, if DHCP is running on your router, it is usually not necessary to interfere with the network parameters of the docking base. They are loaded automatically when you connect the network cable to the docking base.
|

|
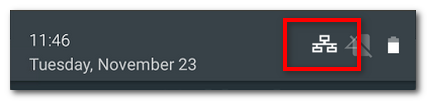
The Dotypay terminal will now automatically connect to the docking base. This is an internal system connection via protected Wifi that other devices cannot access. The connection is indicated by an icon in the status bar.
|

|
When setting up a fixed IP address, all 3 DNS fields must be filled in. We recommend using the IP address of the gateway, i.e. your active element, as DNS1 and entering the public DNS IP addresses of Google in the DNS2 and DNS3 fields.
|
top
|
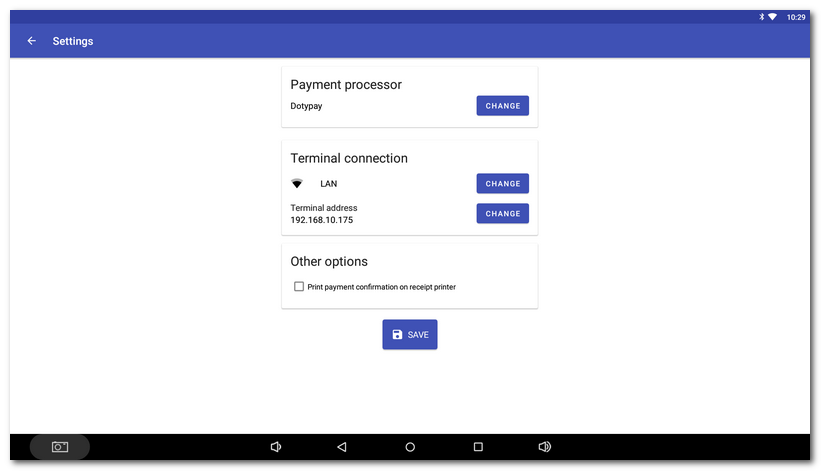
If you are using Dotypay only as a payment terminal and the cash register itself is on another device, you need to install and configure the Payment Terminal Driver on the cash register, this is described in detail in this section. In the Payment Terminal Driver settings, select the Dotypay Payment Provider, Terminal LAN Connection and the IP address of the terminal in this case will be the IP address shown in the Docking base settings. That is, the one you recorded in the previous step.
After saving the settings, a test transaction can be performed in the Payment Terminal Driver to verify correct communication. If the cash register does not communicate with the terminal, check the network settings of the docking base to see if its IP address has changed. If so, you must set the same IP address as the terminal address in the Payment Terminal Driver settings.
top
|
top