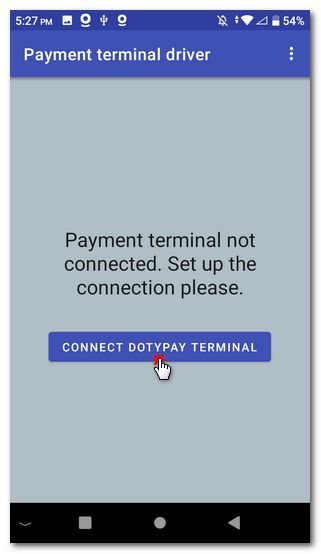
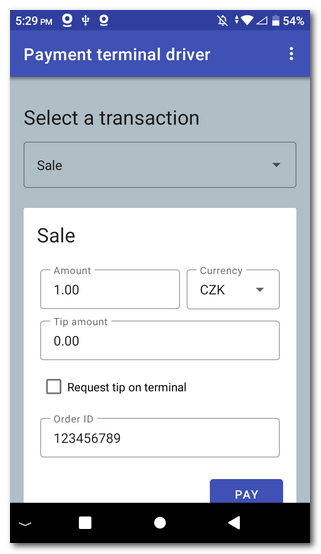
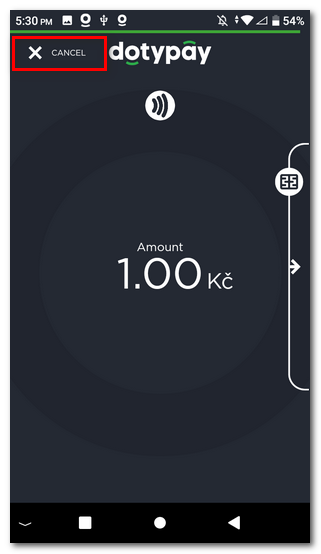
For communication between the Dotypos application and the payment terminal of the device, you have to properly set up the Payment terminal driver. This is the application you downloaded and installed in the previous step.
|
If you do not use the Dotypos POS application on the Dotypay device and you use a standalone POS, please refer to the chapter Independent use, where you will find information on how to set up the terminal for communication with the standalone Dotypos cash register. |
|
Launch the Payment terminal driver application and tap the single CONNECT DOTYPAY TERMINAL button. This will automatically pair the DOTYPAY with the built-in payment terminal. |

|
Then, directly in the payment driver, use the PAY button to execute the test transaction. It should be displayed on the terminal afterwards. If this happens, you have correctly set up the terminal for communication with the Dotypos application. Cancel the transaction using the option on the top left. |
 |
 |
|
If you use Dotypay only as a standalone payment terminal wirelessly connected to your cash register, you can check the option under Other options to redirect the printing of the transaction confirmation to the receipt printer. In this case, however, you make this setting in the payment terminal driver that you have installed directly on the cash register. We also recommend that you refer to this chapter, which describes how to connect the Dotypay payment terminal to the Dotypos cash register via your Wifi network. |
|
The moment you close your account in the Dotypos application and choose to pay by card, the payment will be made via the integrated (built-in) payment terminal. |
|
To get familiar with the Dotypos application, go to the chapter First Dotypos operations. This chapter provides an overview of the basic operations necessary to put the touch cash register into operation so you can start working with the cash register as soon as possible. |