You can also use Dotypay terminal independently like Mobile Waiter or the external payment terminal. In such situations, the POS application Dotypos is installed on another device and this so-called main cash register communicates with Dotypay terminal via the network connection in your establishment.
|
Together with supported payment terminals, Dotypos allows the customer to enter a tip on the terminal before the payment. For more information on tipping, see the Smart tip chapter. |
Use it like an independent payment terminal
Use it like Mobile Waiter with a internal payment terminal
Use it like an independent payment terminal
Connecting the Dotypay payment terminal to the Dotypos cash register is very simple. However, it is necessary to ensure that both devices, the Dotypos cash register and the Dotypay payment terminal, are connected to the same computer network and have internet connectivity. So if you have both devices connected to their own identical network and have internet access, follow the steps below.
Once the pairing is complete, the amount to be paid will be transferred from the cash register to the payment terminal. In turn, the terminal will inform the cash register of the successful or unsuccessful transaction. This will eliminate the need to manually enter the amount to be paid at the terminal. How to make card payments in Dotypos is shown in the chapter Payment with card.
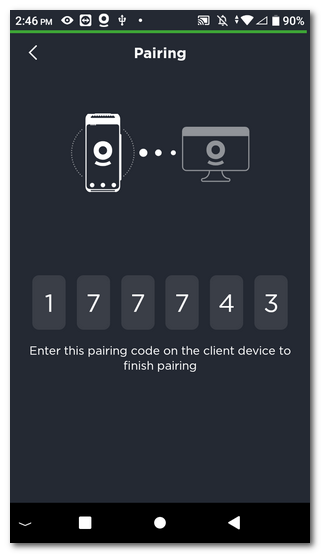
Step 1: Display the PIN for pairing on the Dotypay terminal
|
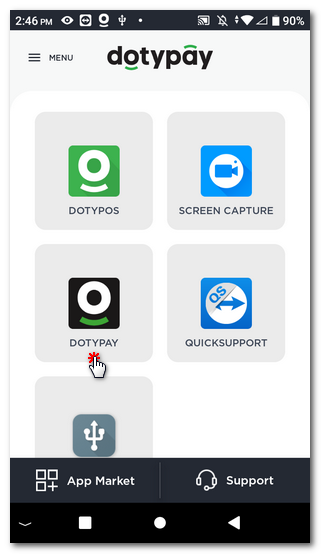
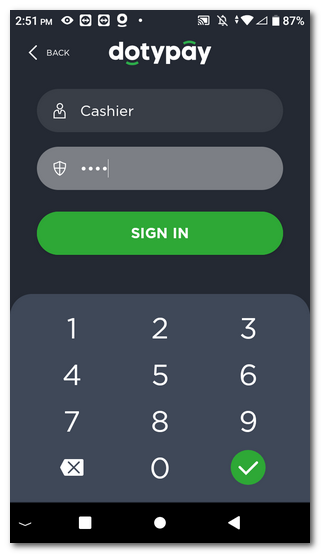
Launch the Dotypay app on the Dotypay terminal and log in. |
 |
 |
|
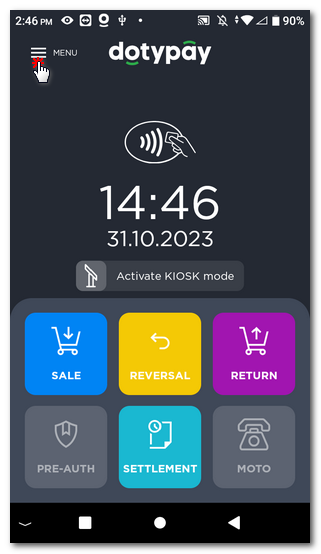
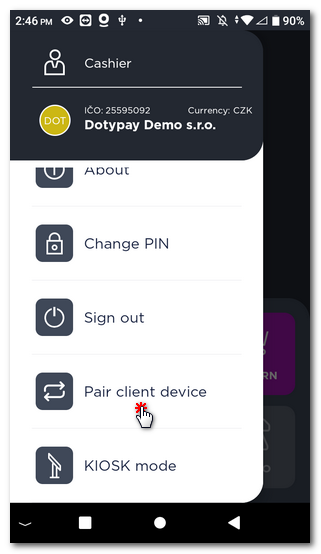
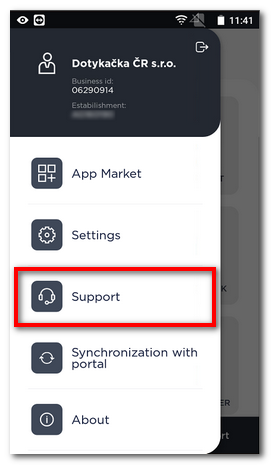
Open the menu and select Pair client device (Pair with Dotypos) at the bottom. |
 |
 |
Step 2: Install the payment terminal driver on the cash register
Dotypos provides its own driver, which is used for communication between the cash register and the payment terminal. Once you have the Dotypay payment terminal ready, you need to perform a simple step at the Dotypos cash register just in the payment terminal driver.
Download and install the payment terminal driver through the Dotypos Marketplace. The procedure on how to install apps is also described in the chapter Installing applications. So open the Dotypos Marketplace application, select the Payment Terminal Driver (Ovladač plat. terminálu) and install it by clicking the INSTALL button.

Step 3: Setting up the payment terminal driver
|
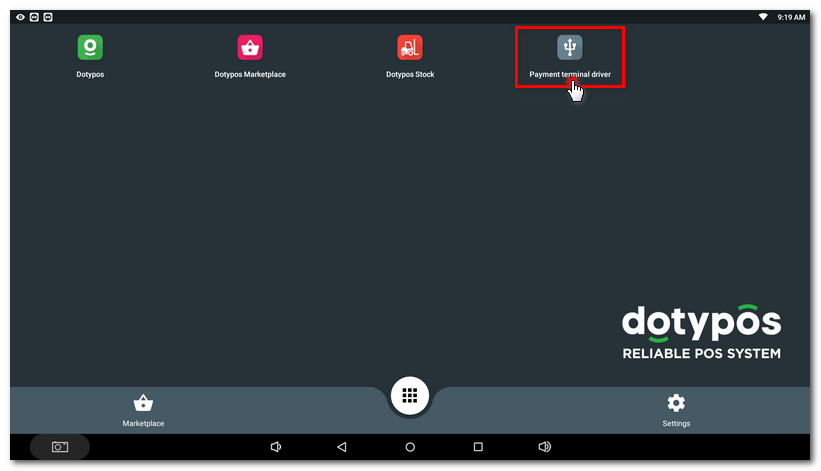
After installation, the payment terminal driver icon will be available on the mainscreen. Tap on it to make its settings. |
|
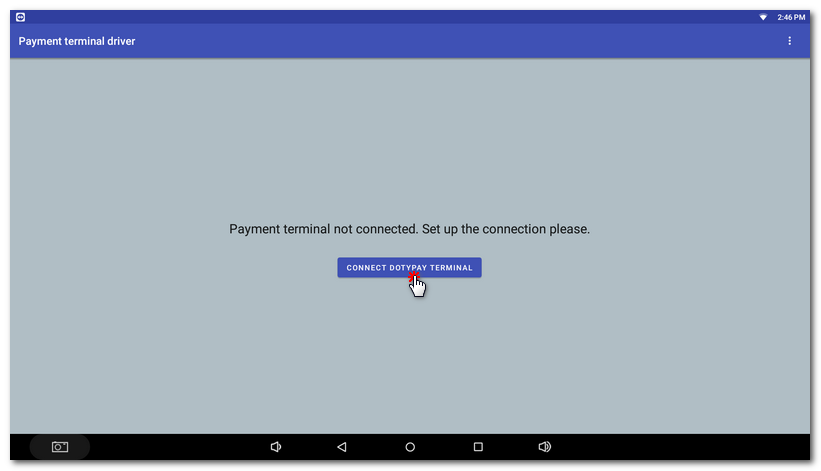
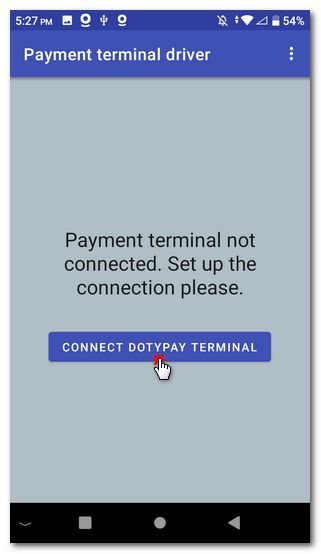
The payment terminal driver app opens. First, agree to the terms and conditions and press the CONTINUE button. Then tap the single CONNECT DOTYPAY TERMINAL button. |
|
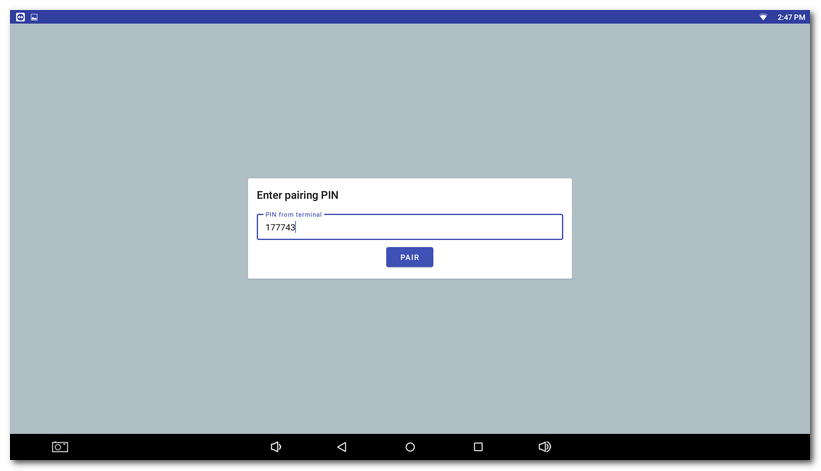
Enter the pairing code displayed on the Dotypay terminal (see step one) in the field displayed and tap the PAIR button. |
|
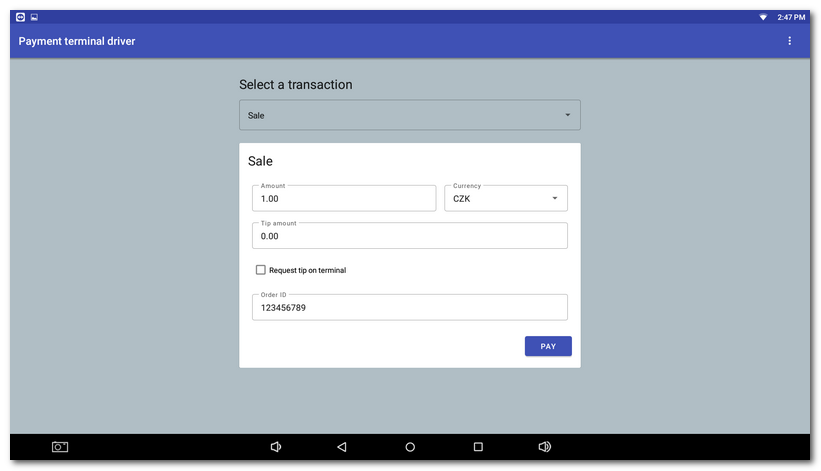
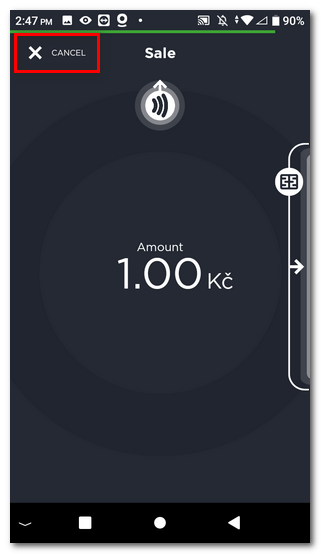
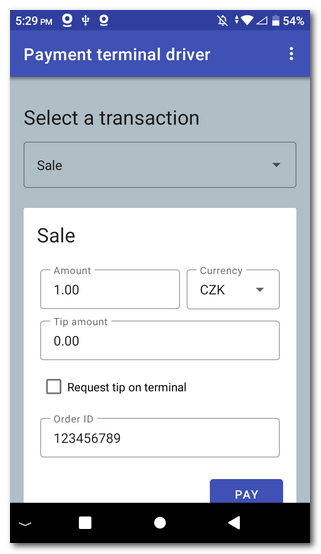
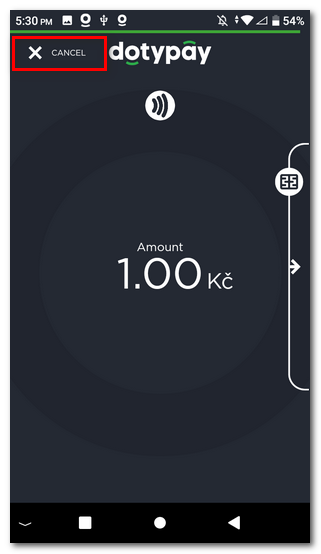
Now execute a test transaction directly from the driver app. The transaction should be displayed on the terminal. If this happens, you have connected the terminal. Cancel the transaction using the option on the top left. The Request tip on terminal option activates the tip entry dialog before the actual payment. |
 |
 |
|
•If the Dotypay terminal in the future acquires a different IP address than it had when it was first paired with the code, a communication error with the terminal will be displayed during the transaction. However, simply retry the payment, this should re-establish communication. Thus, the repeated transaction and each subsequent transaction will already pass. •The transaction error behavior will always be repeated if the terminal has obtained a different IP address since the last connection to the cash register. The next (repeated) transaction will cause the payment terminal driver to update the connection to the terminal and communication will be functional again. However, both devices must have internet connectivity. •If you need to reconnect the payment terminal using a code repeatedly, clear the Payment Terminal Driver app data and then restart it. The connection option will now reappear. |
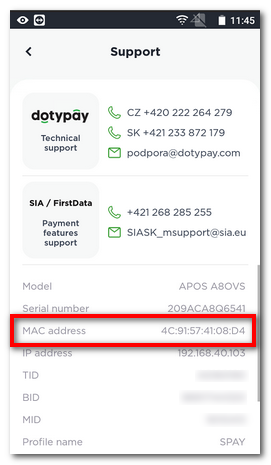
 Fixed IP address reservation based on the MAC address of the device
Use as a Mobile Waiter with its own payment terminal
The Dotypay payment terminal can also be used as a Mobile Waiter when you use the integrated (built-in) payment terminal for card payments.
|
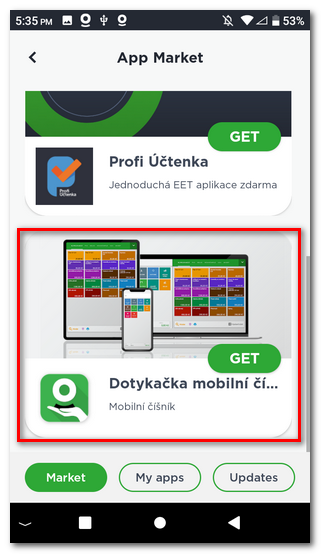
Install the Mobile Waiter app (Dotykačka mobilní číšník) on the Dotypay terminal via the Market button. After installation, launch the application and pair it with the main cash register according to the procedure in this chapter. A full description of the Mobile Waiter can be found here. |
|
Next, install the Payment terminal driver from the Market. Once installed, launch the application and tap the single CONNECT DOTYPAY TERMINAL button. This will automatically pair the Mobile Waiter with the built-in payment terminal. |
|
Then, directly in the driver environment, use the PAY button to execute the test transaction. It should be displayed on the terminal afterwards. If this happens, you have correctly set up the terminal for communication with the Mobile Waiter. Cancel the transaction using the option on the top left. |
 |
 |
|
The moment you close the order in the Mobile Waiter and choose to pay by card, the payment will be made via the integrated (built-in) payment terminal. |
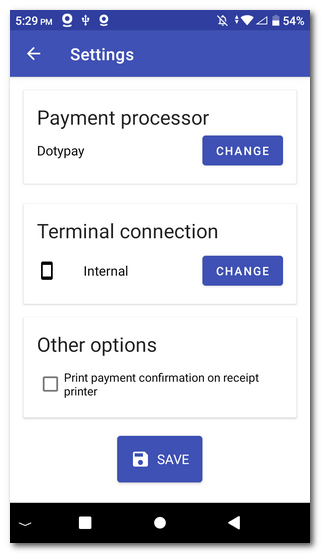
 . For Dotypay, select