The touch cash register supports up to 3 connected printers, but just 1 printer can be connected to the cash register directly via a USB port. Eating establishments usually have one printer for receipts and another printer for orders.
The order printer is usually connected to the touch cash register via the customer’s own network. Thus, the printer is connected via the network cable to the active component (router), which also provides the Wi-Fi connection. The touch cash register also has to be connected to this Wi-Fi network. Wi-Fi printers are not recommended due to their unreliable performance because of frequent instability and poor quality of the wireless connection.
A LAN order printer should always be connected by a network cable directly to the router which is also connected to the Dotypos cash register (via cable or wirelessly). Both devices must be in the same network. If the printer is connected to another active component, it may not print properly.
Connecting the printer to the computer
|
Use the following procedure to set a fixed IP address on the printer for advanced users. A fixed IP address is recommended for reliable communication between the cash register and the printer. However, the same effect can also be achieved by reserving the IP address in the DHCP server settings on the router side. If a fixed IP address is not reserved for the printer, it may happen that after some time or power failure in your premises, the printer will be assigned a different IP address and printing from the cash register will not work. A temporary solution is to re-enter the IP address from the printer parameters printout into the printer's LAN settings in Dotypos. |
How do I connect a LAN printer?
|
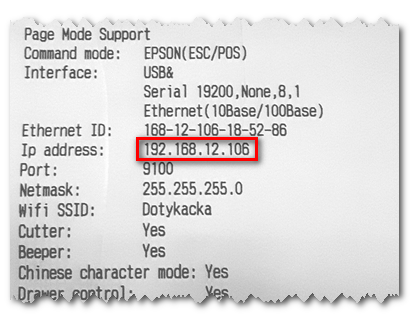
Press and hold FEED on the printer and turn it on. The printer’s parameters and settings will be printed out. The printed information includes the IP address: and next to it is the factory preset value of the IP address. Remember this IP address. |
|
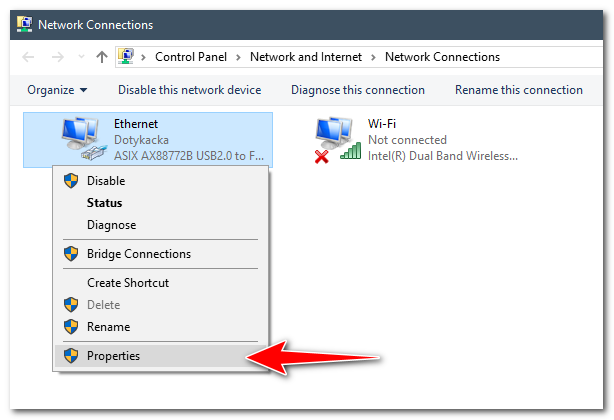
Now connect the computer directly to the router to which the printer is connected with a network cable (Ethernet) and proceed to its configuration. If the printer configuration interface cannot be opened in the browser, connect the printer directly to the computer with the network cable. On the computer open the network connection overview (Press the button START and type ncpa.cpl). Choose the cable network connection (usually labeled as Local network connection or Ethernet) and click on this connection with the right-hand button. In the displayed context menu choose Properties. |
|
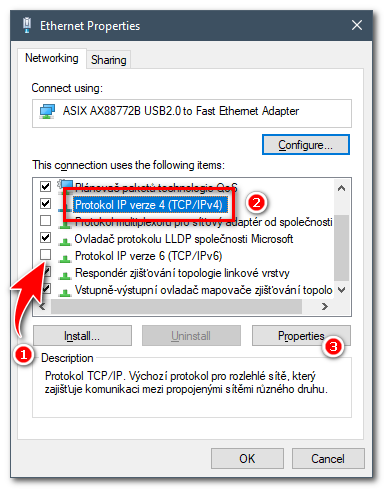
In network connection properties deactivate IP protocol version 6 |
 . Then click on
  and choose
  .
.
|
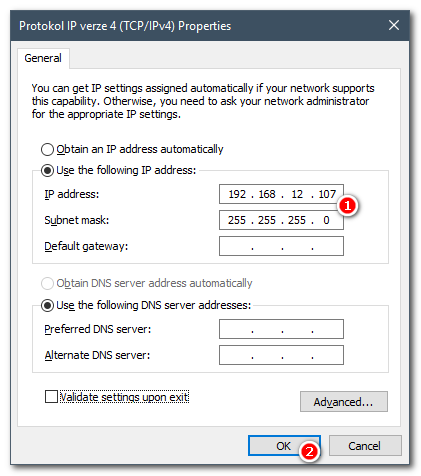
If the static IP address is not set in IP protocol version 4 properties, check the option Use following IP address and for IP address enter the IP address with the same range (but not the same address) as is set for the printer. For example, 192.168.12.107. If the computer has a static IP address set up, mark down this address first and then rewrite it with a new one. When the printer configuration is finished, put the original IP address back. Move to Subnet mask and enter 255.255.255.0, then click on OK to save changes. |
How do I configure a LAN printer?
|
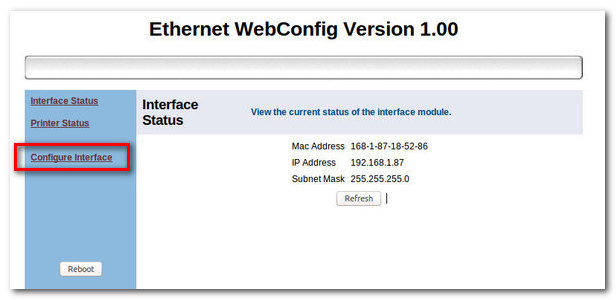
Now open the web browser and enter the IP address of the printer in the address line. The web interface for printer configuration will open. On the displayed page click on Configure interface. |
|
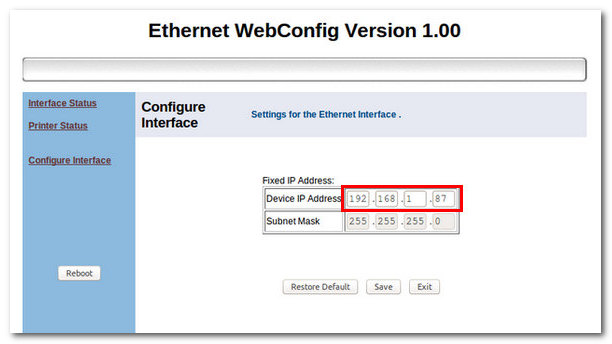
Enter the new IP address for the printer that corresponds with your local network (with the customer’s local network) in the fields next to Device IP Address. LAN printers support only the static IP address. The IP address cannot be assigned dynamically by the DHCP server. In Dotypos, the LAN printer has to be defined and with a static address. Enter the set IP address in the printer's LAN settings in Dotypos. |
|
After saving the set IP address, the printer has to be restarted. This information will be provided in the displayed dialog. Then click on Reboot to restart the printer. When turned on again, the printer will have the newly set IP address available in the network. |
