You can filter many of the information in Dotypos Cloud by a selected time period. This is done by the calendar field in the header of each page with data that can be filtered in this way. You can choose from preset ranges in the calendar. Clicking on a preset range will automatically set the calendar to the selected period. In addition, using the buttons in the header, you can directly limit the displayed records to the last day, week, month or year.
Depending on which part of Dotypos Cloud you are in, two types of calendars are available. Working with them is slightly different and is described below.
Original version of the calendar
New version of the calendar
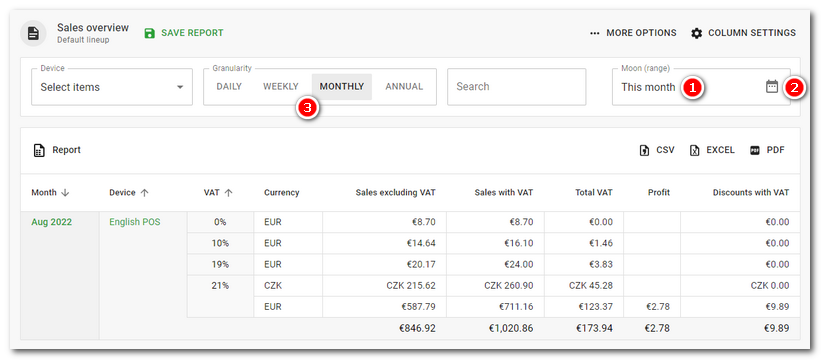
By clicking into the fields  and
and  (see image above), you can directly enter the range from/to. The range in the field always corresponds to the selected period in the section
  . For example, if MONTHLY is selected here, enter the range of months in the format mm.yyyy in the section . If you select a DAILY range, you will be able to enter a range defined by two dates - dd.mm.yyyy - in the section .
The field allows you to set the time range of the displayed data. If you set the end time, for example, to 23:59, all records up to 23:59:59 will be displayed. If you enter the time 00:00 - 23:59, records from 00:00:59 to 23:59:59 will be displayed.
Click on the calendar icon  to open a clear calendar with quick options:
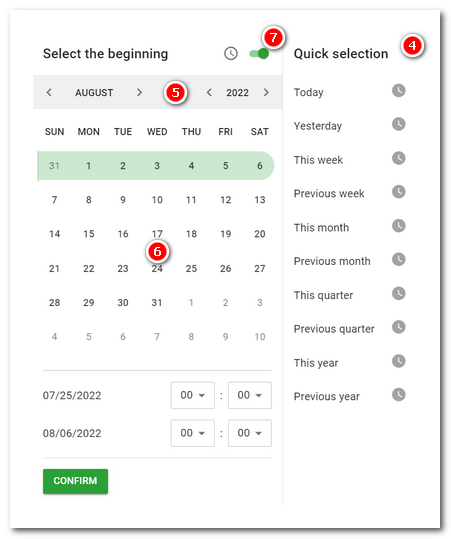
Click on one of these options under  to set the most common time period. You can then use the calendar to select your own interval. First select the month and year
  , then mark the specific start day
  . If the month and year match, you can also mark the start day. The selected start day will be highlighted. Then select the ending day in the same way. The entire interval will be marked in the calendar and the displayed dates will correspond to this interval.
If you also want to limit the set interval by time, activate the switch  and specify the time from - to at the bottom of the calendar.
|
•Based on the current calendar date, the corresponding period will be displayed automatically if it has been set. So if you set the calendar in the quick options to This month, the next month will display the dates from the current month and not the previous month. •If a large number of dates are displayed, the dates will be loaded sequentially automatically as you scroll with the mouse. So there is no classic pagination. |

Original version of the calendar
This calendar is used by some pages under the Warehouses tab.
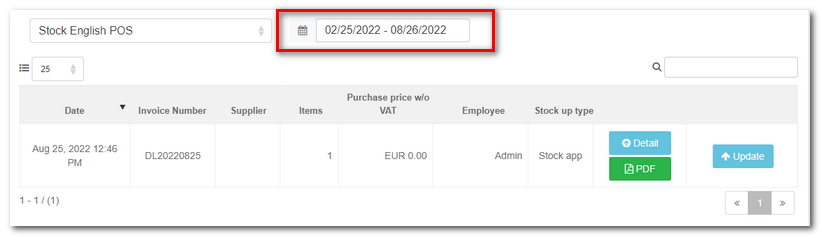
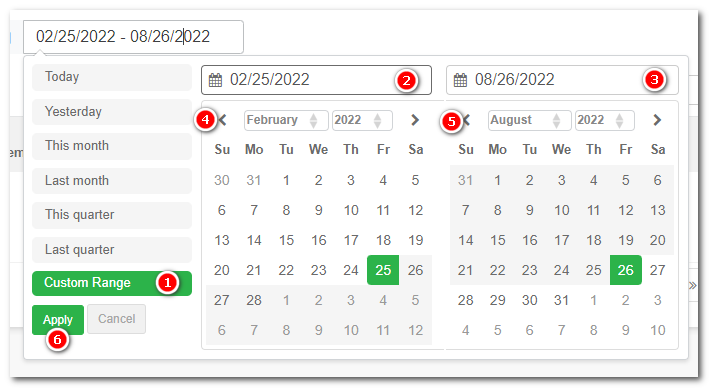
If you need to select a custom range, select Custom Range and tap the right and left months to select the start and end of the period for which you want to view the data. You can also type the date directly into the and fields, using the mm/dd/yyyy format. Click on the and icons to scroll through the calendar by month. Finally, confirm the range you have set by clicking Apply .
|
If you only need to set one day as the time period, tap twice on the selected day in the left or right month. You can see the correct date by the shape of the green square in the calendar. If it is rounded, you have entered everything correctly and the calendar will allow you to save via the Apply button. |