A completely functional touch cash register is a prerequisite for installing and setting up the customer display. I.e. the Dotypos app installed and the Customer Display connected. The separate customer display communicates with the touch cash register via the network connection. Both the cash register and the separate customer display itself must have IP addresses assigned and “visible” to each other.
|
If you use a customer display connected directly to the 15" cash register, it is a display device only and in this case you do not install any application. You simply enable the customer display function directly in the Dotypos application and then upload media via Dotypos Cloud. |
How do I install the customer display and put it into operation?
Follow these steps to set up the customer display:
1.Install the application Customer display
2.Configure the customer display on the cash register
3.Load the media via Dotypos Cloud
Install the application Customer display
|
Unpack and connect the separate customer display. It should turn on automatically. On the Android desktop, run Dotypos Marketplace and install the application Zákaznický displej Dotykačka (Customer display Dotypos). |
|
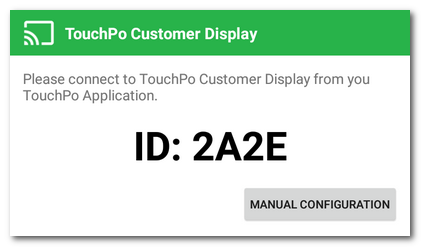
Run the application Customer display. The initial dialog with a generated ID number appears. The touch cash register connects to the customer display using this number. Remember this number. Use the button MANUAL CONFIGURATION to display and change the IP address of the customer display and the port. However, we recommend that only advanced users change these settings. By default you do not have to change them. Now continue by setting up the customer display in Dotypos. |
|
If you are using a DHCP server in your network, the customer display will obtain the IP address automatically. When paired using the ID number, the cash register is able to find the customer display even if you change its IP address. If the customer display has stopped communicating with the cash register, please refer to this section. |
Touch cash register configuration
|
Run Dotypos on the touch cash register and go to the advanced settings to the Accessories section. There, click on the option Customer display. The advanced customer display settings for Dotypos will open. |
|
Click on Connect Dotypos display |
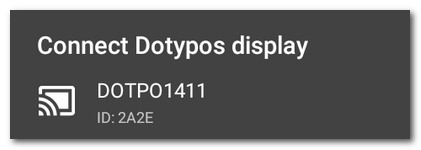
 and, in the displayed dialog, select the customer display with the relevant ID number (see the
  . Now you have the customer display connected to the cash register. You can then continue by
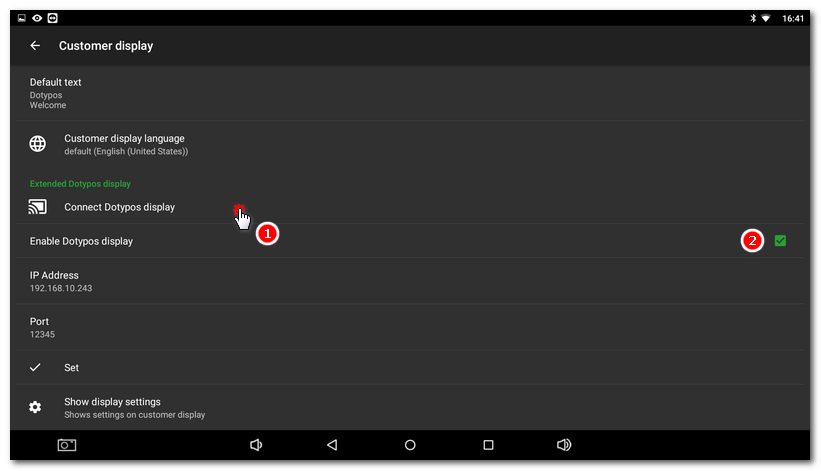
Loading media
Now set up what kind of media will be displayed on the customer display. This setting is available via Dotypos Cloud. Log into the web interface of Dotypos Cloud and follow the steps in this chapter.
Synchronize
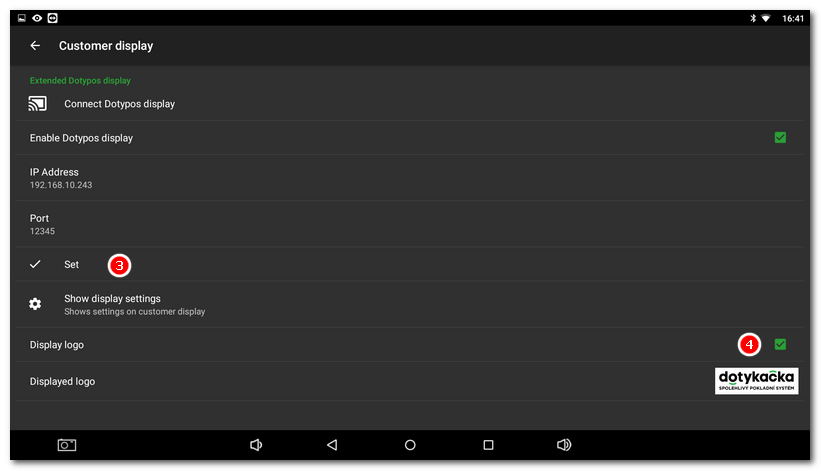
Once your media playlist is ready, click on the option Set  to load and synchronize the media. Images or videos will be displayed on the customer display in a few seconds (according to media number and size). At the same time, it will leave activated the option Show display settings. By clicking on this option, you show the settings directly on the customer display. The settings will also appear if you click three times at length on the customer display during playback.
If you want the Dotypos logo not to be shown on the customer display, deactivate the option  . You can also change the logo picture by clicking on it (under this option).
|
If you just want media without information about the current account to be shown on the customer display, perform the synchronization and then set another IP address. The customer display will now contain the media, but it will not be available for displaying actual information. |