You can purchase an additional Customer Display for the cash register, which is either another standalone tablet with a special application installed that displays advertising images and videos on the screen, or a tablet mounted on a stand alongside the cash register. When there is an active account on the cash register, besides the images and videos, the display also shows charged items and the total amount. The customer can see what goods are being charged and the total price for their purchase.
|
Before setting up the customer display in Dotypos cloud, first activate the Customer Display function in the cash register and configure the second tablet that will serve as the customer display. The procedure can be found in this chapter. |
If you have correctly set up the customer display on both the cash register side and on the tablet displaying it, you can proceed to create a playlist and upload media. You will further determine how long and in what order the images are displayed on the customer display. For each cash register, you can create multiple playlists and switch between them or let them all play. The media will play on the customer display connected to the given cash register. We recommend uploading a maximum of 20 files at a time. If you have more media files, upload them in batches of this size.
Supported media formats |
|
Image type |
jpg, jpeg, png, gif |
Video type |
mp4 |
Recommended resolution |
1920 × 1080 px |
Size of a single image file |
max. 30 MB |
Size of a single video file |
max. 500 MB |
Creating a playlist and uploading media
Creating a playlist and uploading media
|
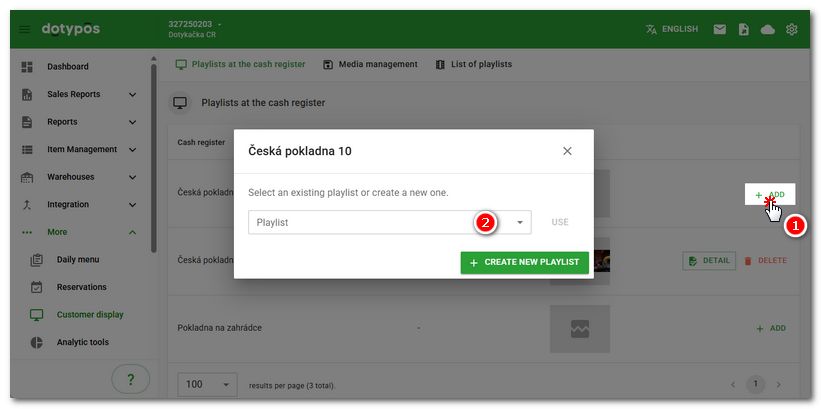
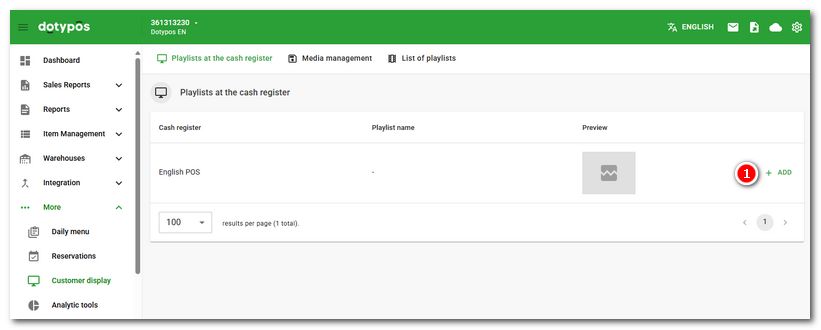
Log in to Dotypos cloud and navigate to the Customer Display tab (you can find it by expanding the ... More tab). For the selected cash register, tap the |

|
Click the + CREATE NEW PLAYLIST |
 button, or select a previously created playlist from the dropdown menu.
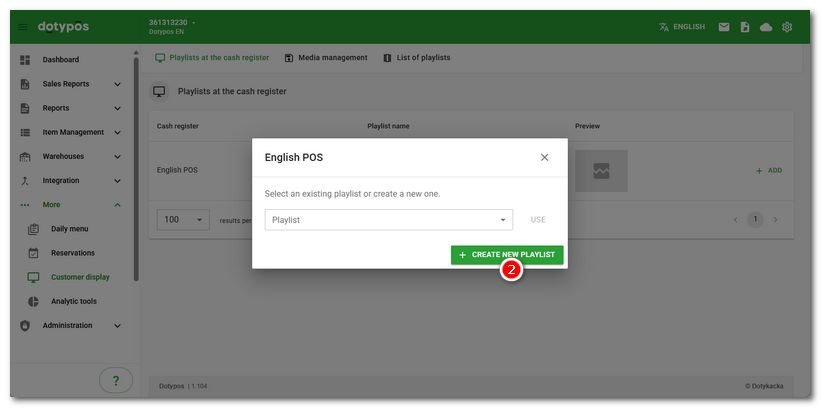
|
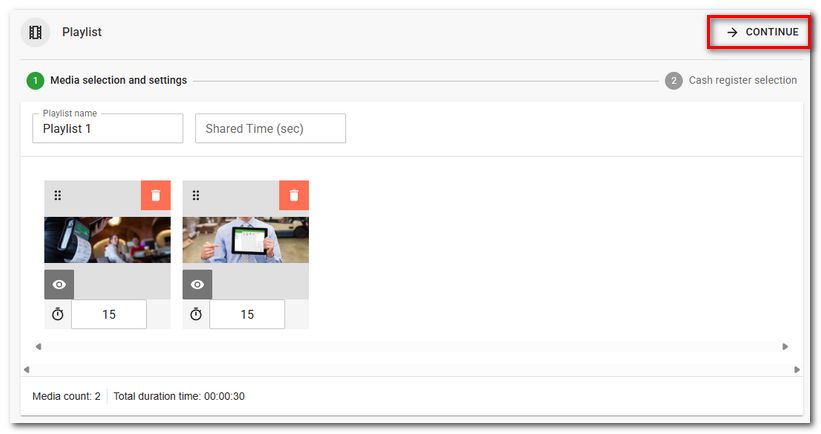
In the header |
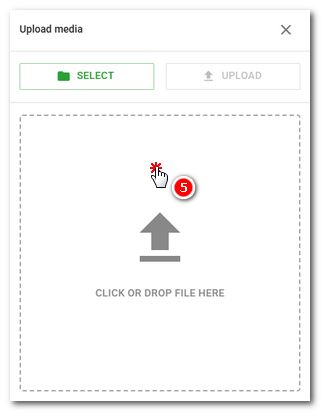
 , enter the playlist name and optionally a common playback time for all images. At the bottom, press the
  button to open the media insert dialog and select files to upload by clicking in the area
  or using the
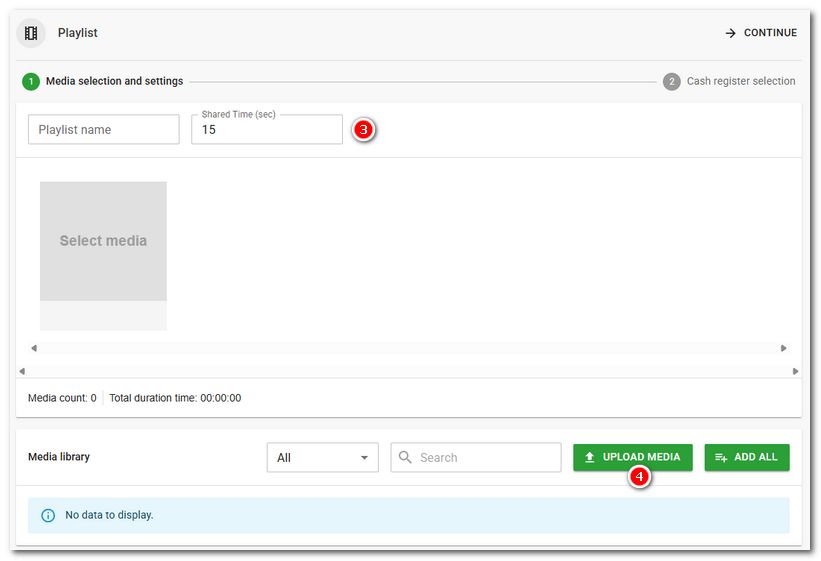
|
After inserting all files, press the UPLOAD |
 button to insert them into the media library. They will not yet be part of any playlist. They will be uploaded in the library where you will have them available.
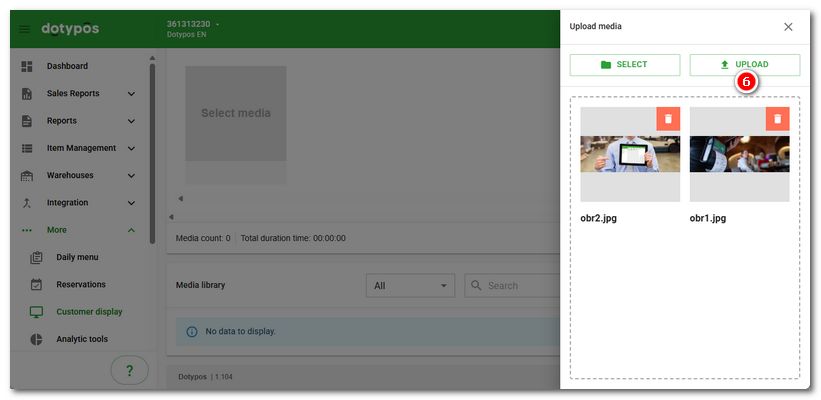
|
For the best result, use media with full HD resolution i.e. 1920x1080 pixels. |
|
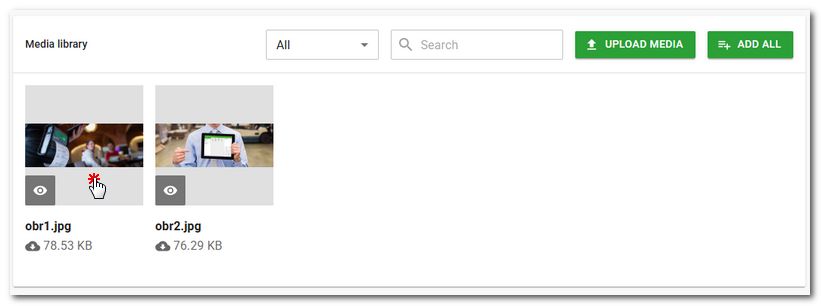
Now insert all or selected media from the media library into the playlist. You can insert individual media into the playlist by clicking on them. Alternatively, use the ADD ALL button. Click the eye icon to view or play the media. |
|
After inserting into the playlist, the media will appear at the top of the page. You can determine the playback order simply by dragging files with the mouse over the icon |

 . Furthermore, you can set a specific playback time for each file, or delete a file with the trash can icon. Once you have prepared the playlist with the files, continue by clicking
  in the header of the dialog.
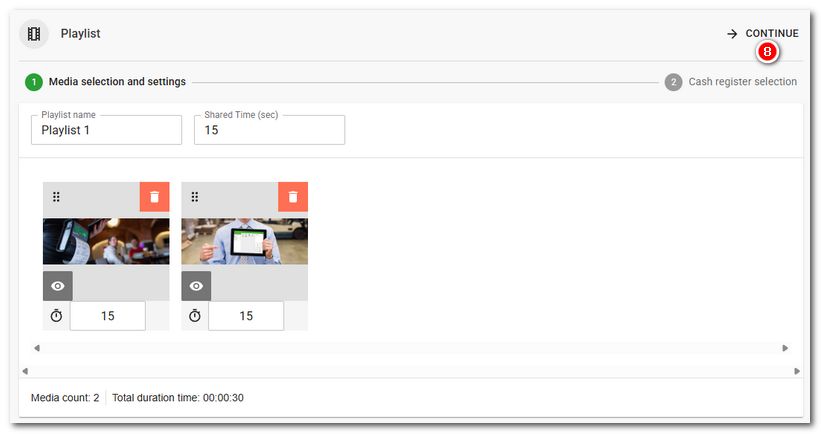
|
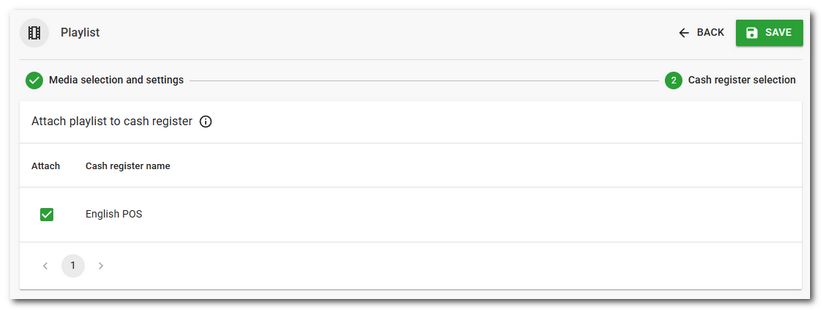
Next, select the cash registers where the playlist will be played. Select the cash registers and save everything with the SAVE button in the header. |
Now your playlist is ready, and the final step is loading the media onto the device (tablet) which functions as a customer display. Go back to the customer display settings on the cash register and tap the Set option. This final step is described in this topic.
Media and playlist management
By clicking on DETAIL next to a created playlist, you will open a page with the playlist's content, and you will be able to edit it or upload and insert additional media. It can also be DELETE here or just removed from the selected cash register.
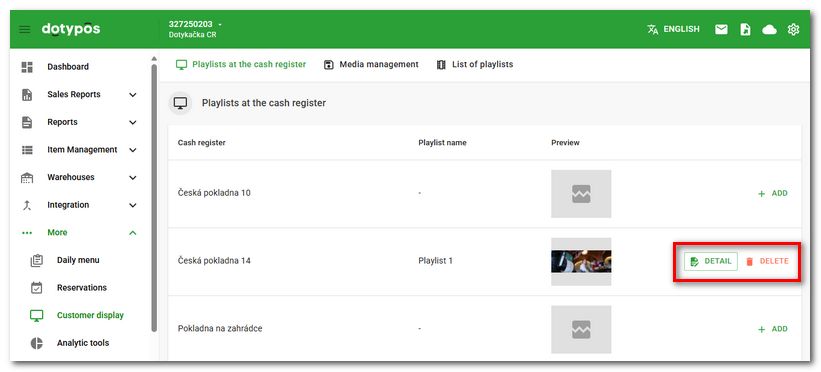
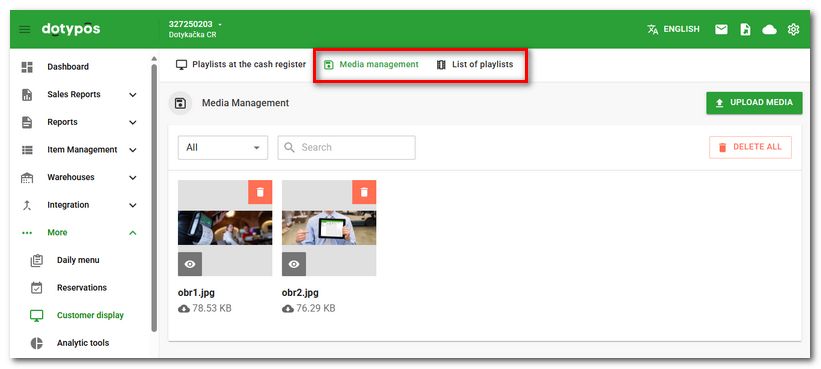
You can navigate to the media library by clicking on Media Management in the header, as well as to the playlist list. In both cases, items can be deleted or new ones added.
If you need to assign a playlist to a different cash register, go to the playlist list and open the playlist by clicking the DETAIL button. Now simply proceed to select cash registers using the CONTINUE button in the header, choose a cash register, and save the selection using the button in the header again.
Alternatively, in the Playlists at cash Register overview, select a previously created playlist using the ADD button and add it to the cash register using the USE button.