This lets you assign privileges to users for different Dotypos Cloud operations. The full description of Dotypos Cloud user privileges can be found here.
|
Apart from performing individual operations, Dotypos Cloud also lets you set privileges for cash register operations or the application Warehouse. To create a user account in the cash register and assign privileges, see this chapter. |
How do I add a user and assign him or her Dotypos Cloud privileges?
|
Use the button Add |
 to add users. When you press the Add button, a field for the new user's e-mail address will be displayed. Use the
  button to add or remove individual rights for users to work in Dotypos Cloud, or to delete users. They will then no longer have access to Dotypos Cloud.
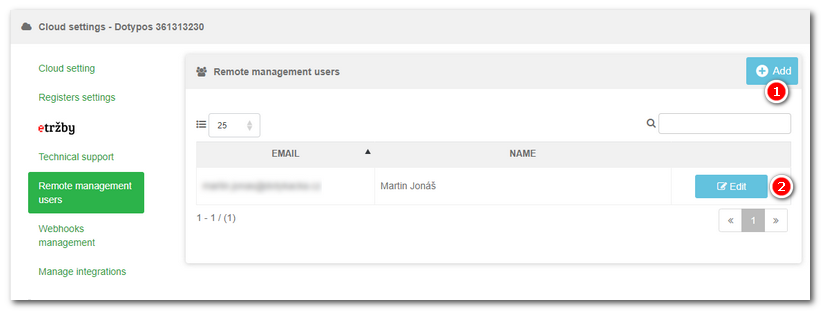
|
If you are adding a new user, type the user’s email address in the appropriate field Then for the new user, select the Login |
 . Settings or cancellation can be confirmed using Save in the bottom of the page. If you are adjusting an existing customer, the information will be already filled out, so you just check or adjust it.
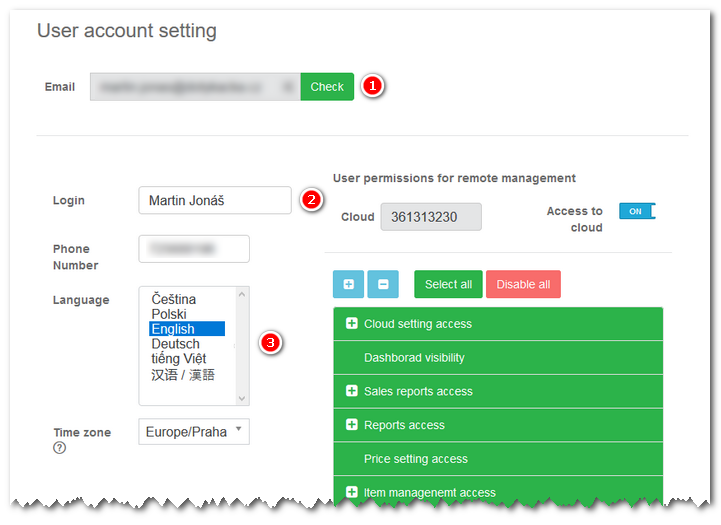
|
The right-hand section of the editing window has the following items: •The informative field Cloud •Switch Access to cloud •The button + •The button Select all (default status) •By clicking on the selected privilege •After setting all privileges, click on Save, or you can cancel them all using the button Cancel in the bottom of the page. |
 marks all privileges, which means the user will have this cloud fully under their control. Use the button
  you remove it from the user. Non-active privileges are not marked green. If you click on a non-active privilege again, it will be reassigned to the user and again marked green. By clicking on the item preceded with the mark
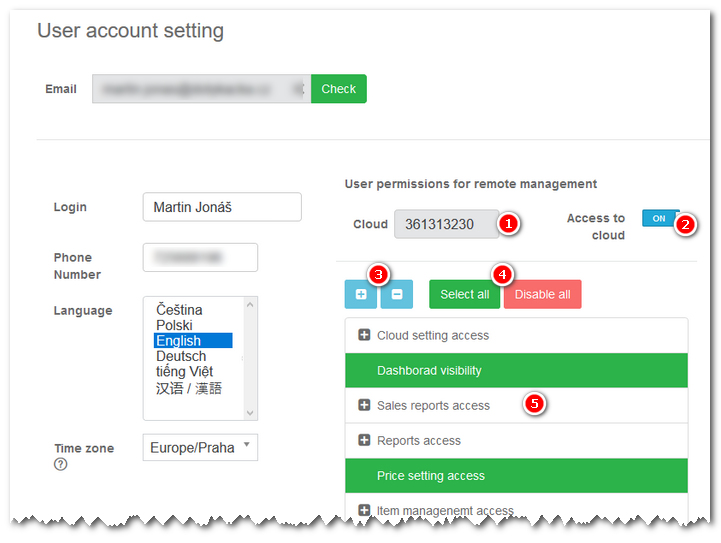
|
Once saved, a password will be sent to the new user's email address. To log in to Dotypos Cloud, you will use your email and this password. The password can then be changed (reset) in the Dotypos Cloud settings under Acount settings or in the log in dialog. If a user is not authorized to view a page or data, a warning will be displayed: Access denied. You do not have permission to access this page. |
|
If the list of user rights is displayed in a different language than the rest of Dotypos Cloud, it means that you had a different language set the last time you logged on to Dotypos Cloud. Just set your preferred language again and then log in again. |