» Available only in Dotypos FULL and higher. « |
|---|
|
Products can be stocked in directly at the cash register using the application Warehouse. To stock in products in the Warehouse application, see this chapter. Dotypos Cloud also supports the batch stocking in of products; instructions can be found here. |
How do I stock in or transfer the product to another warehouse?
|
In the item Item management » Products select the product and click on the button |
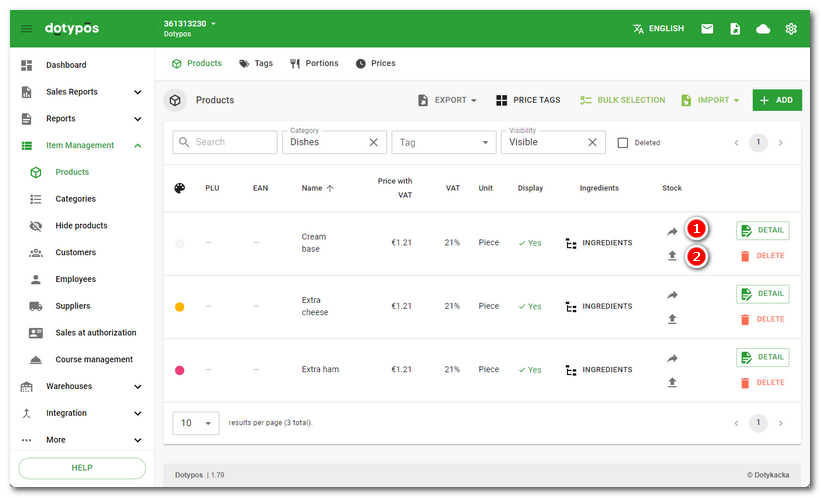
|
In the displayed dialog, choose the warehouse for the product to be stocked in or the warehouse from which you want to transfer the product and then click on the button OK. |
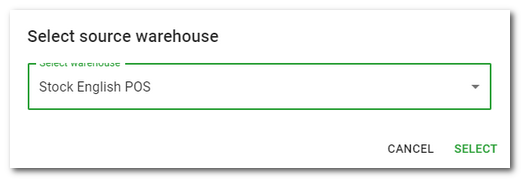
|
The product overview page for the selected warehouse will be displayed. By clicking |
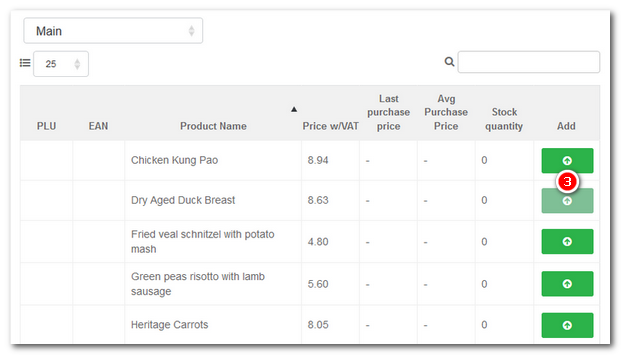
|
If you move to the bottom section of the page, you will now see there the chosen product(s) to be stocked in. Now just enter the quantity to be stocked in the field |
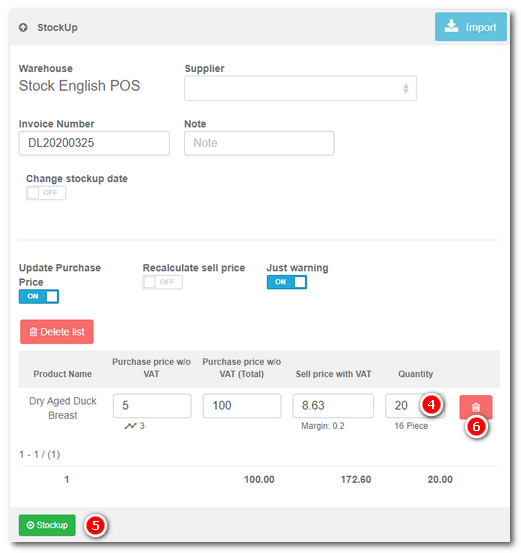
|
If in step 1 you selected to transfer the product, the process will be similar. Use the button |
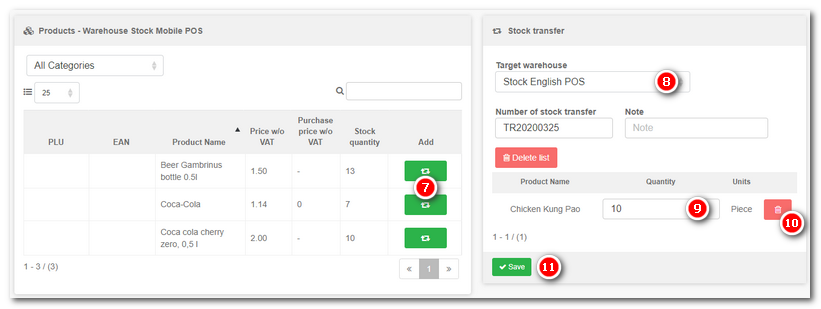
 to transfer to another warehouse or click
  for stocking the product in.
 you may add more products from the list to be stocked in, which you will see in the right section of the page.
 and click on the button
  to save the stock movement. If you do not want to stock in some of the products, just delete them by clicking on
  . You can also enter a negative amount to be stocked in, in which case you will either correct a product or
  lets you add more products to be transferred from the product list in the source warehouse. Then, move to the right section of the page and use the roll-down menu
  to select the target warehouse (to which the products will be transferred). Use the field
  to enter the quantity to be transferred. Use the button
  lets you delete a product you do not want to transfer. Click the button
  to save the stock movement. The product(s) will be transferred from one warehouse to another.