» Available only in Dotypos UNLIMITED. « |
|---|
In this section, you set the behaviour of the integration of the cash register with ordering systems and also specify which products will be available for orders. Before changing the settings, you must connect the cash register to one of the supported ordering systems. This is done in Dotypos Cloud and is described in this chapter. After linking and setting up the menu in Dotypos Cloud, the following options will become available. Order checkout at the cash register is then described in this chapter.
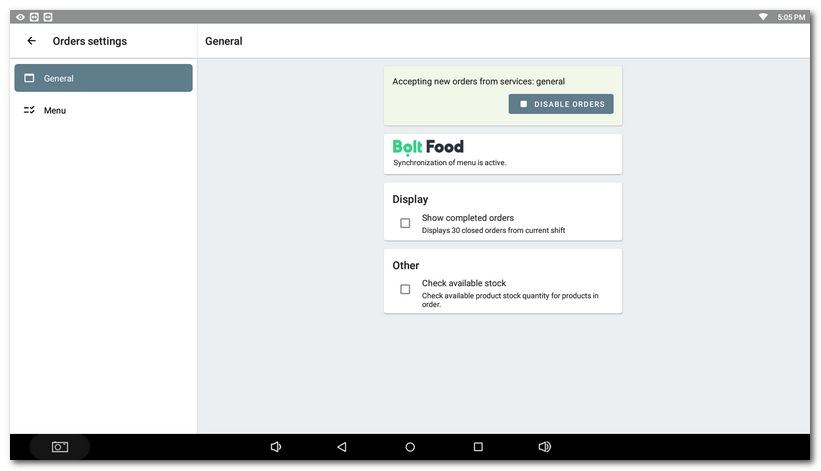
On the General tab, click on the START / DISABLE ORDERS button to enable or disable the receipt of orders from all connected ordering systems. These are displayed below with information on whether the linking i.e. synchronization is active. When you activate the Show completed orders option, the last 30 completed orders will also be displayed on the orders screen, giving you an overview of your order history. Despite the available option, inventory control is not yet supported.

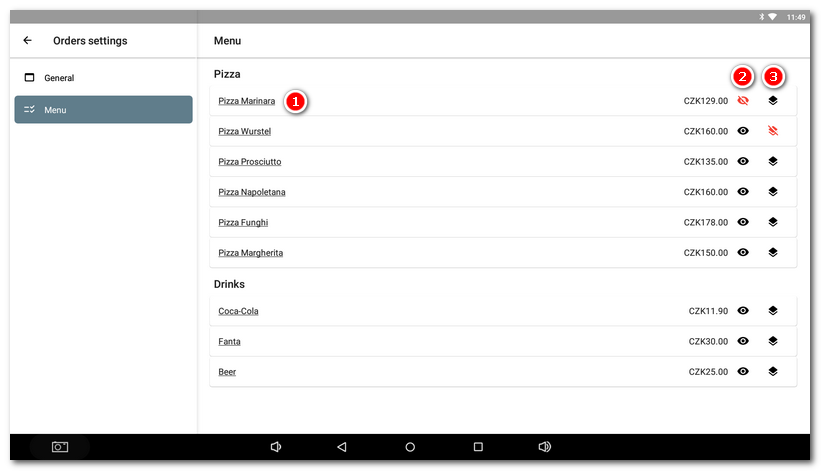
The tab Menu shows the categories created for the ordering systems and the products in these categories. You can create this menu via Dotypos Cloud by connecting to one of the supported ordering systems. Tap the product name  to open its properties. The icons
  and
and  allow you to temporarily hide the product
  for orders or set it as out of stock
  . Active settings are indicated by a crossed out red icon.

|
Ordering options may vary depending on the support for the specific ordering service. Similarly, the options for managing the offer (temporarily hiding products, marking them as sold out...) are determined by the options offered by the specific ordering service. |
Order checkout at the cash register is described in this chapter.