» Available only in Dotypos UNLIMITED. « |
|---|
1.Through the Dotypos cloud, link the cash register to your preferred ordering system with which you are registered. Create separate categories and insert products from the cash register into them.
2.Check the settings for orders directly at the cash register. In both the Dotypos cloud and the cash register, you can temporarily hide the offered products for orders or mark them as sold out.
3.Process orders at the cash register by following the steps below.
|
How to enable the Dotypos integration with the Wolt service is described in this chapter. |

How to process orders from ordering systems?
How to process orders from ordering systems?
|
When a new order arrives, the tile will display the number of new orders with an exclamation mark. You are also alerted to a new order by this sound and by a flashing bar in the header of the screen. When you tap the ORDERS tile, you will see the new orders on the right side with information from the specific ordering service. Tap the order to process it. |

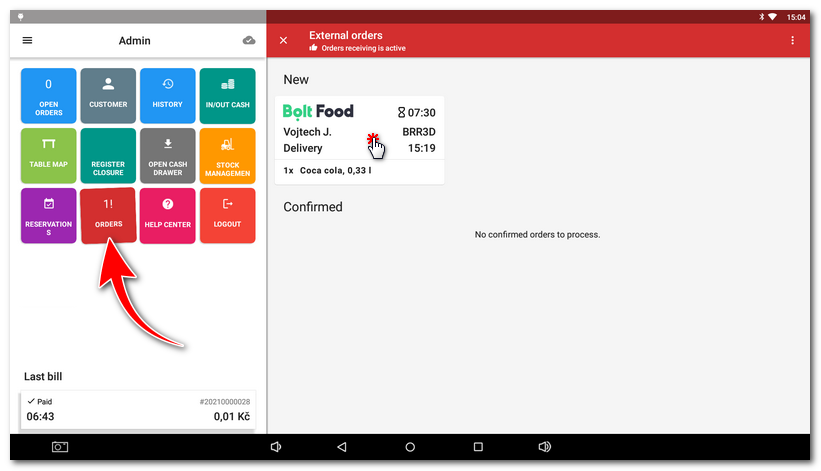
|
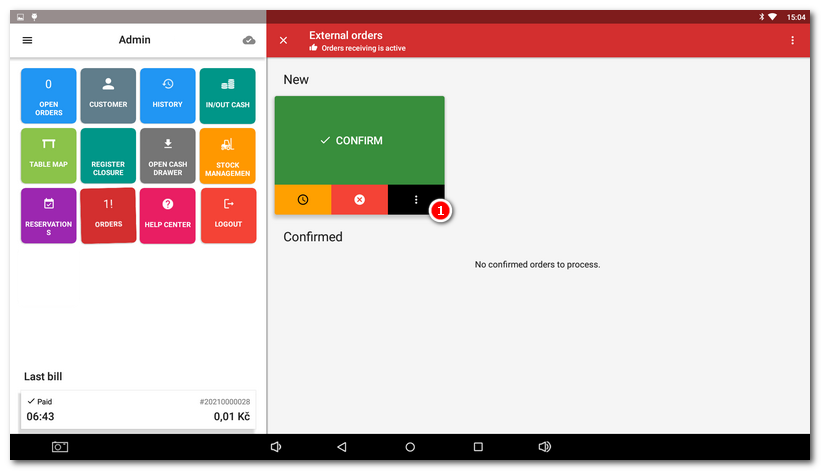
The order will change to a CONFIRM button with additional options |

 . If you tap the order again, information about the delivery location will be displayed for an order with delivery. You confirm the order by selecting the delivery time. The customer will be notified and the order will move to the
|
•In the case of Bolt, you must respond to a new order within 8 minutes. If you do not confirm the order within this time limit, it will be automatically rejected. It will then be marked as Cancelled by employee in the cash register. This is standard behavior of the Bolt system, which is out of our control. •In the case of Wolt, you have less than 3 minutes to open the order. If you don't confirm or reject the order by then, it will be automatically marked as rejected and your establishment will switch to offline mode. For further orders, you will need to enable order acceptance again in the general menu. |

|
Tap the confirmed order to mark it as ready for pickup. This will instruct the ordering service to send its courier for the order. At the bottom of the button you can again cancel the order (e.g. if the customer refuses it in this state) or perform other operations with the order via the menu |

 .
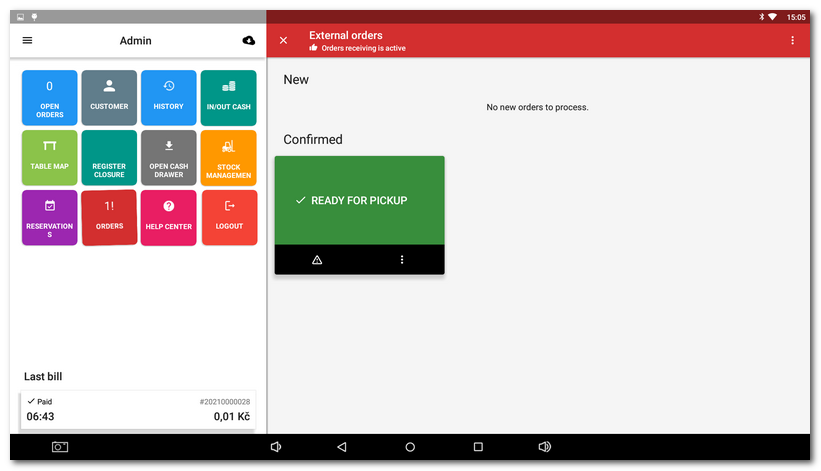
|
The order will move to the Done status. This completes its processing. Tap SHOW ORDER to display its details on the left side. You can display these closed orders via the button in the general menu and you can also find them in the History. Depending on the settings in this section, the last 30 closed orders can always be displayed in the completed orders. |

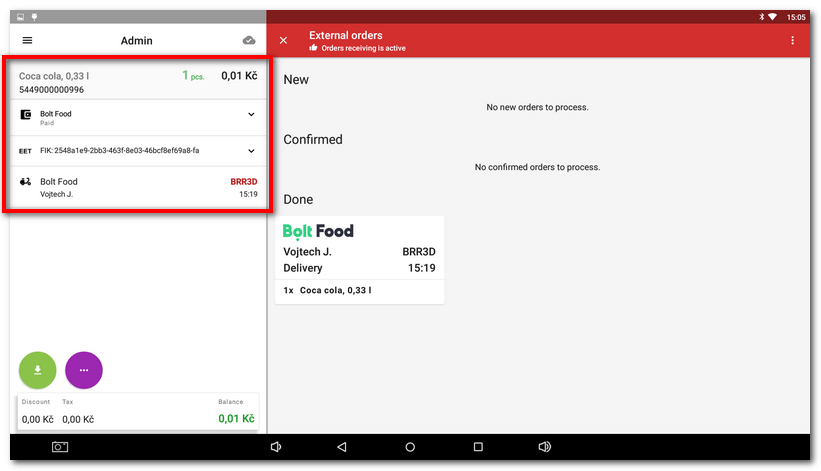
|
Tap the |

 icon at the top right to display the general menu for orders. Here you can temporarily disable orders, and this status will also be transferred to the ordering service. Keep in mind, however, that disabling orders applies to all linked ordering systems. The
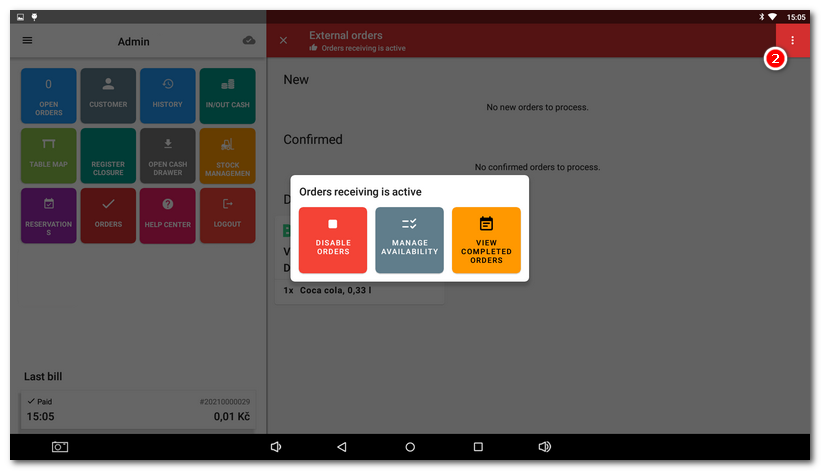
Tap the VIEW COMPLETED ORDERS button to open an overview of the closed orders on individual days. Select a specific day using the calendar on the left side.
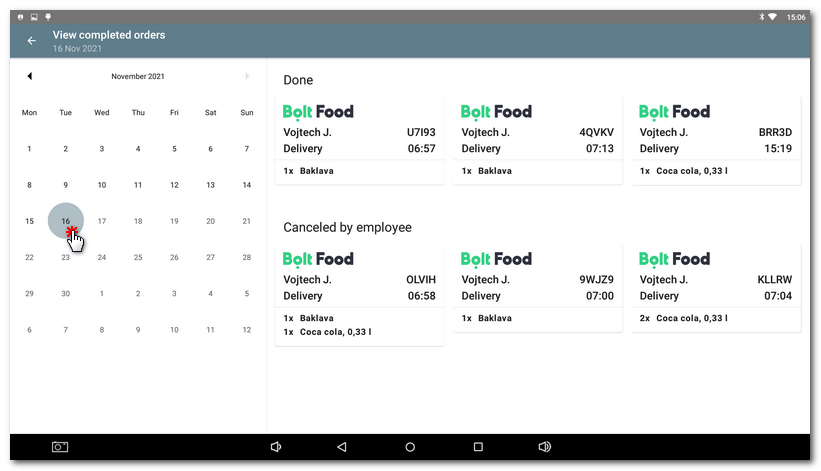
|
Ordering options may vary depending on the support for the specific ordering service. Similarly, the options for managing the offer (temporarily hiding products, marking them as sold out...) are determined by the options offered by the specific ordering service. |
Wolt - pre-orders
In the case of Wolt, the customer can create an order in advance for a specific time. Such an order is marked as a Pre-order in Dotypos. As with regular orders, you can confirm it, reject it or postpone the time of its preparation. A confirmed pre-order waits for the ordered time. Approximately 30 minutes before the ordered time, the kitchen order (ticket) will be printed automatically and you will be able to perform other operations with the order, e.g. mark it as ready for pickup. Until then, the order is marked as confirmed and blocked.