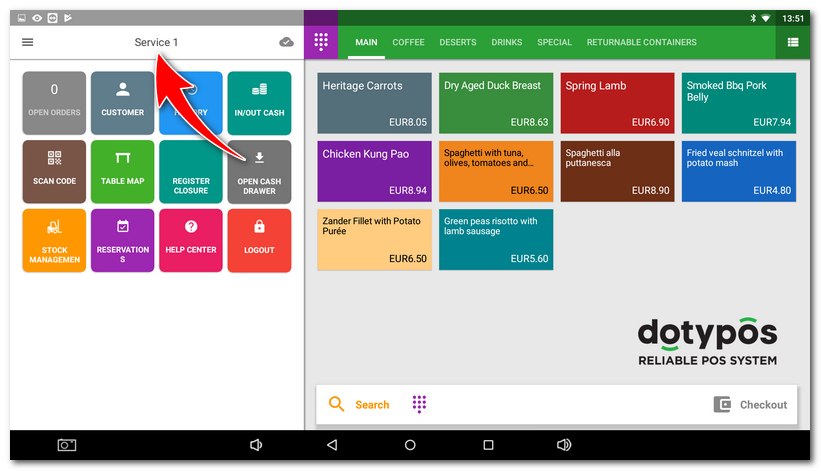
Users can login in standard mode either by typing a PIN to enter the account or they can log in/log out using a chip reader. In the latter case, the user is logged in or logged out after the chip is read by the reader. Connecting the chip reader is described in this chapter.
If the user that logged out from the cash register has any orders open, they will be automatically parked when logging out. If any user is logged into the cash register using a chip and another user logs in with a chip, the preceding user logged in will be automatically logged out.
|
According to your Dotypos license you can also have at hand a simple attendance system. And this system is accessible via the login dialog. You can find more information on the attendance system in the chapter Attendance. |

How do I change a logged in user?
|
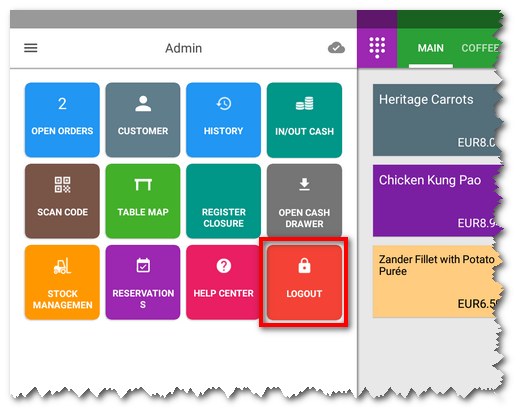
To change the user logged into the cash register, click on the button LOGOUT in the tile menu on the main screen Dotypos. |

|
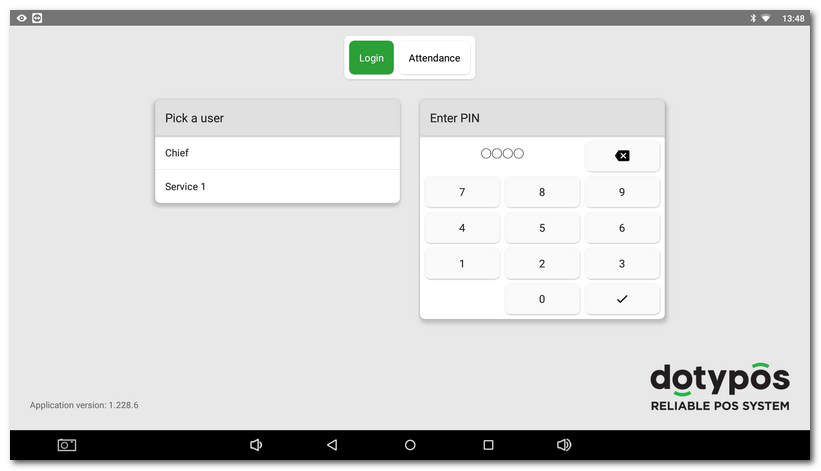
In the displayed login dialog, just tap your account PIN in the section |

 and confirm it by clicking on the button
  . You can also tap on the account name in the user list
  . Doing that logs you into the selected account. However, only accounts without PIN protection are displayed in the user list. In the upper part
  you can switch between the login dialog and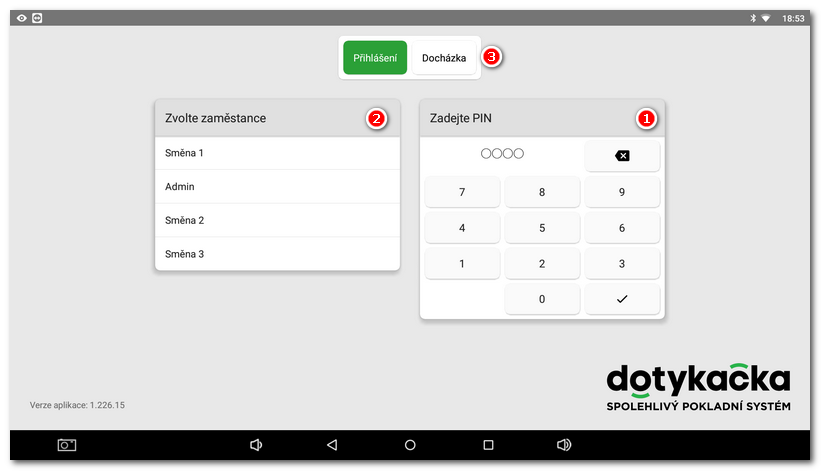
|
If the user forgets his PIN for logging in to the cash desk, it can be changed in Dotypos cloud. |

How to use the reader for an employee to log in
First insert a numeric code to the employee account created. This numeric code is saved in every chip. To save it you just have to adjust the employee account and load the chip. Then an employee can simply log in with the chip. To login you can also use cards with bar codes in combination with bar code readers. Then the numeric code is represented by the bar code on the card.
1. Creating a code and assigning it to an employee
|
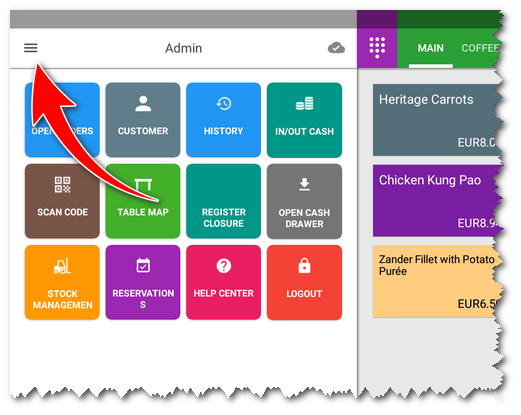
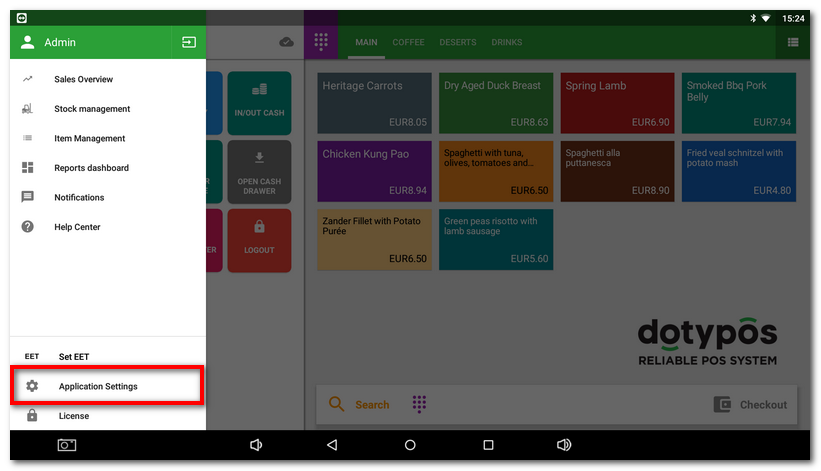
Click on the three horizontal line icon to display the side menu. |
|
Select the option Application settings. |
|
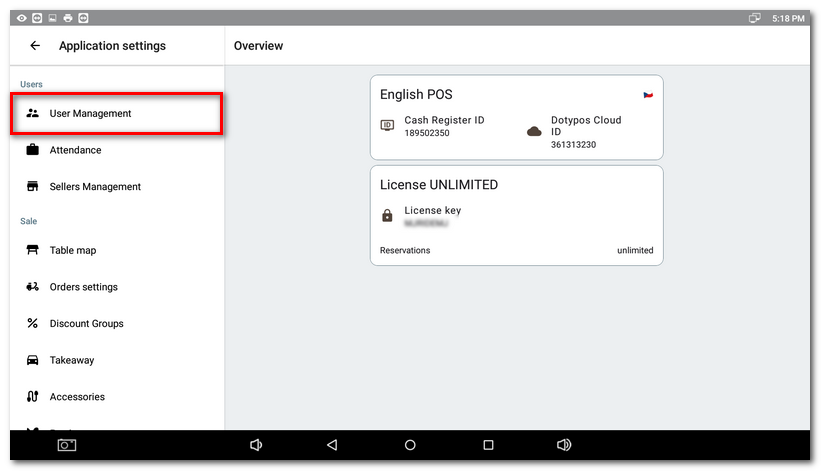
Now select User management. |

|
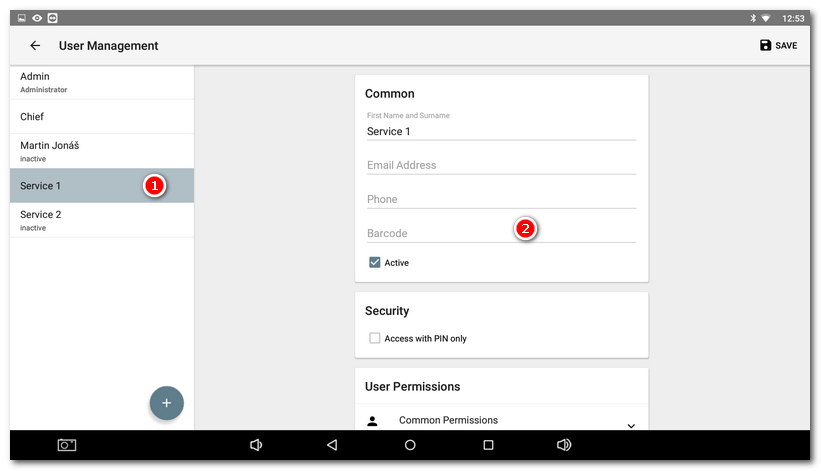
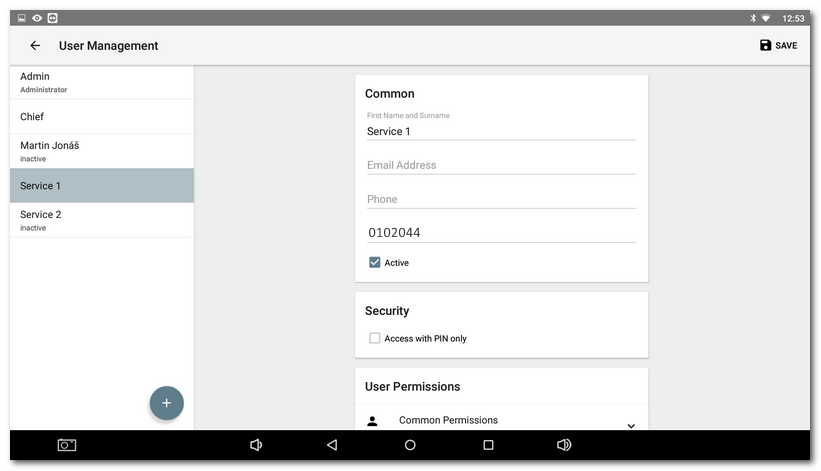
Choose the employee (user) |

|
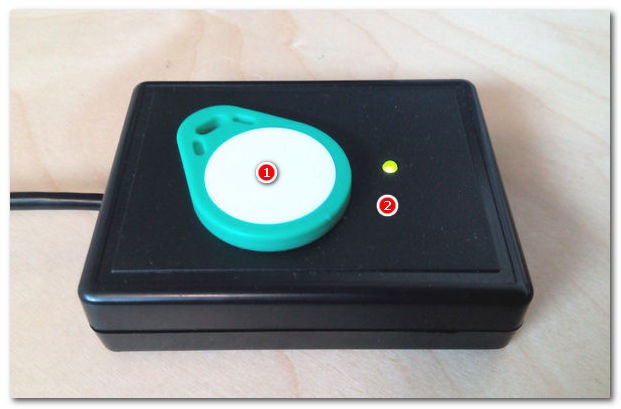
Place the chip |

|
The code will be automatically loaded from the chip and into the field Barcode. Now remember to save the changes by clicking on the button SAVE in the top right corner. |

2. Logging a user in with a chip
|
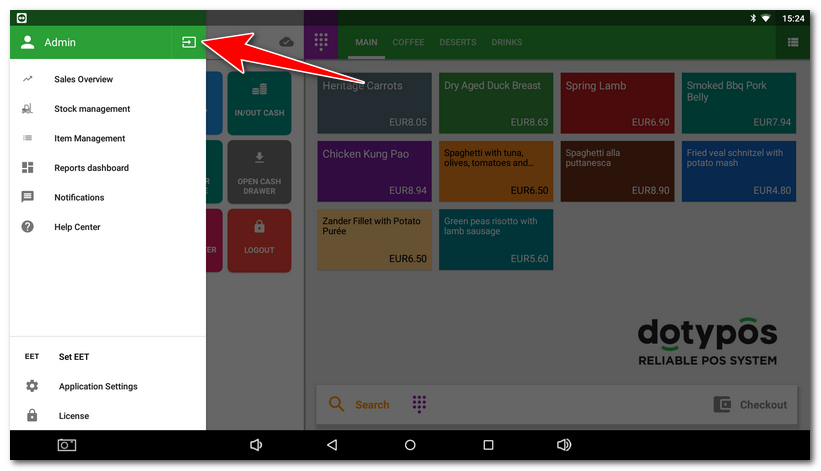
Log out by clicking on the icon. The dialog for selecting the user appears. |
|
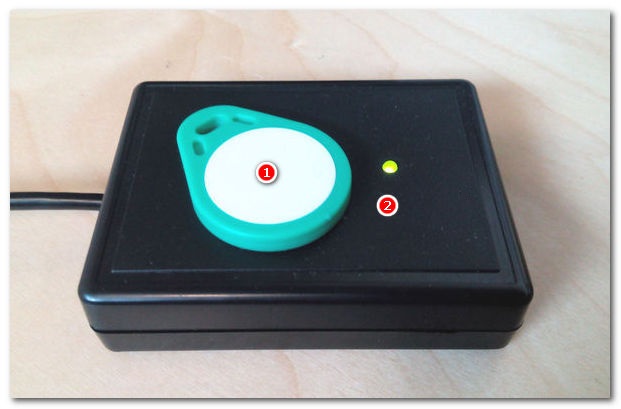
Place the chip |
|
The user given the chip will be automatically logged in. Then log out by having the chip read by the reader. The principle is that putting the chip to the reader for the first time logs in, while the next time logs out. |