How do you create or cancel a reservation?
The reservation can be created in every view. If you need to adjust an already created reservation, tap on it in the overview, remove it and create a new one. If there is no table available, you can just find a free table according to the defined specifications.
|
Before creating the first reservation, the number of seats at each table must be set. Otherwise the tables will not be displayed! |
|
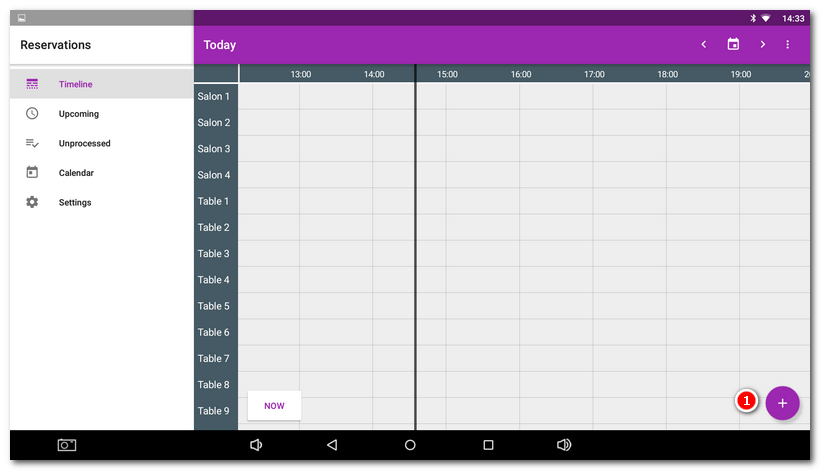
In any view, click on the button to create a reservation |
 .
.
|
A dialog with reservation properties will open. In the right-hand menu |
 . In this part, the tables from all cash registers connected to the same
  or has a reservation already in the time specified in the section
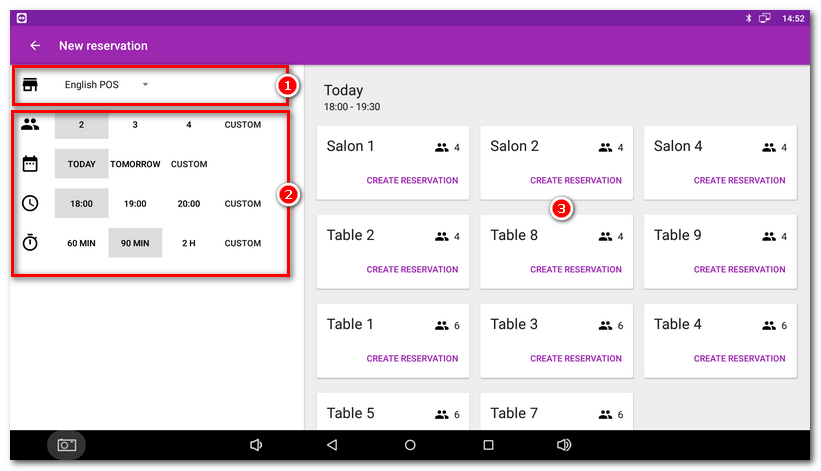
|
Depending on the resolution of your cash register display, the reservation details can be displayed separately first, followed by the table and customer selection in the next step. 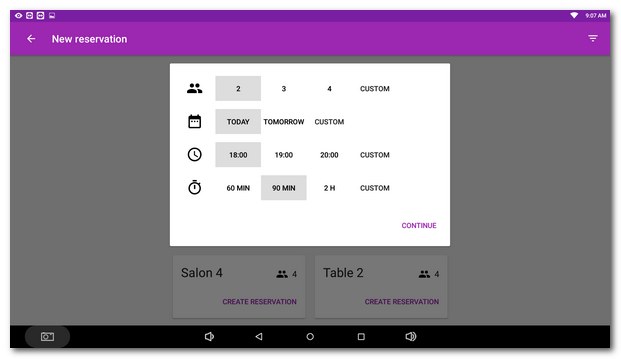 |
|
In the section |
|
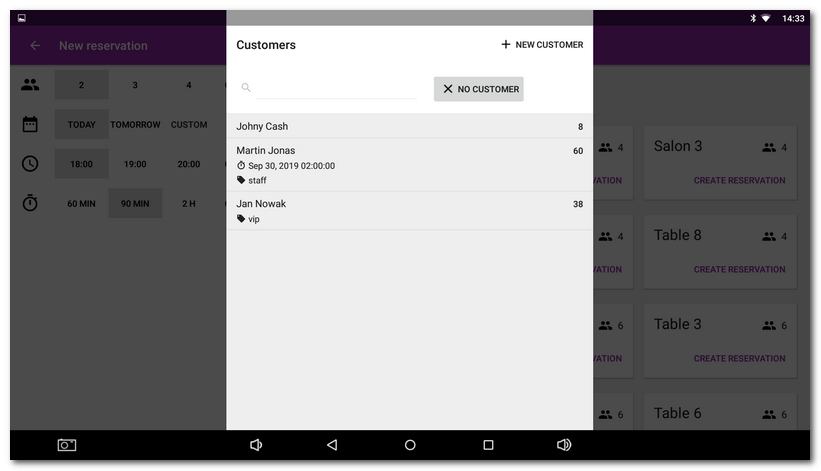
A dialog will appear to select the customer - the person the table will be reserved for. Select or find an already created customer or create a new one. For a new customer, just enter his/her name. In the application setting you can switch off the compulsory customer setting. |
|
Once you select the customer, the reservation summary will appear and you can insert a note in it. Use the button CREATE to save the reservation. |

|
•If you create an order for a table that is reserved in Dotypos, you will be notified of the reservation and will be able to assign the customer with that reservation to that order. •For hotels, you can create reservations automatically for entire days with a view of the times set for Check in and Check out. Just activate the corresponding option in the application setting. |
|
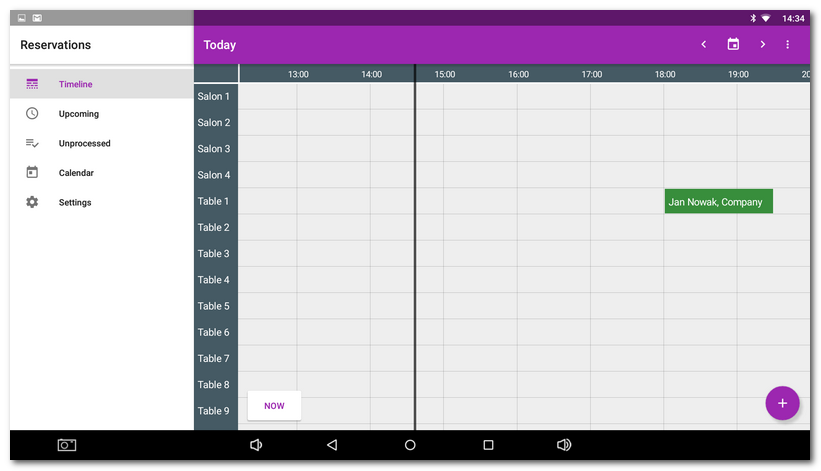
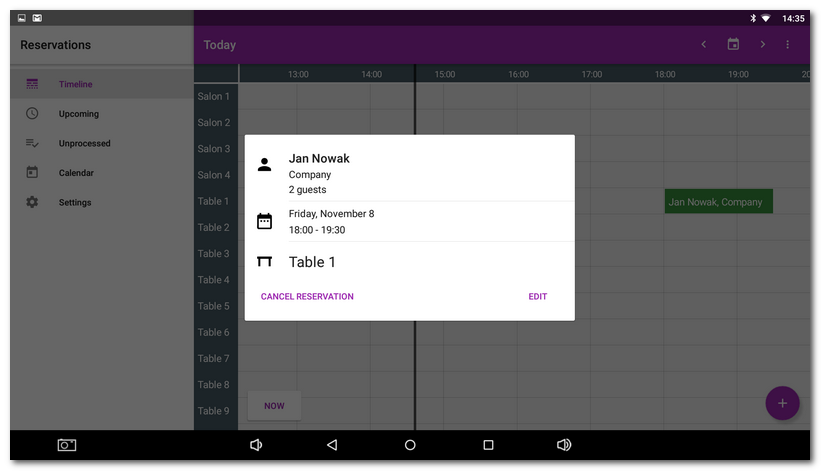
The reservation has been created and will be displayed in the reservation program. In the overview if you click on the reservation, you see its properties including the option to cancel the reservation or edit. |

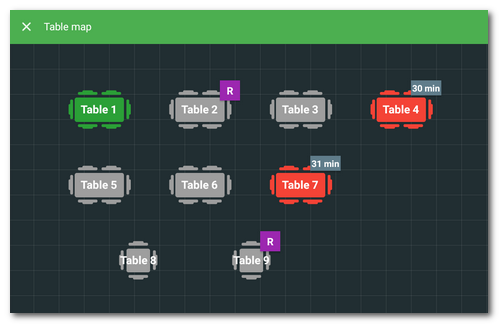
On the Table Map the reserved tables are indicated with a purple R, usually 30 minutes before the reservation starting time and 10 minutes after that time. You can change this period in the Application settings » Table map.
Finding a free table
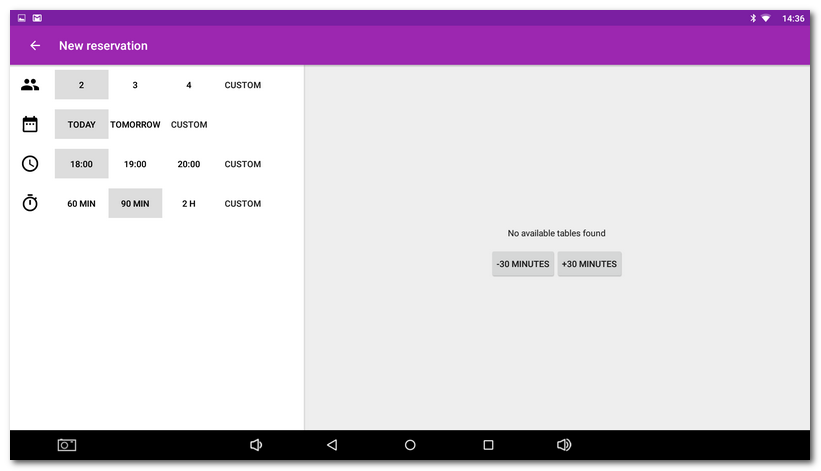
If there is no free table available for the selected time period, the buttons for time shift +- 30 MINUTES will be displayed in the right part. By tapping on these buttons you change the time period specified in the left part (18:00 on the image below) by 30 minutes forward or backward. By changing the time, you will see free tables that meet the selected reservation parameters.
So you can use the buttons (time shift forward or backward) to find the nearest free table meeting the specifications in the left part and create the reservation immediately.
|
We recommend leaving some time distance between individual reservations, because customers are not always punctual. |