How to create or delete a subcategory?
When you create a subcategory, a regular category of the same name will be created, but it will be hidden by default. You will not see it when marking with the catalog (product tiles). This is because subcategories are primarily intended for a Simplified display mode, where you browse categories and products hierarchically. So if you want to use subcategories, we recommend switching the POS mode to Simplified mode.
|
If you unhide hidden categories (turn on Display on Main Screen in category properties) you can see them in Catalog mode. Since the subcategories work as shortcuts, you can get to all the subcategories one by one up to the products. However, it will not be possible to simply go back to the "parent" category. This is because in Catalog mode there is no option to navigate back using the arrows, as in Simplified mode. Therefore, in order to easily move to the parent category in Catalog mode, we recommend that you sort the categories and subcategories one after the other: 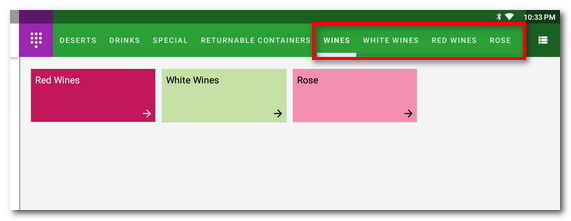 |
The procedure below will show the creation of subcategories so that the cashier will gradually browse the range of wines for sale.
General information about subcategories can be found in the parent chapter.
|
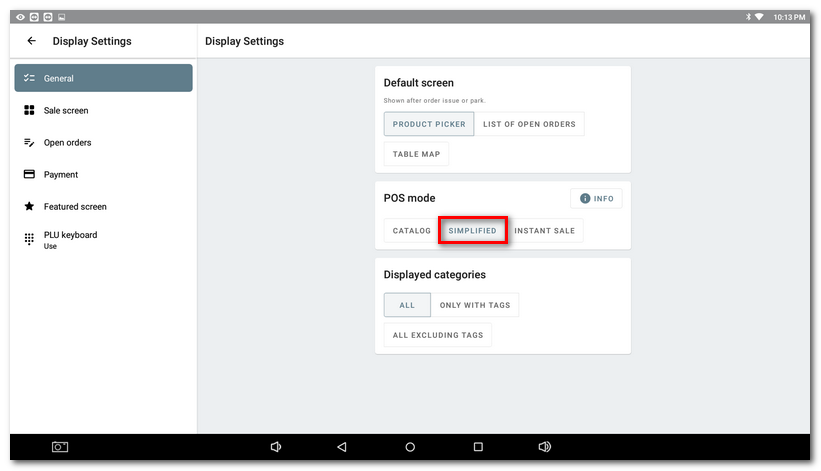
Go to Application Settings » Display Settings and select the SIMPLIFIED POS mode. |
|
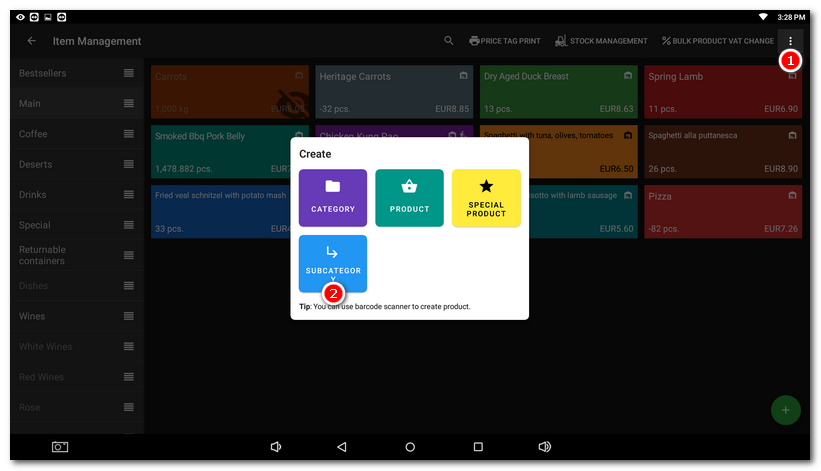
Go back and open Item Management. Here, use the + ADD NEW |
|
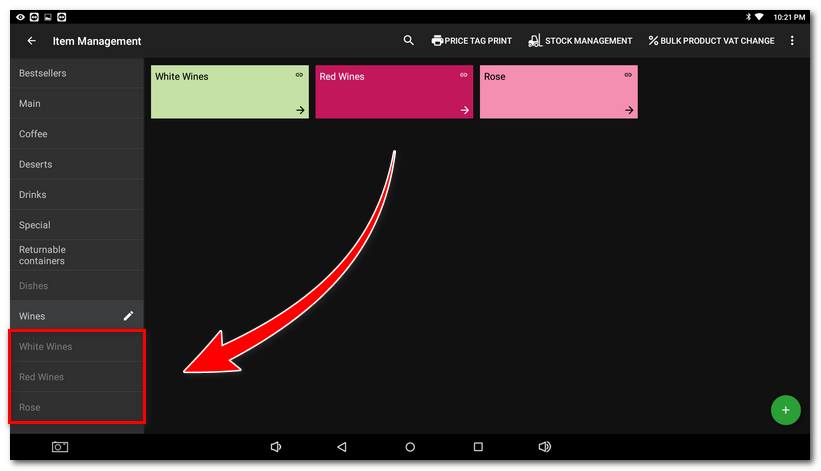
Now you have created 3 subcategories according to the type of wines, which we see as hidden in the Item Management. That's okay, because these hidden subcategories are automatically referenced by the shortcuts created in the Wines category. So, when you create a subcategory, a new hidden category is always created in the cash register and referenced by the shortcut. This shortcut can be inside any other category. In this way we can create a hierarchical structure of categories. |
|
Open each of the created hidden categories |
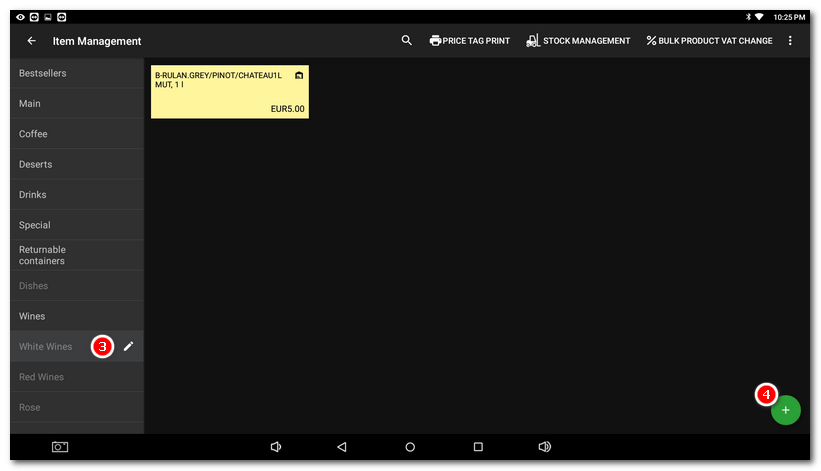
|
Although we see all categories at the same level in the Item Management, the shortcuts on the main screen in the simplified display mode make it different. Close Item Management and go to the main screen. Here you will find the category Wines To get to the parent category or back, use the arrow |
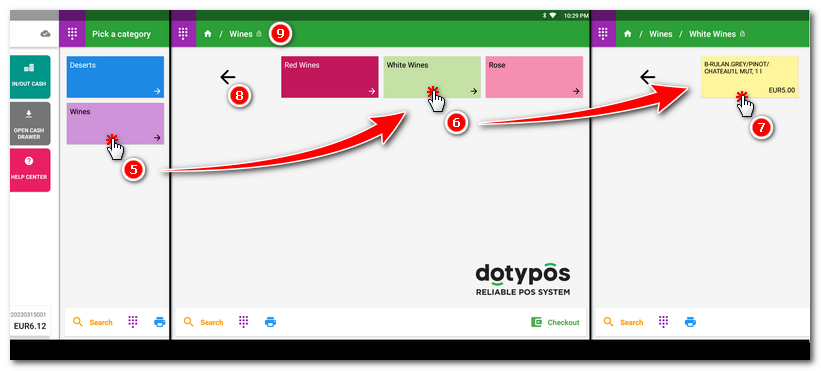
|
To create multi-tiered subcategories, simply add another subcategory to the hidden category (which represents the subcategory you created and links to the shortcut). In the image below, we have added a subcategory of Red Wines to the Wines category and then another subcategory of Winery King to that category: 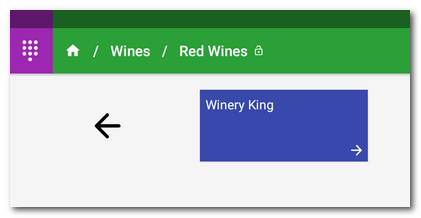 |
|
To delete a subcategory, just delete the shortcut. To do this, simply open the subcategory shortcut in the Item Management. As with the product shortcut, a delete button will appear. The hidden category to which the shortcut refers will also be deleted. |
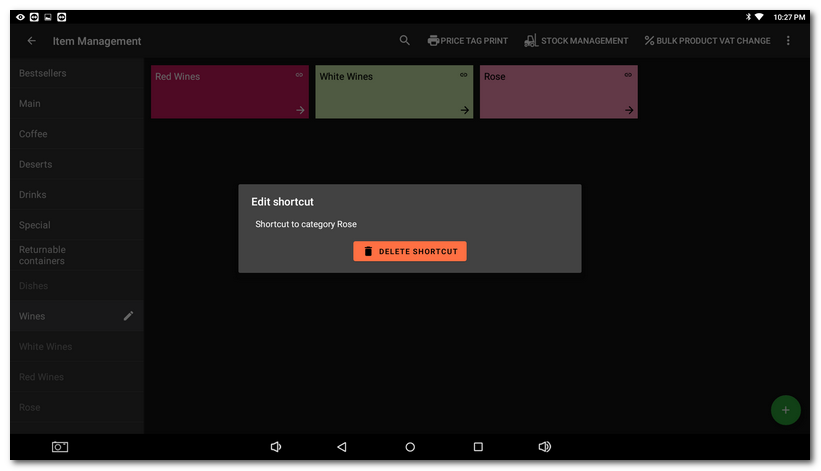
|
•You cannot edit product shortcut or subcategory after creation, only delete it. To correct, for example, a wrong subcategory name, delete it and create it again. •Neither product shortcuts nor subcategories can be created/managed via Dotypos Cloud yet. This option will be added later. |
 menu at the top right to create a new standard category for
  :
:  and create products
  in them or drag and drop already created products from another category.
 and within it subcategories by type
  . Tapping on the selected type will display the products
  , which you have already tapped to add to your order as standard.
 or tap the path in the header
  . Activating the header lock will take you back to the last category/subcategory after closing and paying your account, rather than the standard main sales screen.