Categories are used for the transparent management of products. It is recommended to create the categories prior to creating the products themselves and then inserting the products directly in individual categories.
|
You can also manage the categories in Dotypos Cloud. |
How do I adjust or delete a created category?
How do I create a category?
|
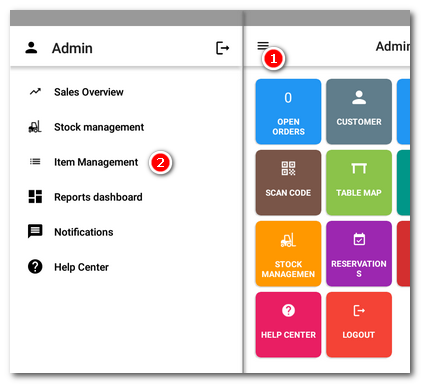
On the main screen of Dotypos, click on the icon to open the |
|
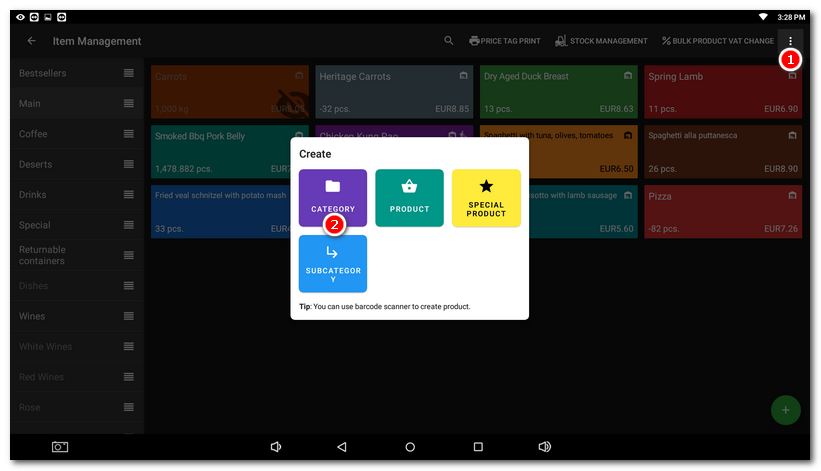
On the open page, tap the three dots icon at the top right, select + ADD NEW |
|
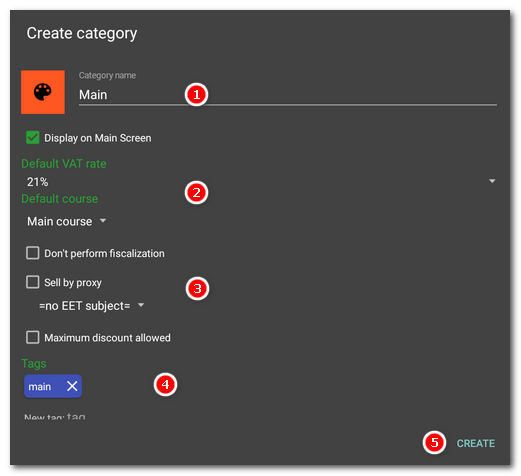
Select the name of the category and then click on For items in this category you can set a uniform VAT rate by clicking on the pull-down menu In the section Keep activated the option Display on Main screen, otherwise the category will not be displayed in the cash register. It is useful to hide the category when you e.g. want to insert into this category products (ingredients) for warehouse ingredients. Then you do not have to hide each product (ingredient) individually. If you want all products in the specific category to be recorded to another subject, check the option Sell by proxy and select the subject from the list which you added into Sell by Proxy settings in advance. When issuing an order in the Payment dialog, a note will be displayed that the document for the selected product of this category will be issued by proxy. The defined maximum discount in the section In the Save the new category by tapping CREATE |
|
When selling by proxy, you will see a figure icon next to the specified category or product, this is the symbol for sale by proxy. 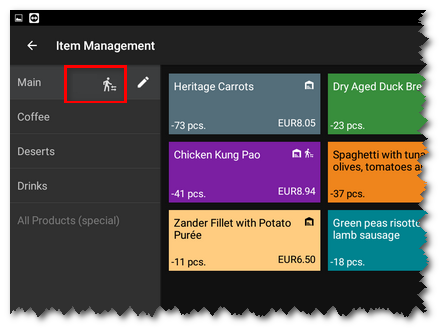 |
How do I move a category?
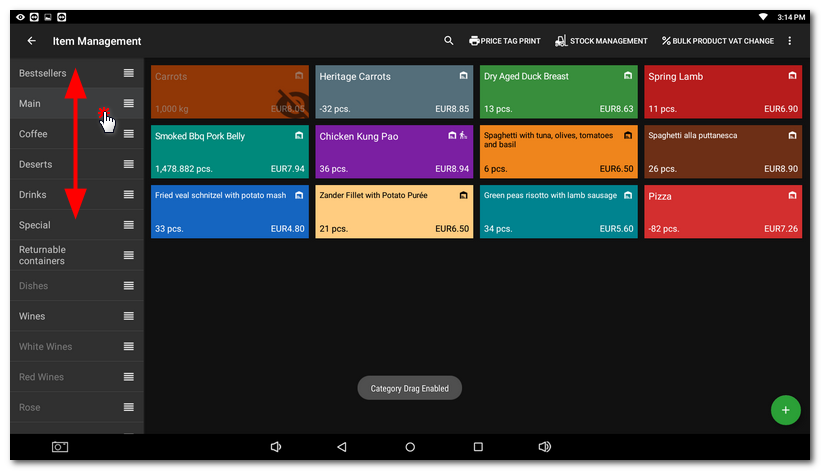
To transfer (arrange) categories, just use the gesture long clicking to activate the arranging mode and then drag the icon for category transfers to move it up or down. This changes the order of categories displayed on the main screen. Long click the category you want moved and the sorting icon appears. Now click on the sorting icon next to the selected category and drag it to the desired location.
How do I adjust or delete a created category?
|
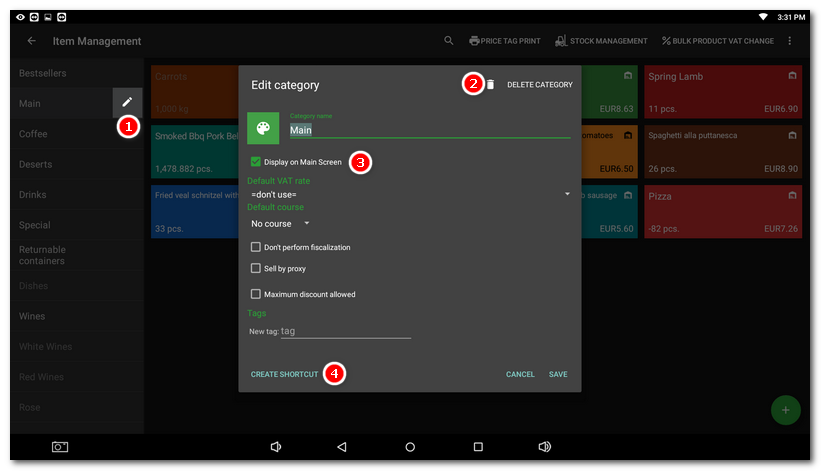
Go to Item management, select the category on the left-hand side list and click on the pencil icon Instead of permanently deleting, we rather recommend hiding the category by deactivating the option Any number of shortcuts |
|
If you delete a category containing products, you will not lose them. Instead, products in the deleted category will be moved to the default category All Products (special). However, this category is visible only in item management. |
 Side menu
  and select
  will be valid for all products in the relevant category. So for these products, the service crew cannot grant any higher discount to the customer than is set up here. The maximum discount can also be set up directly for each employee, e.g.
  section, you can add your own
  .
.