This chapter will show you a sample import of products using Dotypos Cloud, step by step. With this guide you can perform imports on your own. This guide is meant for customers who do not have any products in the cash register yet. So, typically you can use it when filling out the cash register for the first time with new items.
The basic import/export procedure is shown in the previous chapter. The product procedures shown below are then applicable to all items in the Dotypos that support import and export (except inventory imports).
Create new products by importing
Import data from other POS systems
Bulk edit products using import and export
Important notes
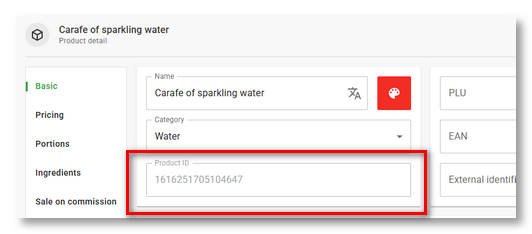
•When importing new products into the cash register, each product receives a unique number (productId). This number is used for further updates of the identical record. So, if you export the imported products from the cash register and in the file you change the properties of the product with the productId 6351216842362154, these product adjustments will be transferred to the cash register during the next import. The existing productId allows the cash register to recognize it as an existing product. If you delete the value in the column productId, a new product will be added to the cash register.
•We recommend using the .xls and .xlsx format for import/export. Working with this file format is a bit easier and clearer than with the pure text format .csv.
•If you are redirected to a specific data report when exporting, the form of the exported data is affected by the current column settings in that report.
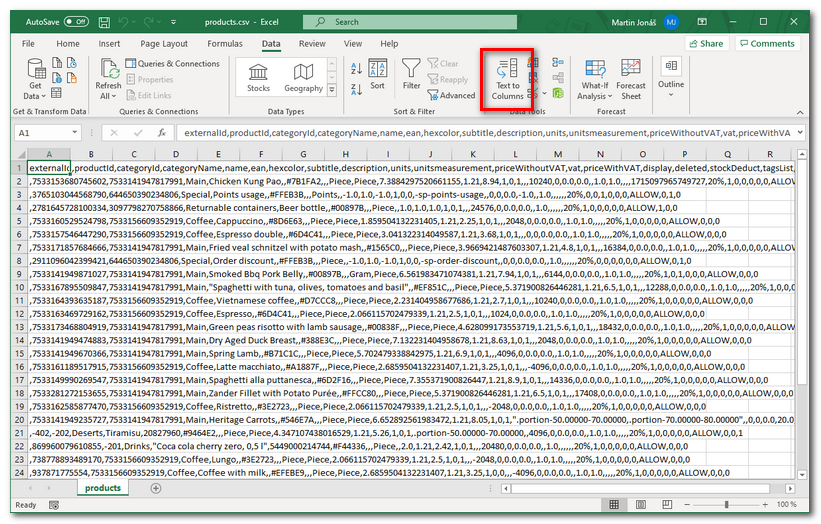
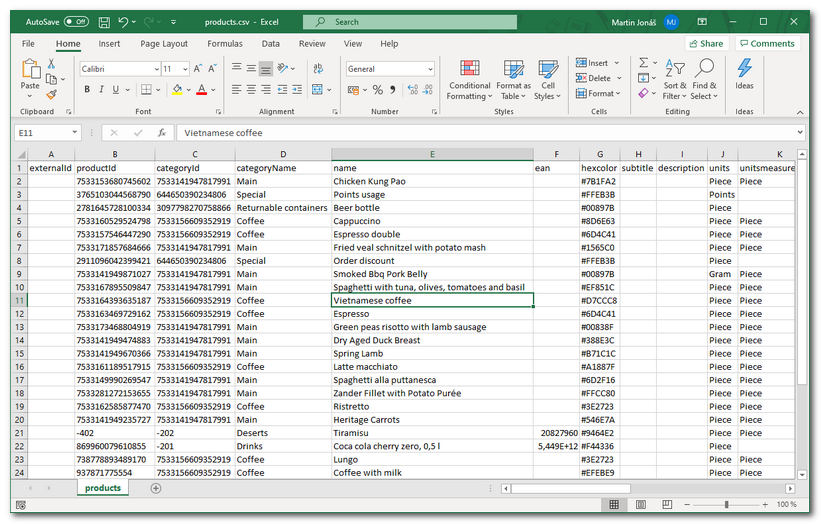
•If you edit custom file using the Excel application, you have to set the value of columns to Text and save the file. Otherwise, Excel may treat the data in this column as numbers and adjust them automatically. That would change the unique identifier of the product and the file could not be imported back after modification. To see the correct process, please check out this chapter. Files exported from Dotypos Cloud already have the correct column formats set.
•You can verify the properly prepared .csv file with data by opening it in a notepad.
•If products in the cash register contain any incorrect data after the import, do not delete these products. Just export the products from the cash register and correct the data in the file, then import it again. The productId allows you to fix product properties.
•The modified file must contain data at least in the required items (columns), otherwise it cannot be loaded into the cash register. These columns must not be empty. The description of individual items (columns) in the file for import, including the required ones, can be found in the chapter Importing products.
•As separators you can use ; (semicolon) and , (comma). If you use the semicolon, you can use a comma or period to separate decimal places. If you use a comma as a data separator, you must use a period to separate decimal places.
•The number of items that can be imported once is limited to 10 000. Therefore, there can be a maximum of 10 000 records in one file. If the import file contains multiple entries, it must be split.
Create new products by importing
|
Log into Dotypos Cloud and go to Item management » Products. In the header of the page click on the button IMPORT and select Import products. Next click on button |
 to download template to your computer as a
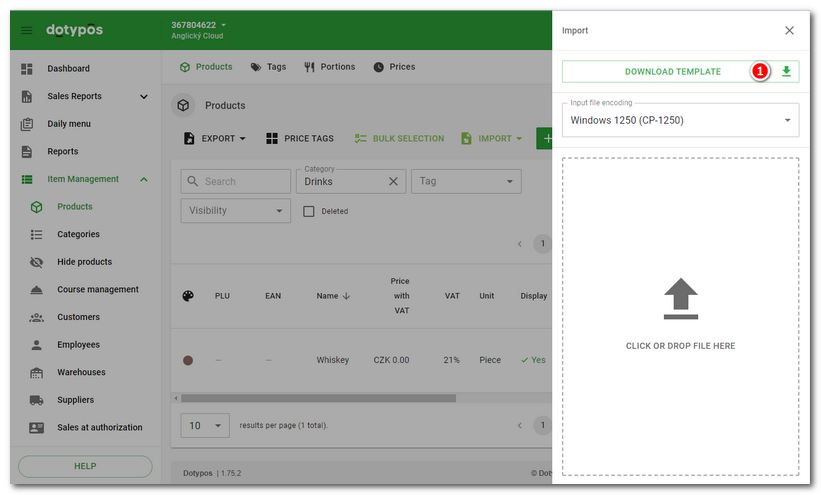
|
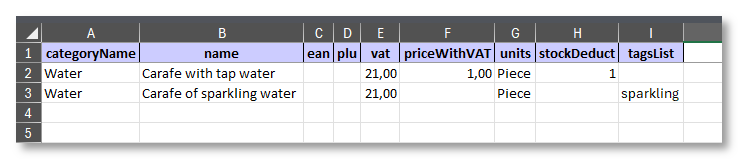
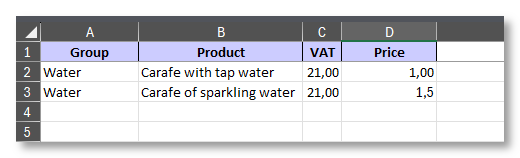
The file productsTemplate.xlsx can be opened in a spreadsheet app (Excel, in this case). When opened, you will see the text information on two lines, divided into cells. On the first row, columns with names of basic properties for setting up products in the cash register: category name (categoryName), product name (name), EAN code (ean), PLU code (plu), VAT rate (vat), price with VAT (priceWithVAT), units (units), stock deduction (stockDeduct) and tags (tagsList). On the second line is the first sample product belonging to the Drinks category with 21% VAT and a price of 24 CZK incl. VAT. Column H then says that the product will be deducted from the stock (value 0 or 1) and gets the label sample-product. |
|
To create a new product, simply overwrite the values on the second line with your own product and its properties. Follow the same format as the sample product. Insert each additional product on the next line. Finally, save the file. |
|
Now, navigate to the Dotypos Cloud web interface again and on the product import page, click |
 to select the
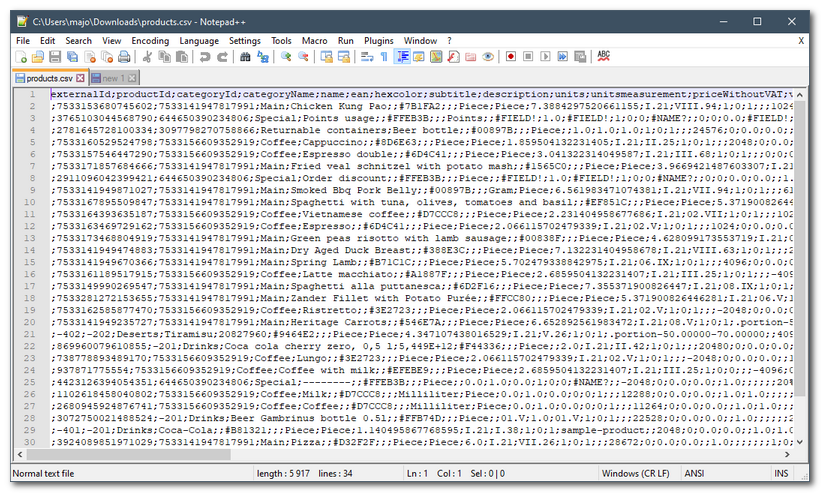
|
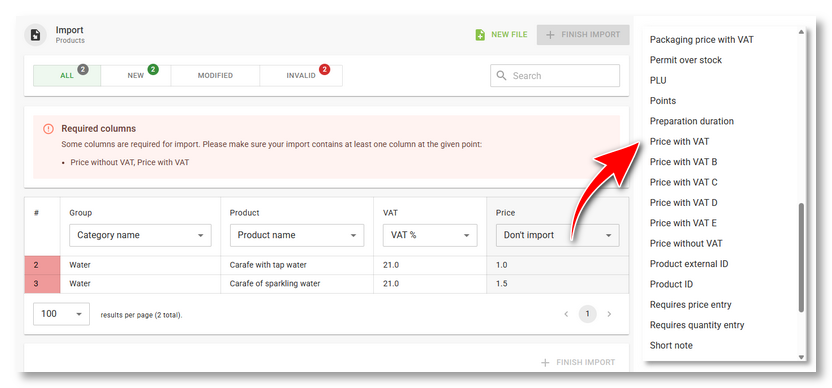
The next step of the import is to check the data before uploading it to the cash register. The tabs in the header of By clicking on the drop-down menu So if we have a price without VAT in the Price with VAT column, we simply select the Price without VAT option in the drop-down menu for this column. The cash register then assigns the values in this column to the products correctly. The buttons |
 can be used to complete the import without errors, or the button
  can be used to upload a new import file.
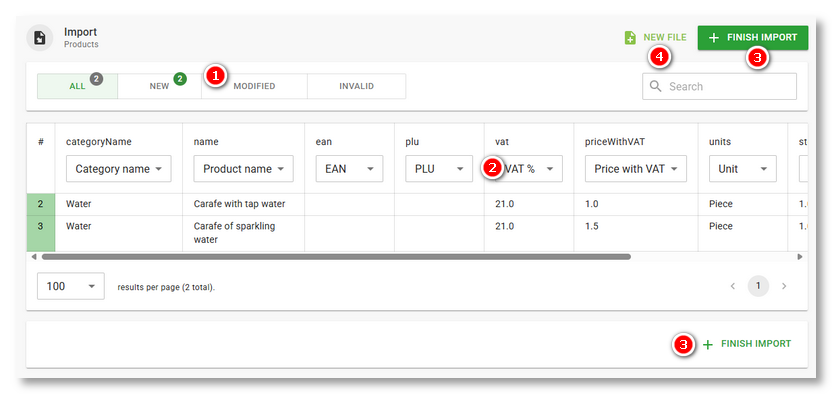
|
Thanks to the ability to set for each column what data it contains, you can actually import any data that is divided into columns or properly separated in Excel, as long as it is a .csv file. It does not matter how the columns are named in the import file. |
|
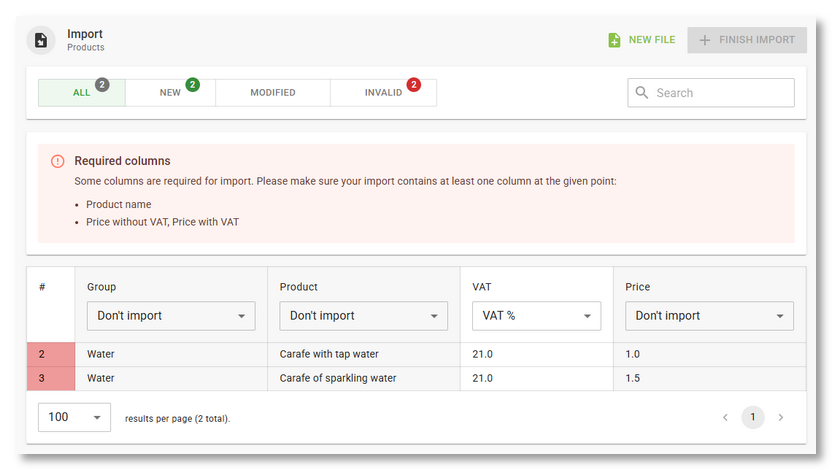
If the file contains errors, the number of errors will be displayed in the header and the individual lines with errors will be marked in red. To view the error lines, just go to the INVALID tab in the header. Each line with an error is indicated by a red background next to the line number, and any invalid value in that line is also marked as such. In our case it is a missing Price with VAT and a missing option whether the product Carafe of sparkling water should be deducted from the stock or not. In the original file, columns F and H are now blank. |

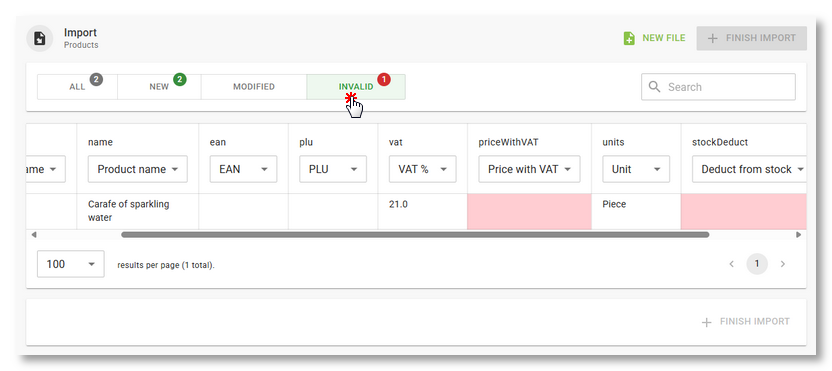
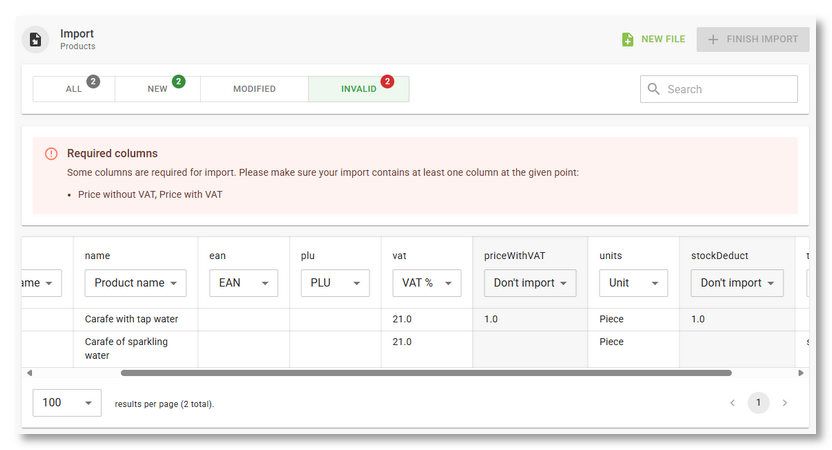
So we can now abort the import (for example by going back one step in the browser), edit the file and import it again. In the still open import, use the + NEW FILE button in the header. Another option is to remove the error columns from the import and fill in the missing product properties manually in the cash register or Dotypos Cloud after the import. However, this does not apply to the Price with VAT column, which is required if the Price without VAT column does not exist in the file. To exclude columns, simply select the Don't import option in the column header menu.
|
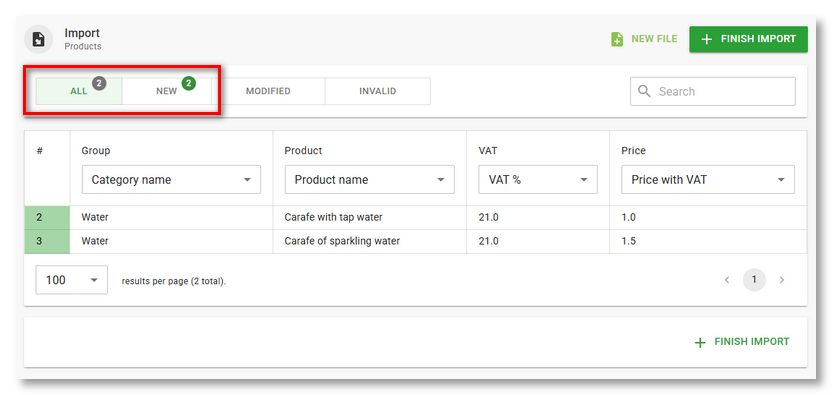
In our case, we will have to edit the import file and add the required value to the priceWithVAT column. We can then set the stock deducting later after import. We will then revert the Don't import option on the priceWithVAT column to the original value of Price with VAT and use the + NEW FILE button to reinsert the file for import. Now everything will be OK. Both rows are green. |
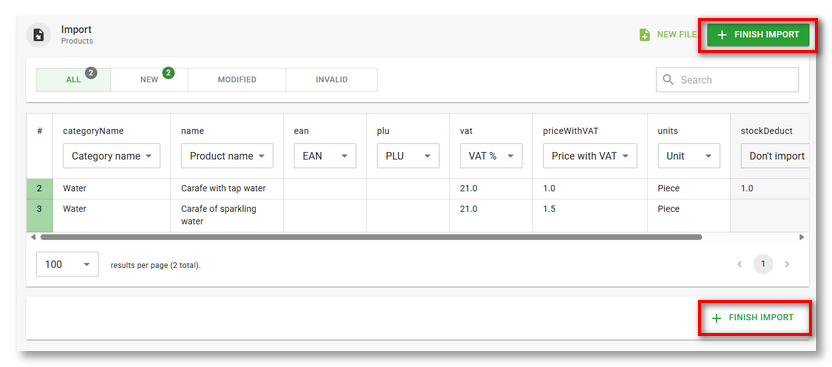
Once the import is complete, click on the + FINISH IMPORT button to create 2 new products with matching properties in the Water category. The DETAIL button for each product can then be used to edit its properties.

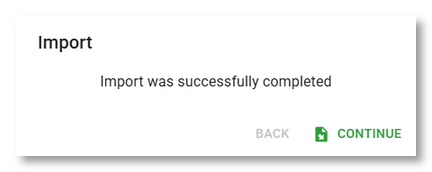
After synchronizing Dotypos Cloud with the cash register, the products will also appear in the cash register. However, if you have imported a large number of products, the actual import into Dotypos Cloud and the subsequent synchronization with the cash register may take several (tens of) minutes. A maximum of 10 000 products can be imported from a single file. The ongoing and successfully completed import is indicated by the displayed dialog.
Import data from other POS systems
|
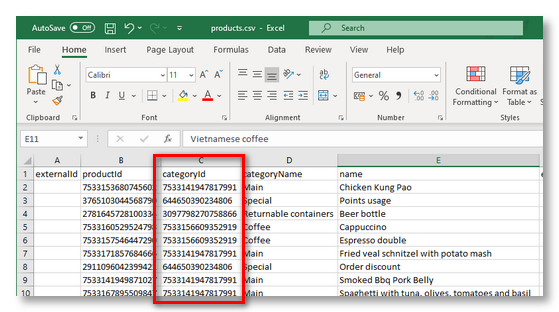
In order to get products from another POS system into Dotypos, it is necessary to have an exported list of products in .xls, .xlsx or .csv format. It is also necessary that the import file contains at least basic records in the correct format for each product, without which it is impossible to create a new product in Dotypos. These are the product name, category name, price with or without VAT and VAT rate (for taxpayers). If the category name is not available, the product will automatically be placed in the general category Import. The required columns and the data format for each item that can be imported into Dotypos are listed in the following subsections. If the names of the columns in the import file do not correspond to those in Dotypos, after inserting the file, simply select what data it contains in the drop-down menu of each column. This will match the data in the import file with that used in the Dotypos app. For example, our sample import file with products from another system looks like this: |
|
Because the names of the columns in this import file are not known by Dotypos, after inserting the file for import an error will be displayed and all columns will be marked as Don't import. We will be alerted to the need to provide the basic required data/columns: |
|
Now we need to determine what data each column actually contains. In the header of each column, click on the drop-down menu and select the correct data type for each column. In our case, this will be Category name, Product name and Price with VAT. |
|
Once the selection is complete, the rows will be highlighted in green and we will see in the header that we have created 2 new products by importing. Now we can complete the import with the button in the header or footer and physically upload the file to the cash register. |
Bulk edit products using import and export
If you need to edit the properties of multiple products and want to use Excel spreadsheet editing to do so, exporting products, editing the file and then importing is a great way to go. This way, you can actually edit any item in Dotypos that can be exported and re-imported. By default, export products from Dotypos to Excel using the button in the header. Open the exported spreadsheet, edit the data and then import back into Dotypos. Always edit only the values in the columns and do not delete any columns. Since the file contains the numbers of existing products (productId), Dotypos will recognize that this is a change to existing products in the cash register.
 |
 |
Just be careful to get the cell format right. When editing a .csv file with existing products from the cash register using Excel, the first thing to do is to set the format of the cells of the productId column and others with multi-digit numbers to Text and save the file that way. This is because Excel can evaluate these cells as numbers and automatically transform them into its own format. This will change important data and the file will not be able to be reimported after editing. See this chapter for the correct procedure.
It also recommends to first import, for example, the first three changed products, verify that everything is correct, and then import the rest of the products. The changed existing products and their values are marked in blue in the import:
