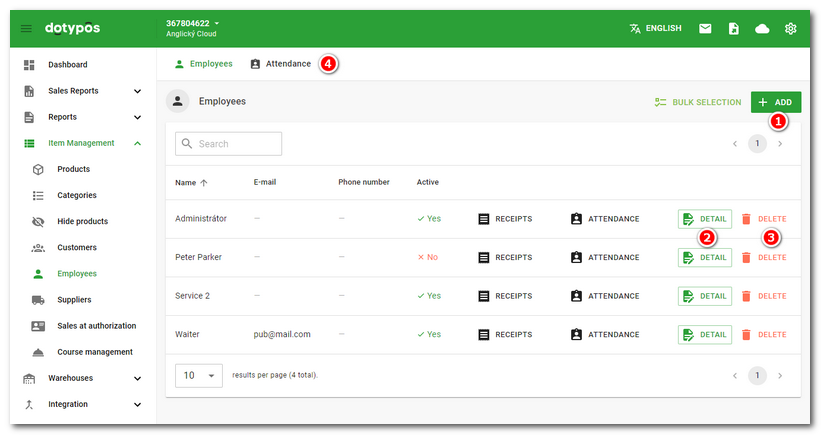
In the item Item management » Employees you can see an overview of created employee accounts. Every employee can log in before operating the cash register and all cash operations will be connected with the employee’s account. So you will get a summary of your employees and their operations. The employee overview highlights all accounts actually logged into individual cash registers.
To any employee account you can assign a separate set of privileges, especially for the cash register and for the application Warehouse. If you define the PIN in the account properties, the account will be protected and the employee can log into the cash register by entering it. If the PIN is forgotten, simply change it here for the specific employee.
Using the Bulk edit function, you can select multiple items that can be moved to another category, deleted, or other parameters modified. There is also an overview of attendance with the possibility of additional editing.
|
Or you can create employee accounts directly in the cash register. In this case, too, you can assign to the account user privileges concerning the individual functions of Dotypos and application Warehouse. |
How do I create a new employee account
|
In the item Item management » Employees click on the blue button + Add |
 . If you have already created any accounts, edit the selected account with
  and delete it with
  to delete it. Click
  .
.
|
A page with information about the user account will open. Enter the required information in the individual fields. If you enter a bar code in Barcode field, you can log into the account just by scanning the bar code with the reader. To protect your user account, use the pin entered in the Clicking on the fields in the section In the section the account can be also temporarily deactivated without being removed and you can also set the maximum discount Click on the links You can duplicate a created user with all the properties just with the button |
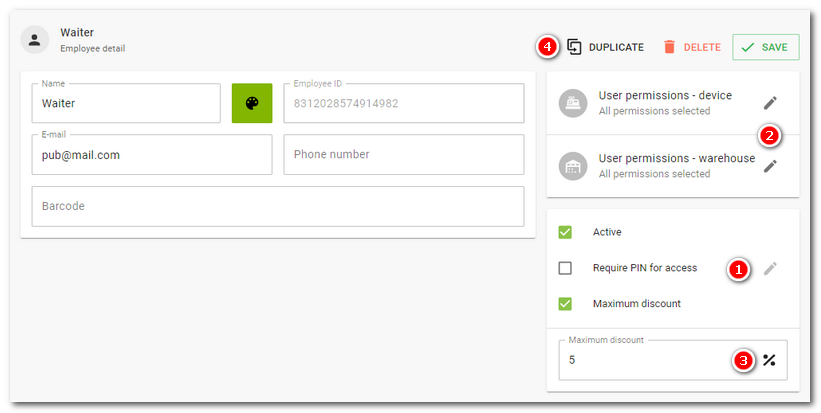
Assigning user privileges
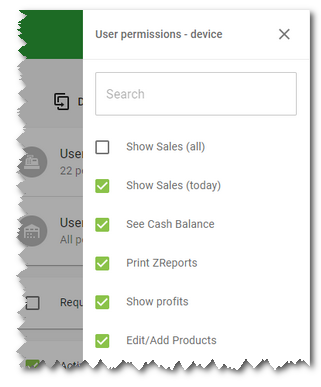
Click into the field User permissions – device or User permissions – warehouse to expand the list of user privileges for individual operations. Activate the selected item in the list by clicking on it and assigning this privilege to the relevant user. For assigning all privileges, click on the first item Select all. Clicking and entering text in the field Search filters user privileges only by the text entered (the entered text is case sensitive). For an overview and description of individual user privileges, take a look at this chapter.
|
User privileges cannot be set for the initial administrator account Administrator. This account has full privileges assigned automatically. That is why it is recommended to always protect the administrator account with a PIN. |