So if you already have the generated certificate downloaded to your computer, its password written down and the number of the created registration unit, follow the steps below and upload the certificates to the cash registers.
1.Uploading the certificate to the Dotypos cloud and assigning it to cash registers
2.Overview of uploaded certificates
3.Verifying the certificate on the cash register
Uploading the certificate to the Dotypos cloud and assigning it to cash registers
|
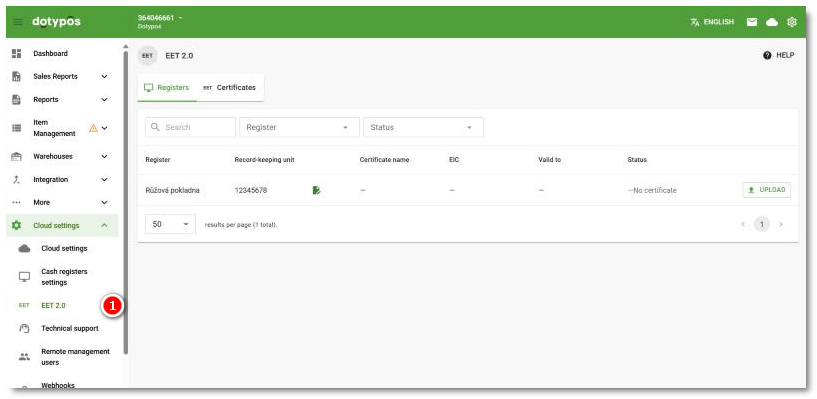
Log in to the Dotypos cloud, in the left tab panel open Cloud settings and click the EET 2.0 |

|
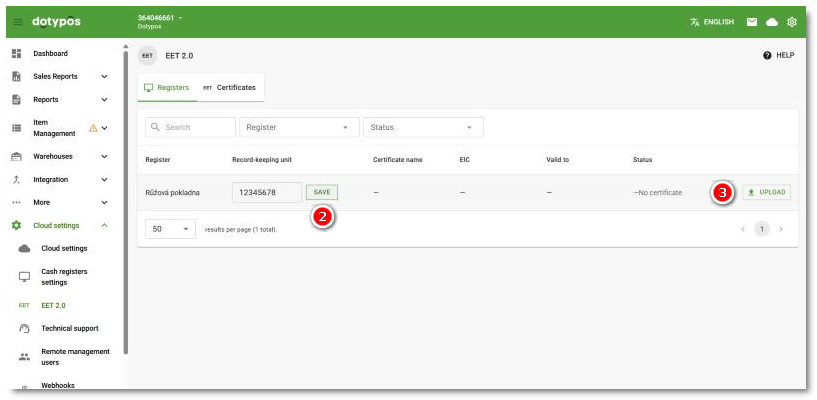
For the cash register to which you want to upload the certificate, click in the Record-keeping unit field and enter the number of the registration unit created on the Financial Administration portal. Save the number with the SAVE |

|
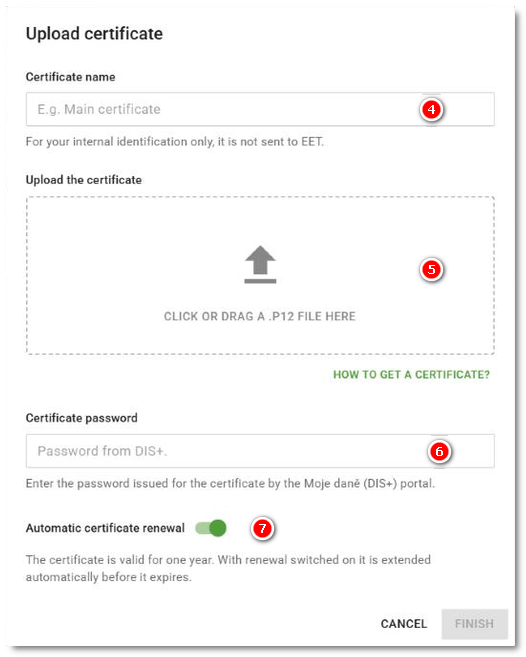
The dialog for uploading the certificate will be displayed. Enter your own name for the certificate |

 , then click in the area
 to select the downloaded certificate on your computer. In the field

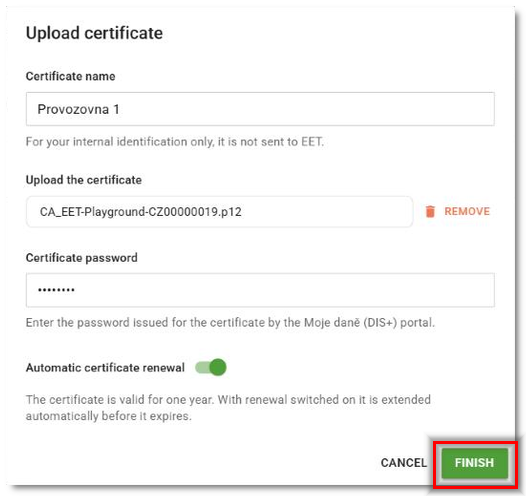
 . The certificate will then be renewed automatically every year, the Dotypos cloud will verify it itself, and you will not have to generate a new certificate at the Financial Administration every year (which is the standard validity period of a certificate) and go through the whole procedure again. Once all the details are entered correctly, save the certificate to the cash register by clicking the
|
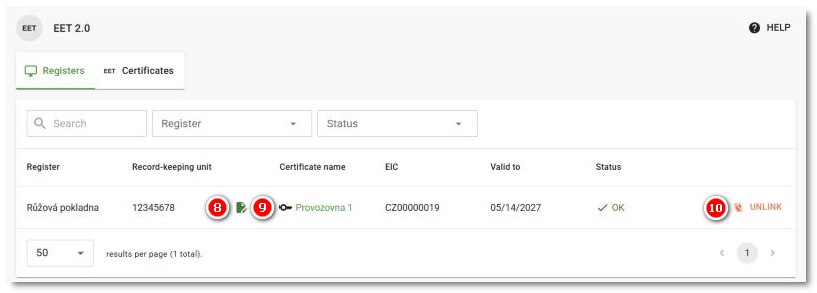
The certificate is uploaded / linked to the selected cash register. Click the icon |

 to change the registration unit number later. Clicking the


|
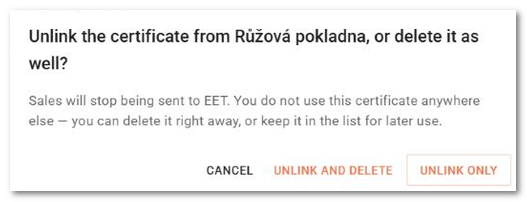
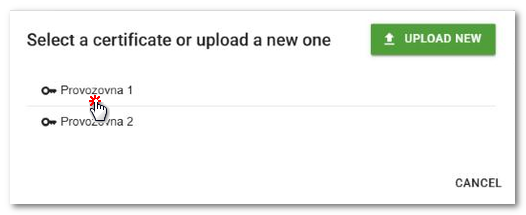
When unlinking the certificate, you choose between removing it from the cash register (UNLINK ONLY) or also deleting the certificate completely from the Dotypos cloud (UNLINK AND DELETE). If you only unlink the certificate, it is removed from the cash register but remains in the Dotypos cloud, so it can be assigned to another cash register again with the UPLOAD button in the list of cash registers. So if you have at least one certificate uploaded in the Dotypos cloud, it will always be displayed under its saved name when uploading and you can use it, or upload a new one with the button. |

Overview of uploaded certificates
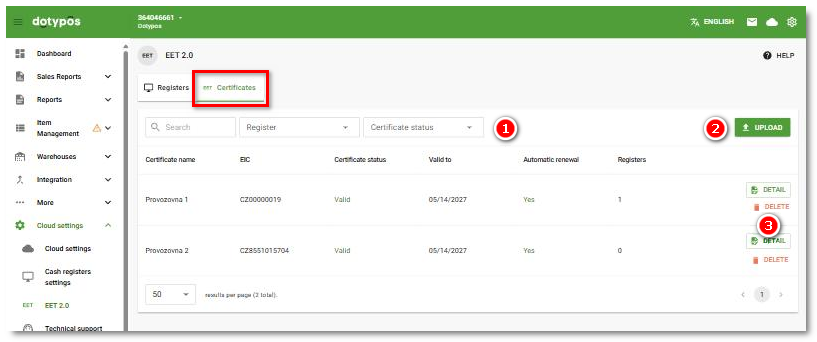
On the Certificates tab you will see a list of all uploaded certificates. You filter the displayed certificates using the fields  in the header. It is also possible to upload a new certificate here
 . You display the certificate properties with the DETAIL
 button. If you delete a certificate here, it will also be unlinked from the cash register to which it was assigned.
In the displayed certificate properties, you can change its name and activate / deactivate automatic renewal. We recommend keeping automatic renewal active. You will not have to upload a new certificate to the cash registers after the certificate expires. When changing the properties, remember to save everything with the button in the header.
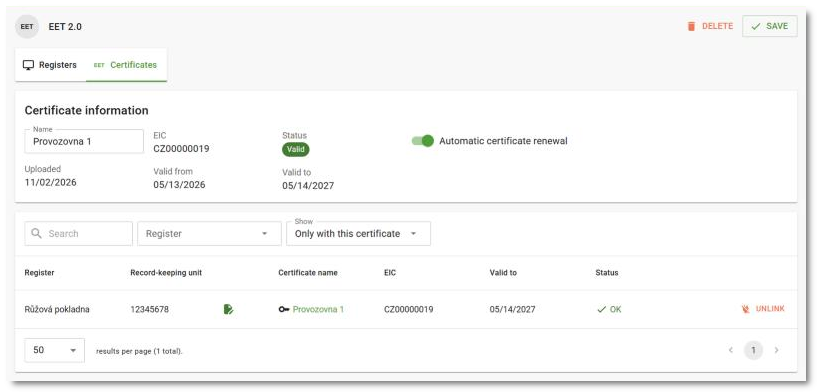
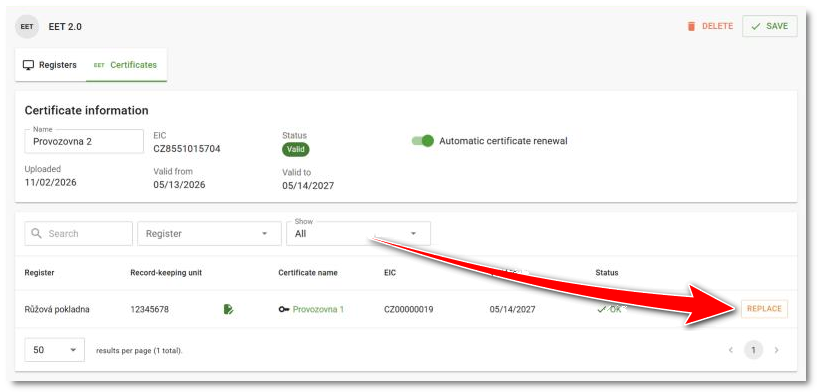
By default, only the cash registers with this certificate are displayed under the certificate properties. If you change the filter in the header to display all cash registers, you will be able to add this certificate to other cash registers with the REPLACE button.
Verifying the certificate on the cash register
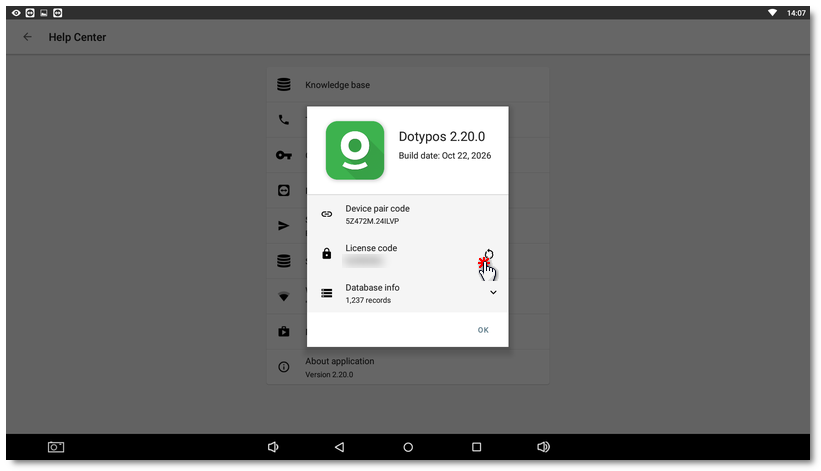
On the cash register, you can check that the sales registration is set up correctly. The live EET 2.0 mode is added to cash registers as part of a standard update of the Dotypos application. If the cash register is continuously connected to the internet, it updates automatically. So first check that you have the current version of the Dotypos application on the cash register. The version should be 2.19 or higher. You can find the version of the Dotypos application under the Help Center tile on the main screen.
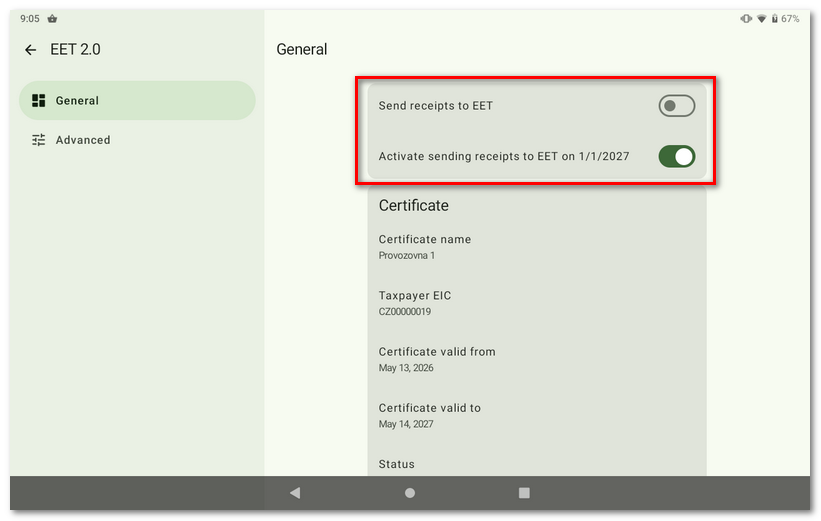
In the Dotypos side menu, tap Application Settings and then the EET 2.0 tab. On the General card you will see the inactive option Send receipts to EET and the automatic activation from 1.1.2027 turned on. There is also information about the uploaded certificate – certificate name, taxpayer EIC, validity, status and the automatic renewal setting.
|
If you upload the certificate to the cash registers before 1.1.2027, EET 2.0 will be set up in the cash register so that the cash register automatically activates sending receipts only from 1.1.2027. If you upload the certificate after 1.1.2027, sending of sales will be active immediately. We therefore do not recommend changing the Send receipts to EET setting on the cash register. Keep the default setting, in which the actual fiscalization (sending of receipts) starts automatically from 1.1.2027. If you turn sending on now, unsent receipts will remain in the cash register and the cash register will report an error, because the production servers of the Financial Administration are not running yet. |