» Available only in Dotypos UNLIMITED. « |
|---|
Divide offered food into individual courses and inform the kitchen via the printer for orders about their preparation. The created courses can be displayed on the Dotypos main screen and the crew can punch them in quickly and easily.
|
You can also create courses directly in the cash register. For more information please see this chapter, where you also find a guide for working with courses in the cash register. |
How do you manage courses?
|
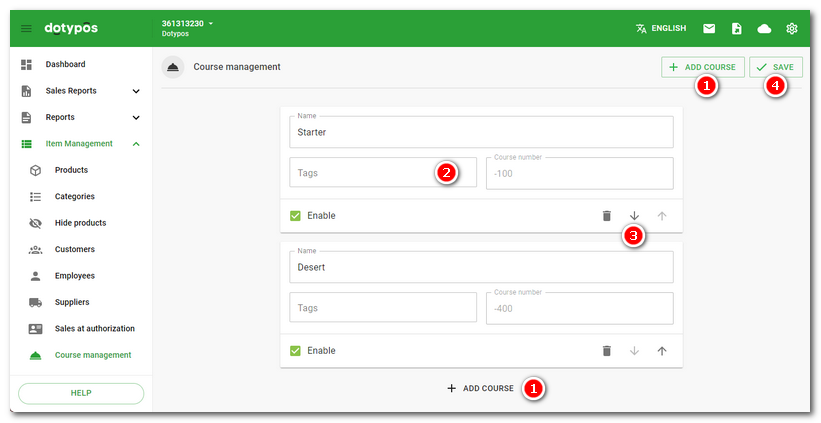
In Dotypos Cloud, click on the tab Item Management and from the pop-up menu select Course management. To create a new course click on the button + ADD COURSE |

|
Enter Name of the course and add possible Tags Finally, don't forget to save the created courses using the button |
|
Assign the created courses to individual products (see Default course) or categories. This way, the product will be directly marked with the correct course when it is deposited in the cash register. See how to work with courses in the cash register. |
 .
. . According to the tags in the filters in
  to define the sequence of courses that will be applied when printing orders for the kitchen. It is always processed from the first course to the last one. The option
  . You can delete a course using the basket icon in the section