Dotypos Cloud lets you import/export the following items from / to the Dotypos cash register system:
•Tags
•Assigning products to warehouses
Based on your Dotypos license some items may be unavailable for import/export. The import/export process is identical for all items. Just move in the web interface of Dotypos Cloud to Item management and to a specific list. The heading of the page with the selected list will have the button for exporting to .xls / .xlsx (Excel) or .csv (text file with separators) format.
You can edit the exported file and then mport it. You can import files in .xls, .xlsx and .csv formats (only .csv in the case of inventory).
|
•How to import data correctly is described in this chapter, where you can find an example of importing products and their properties using the Excel application. •If you are redirected to a specific data report when exporting, the appearance of the exported data is affected by the current column settings in that report. •We can help you import your products into the cash register. Just download the blank product import template from Dotypos Cloud (see procedure below) and fill it with your data. Then send this file to technical support with your data import request. We only import data for free using this file. Importing data from other files is a paid service. |
|
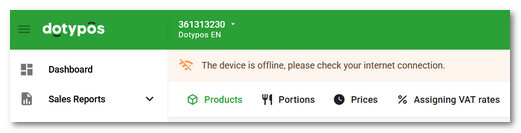
If the warning message The device is offline, please check your internet connection is displayed in the page header, keep the current page open in the browser, do not close the browser and do not perform any other operations until you have resolved the cause of the outage and the warning disappears. Otherwise, you may lose your work in progress.
|
Data export
|
We will show the basic import and export using products as an example. Let's start by exporting data. Go to the tab Item Management » Products |
 ,
, and select
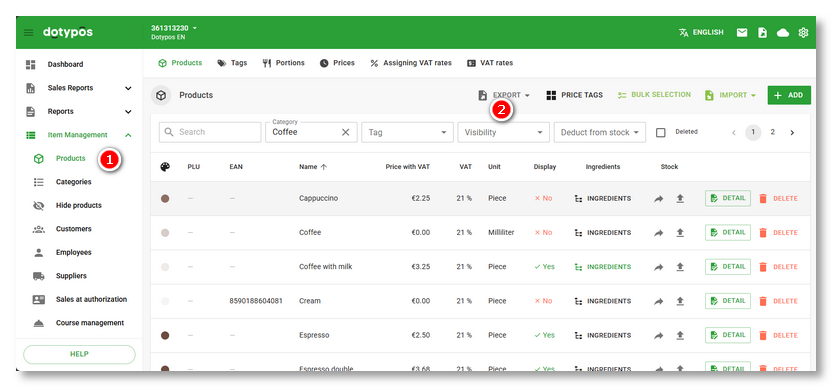
|
The Export products data report opens. Now, if necessary, filter the products in the report using the options in the section |
 , select the columns of data
  that you want to include in the export, and tap the
  to save the products (the displayed report) in .xlsx format.
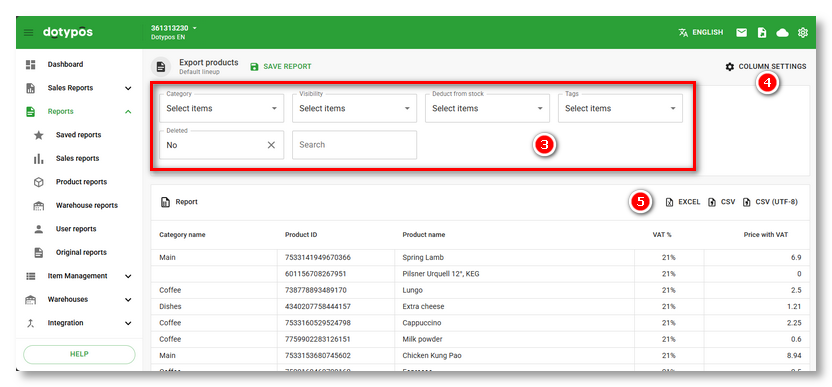
|
When exporting, the data report is always displayed first, which you can customize using the COLUMN SETTINGS menu and finally export the displayed data to the preferred format (EXCEL, CSV) using the buttons. You can save your own report for export and further export the already saved report. |
Data import
|
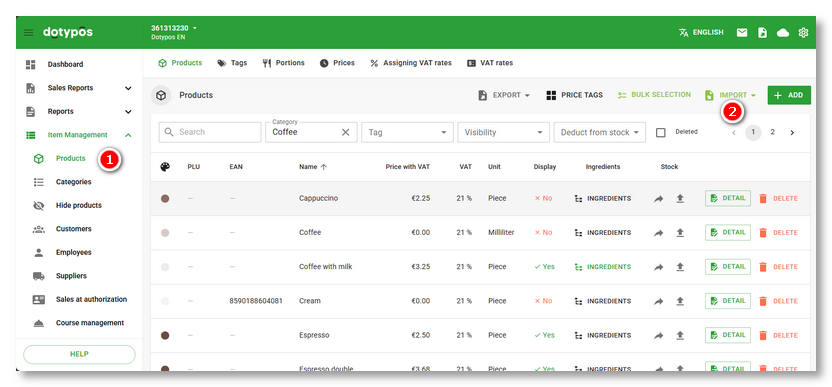
The products have been exported and we can move on to import. On the tab Item Management » Products |
|
The import field will appear on the right side of the screen. In the Click in the section Click on the DOWNLOAD TEMPLATE button |
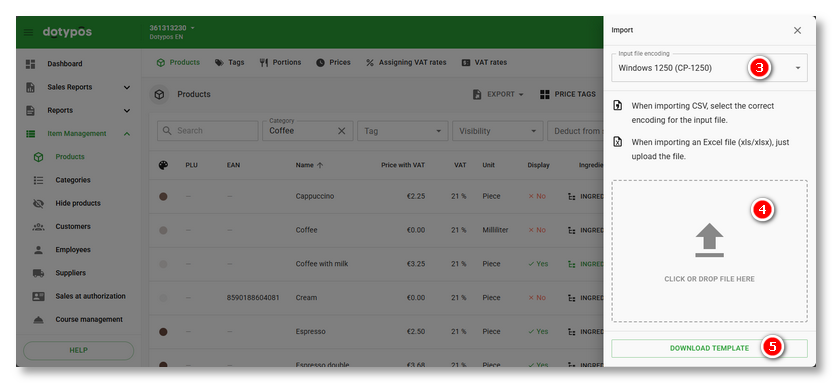
 . Important is the tab
 in the header or footer will not be able to complete the import.
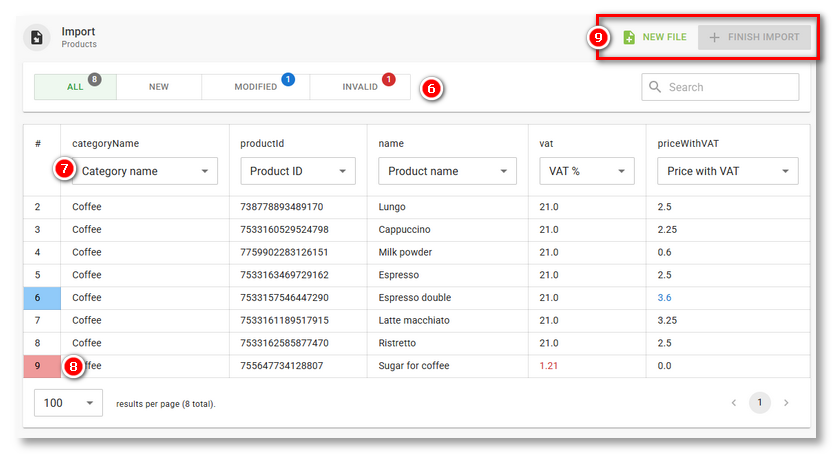
|
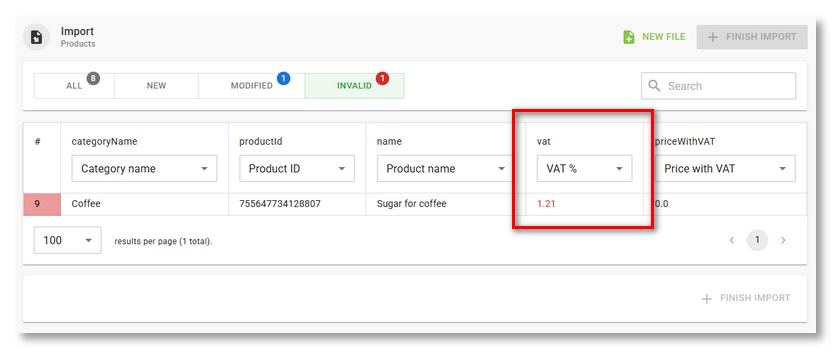
In our case, the VAT (vat) value is incorrectly filled in on line 8 (see picture above). Depending on the number of columns this can be detected by dragging the horizontal scroll bar at the end of the product list to get to the vat column, whose value, like the row, is marked in red. Since this is an existing product in the cash register, we can choose two solutions. Either cancel the import now with the + NEW FILE button, correct the value in the file for this row in the vat column to the correct value of 21, save the file and reimport, or don't import the column at all. Then the original VAT rate will remain for this product. |
|
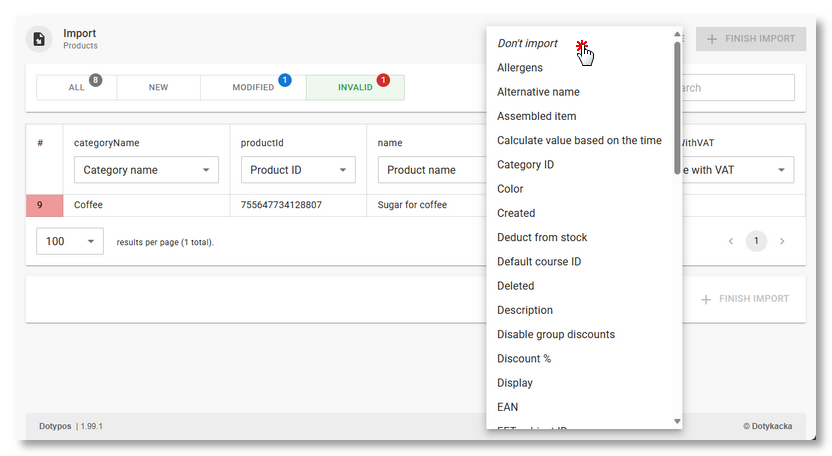
We decided not to import the column. From the drop-down menu in this column, we choose Don't import. This will remove the indicated error. By selecting Don't import, we are actually telling which columns we want to ignore during the import. So you can actually select only those that contain some necessary change and skip the rest. We always recommend importing only really necessary data. |
|
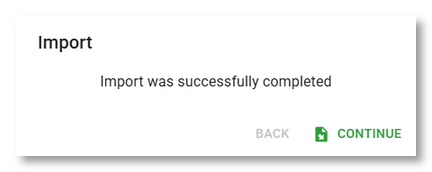
If everything is OK or the errors have been removed, the import can be completed using the button in the header/footer. The actual processing of the file and its transfer to Dotypos Cloud and then to the cash regoster will take place. For larger numbers of items, the import may take several (tens of) minutes. Completed import is confirmed by a displayed notification. |

We have shown a basic sample procedure for importing data. More detailed information can be found in the next chapter Importing data step by step.
|
Once you have clicked on the Import button, you will be able to click on DOWNLOAD TEMPLATE to download a basic template (see image above), a sample file that can be used to re-import once the data has been completed. This template already contains all the required columns, so all you need to do is add the data (in this case your product’s properties). |
|
•Always use this adjusted template or a modified exported file for imports. The imported file has to be in xls, .xlsx and ,.csv format. Never import your own files because it could harm the database’s data structure! •If you want to amend the .csv file in Excel, the columns with numbers productId, categoryId, ean, plu and others must be in the Text format. If not, the file will either not be imported at all or imported incorrectly. You can find the format settings in this chapter. •The file encoding must be either UTF-8 or Windows-1250 (CP-1250) to avoid any incorrect display of diacritics. •The supported types are .csv files separated with ; (semicolon) and , (comma). If you use the semicolon, you can use a comma or period to separate decimal places. If you use a comma as a data separator, you must use a period to separate decimal places. •The number of items that can be imported once is limited to 10 000. Therefore, there can be a maximum of 10 000 records in one file. If the import file contains more items, it must be split. |