 Dotypos lets you draw up simple invoices with the products charged to the selected customer. The invoice will be drawn on the selected customer's name and its header will contain information about your company specified in the Dotypos settings. The already generated invoice can be found in the History and displayed retrospectively.
How to display a copy of an invoice, modify it afterwards or cancel it?
To issue an invoice you have to:
1.In the Invoices section of the application settings, enable and set up the use of invoices and fill in your company details.
2.Optionally in the tile menu use the button Customer to fill out information about the customer or select an already existing customer account.
How do I issue an invoice?
|
Select the customer account to whom you want to issue the invoice by clicking on the button CUSTOMER |
 . Once you select the customer, their name will appear on the button. You can also assign the customer later in the
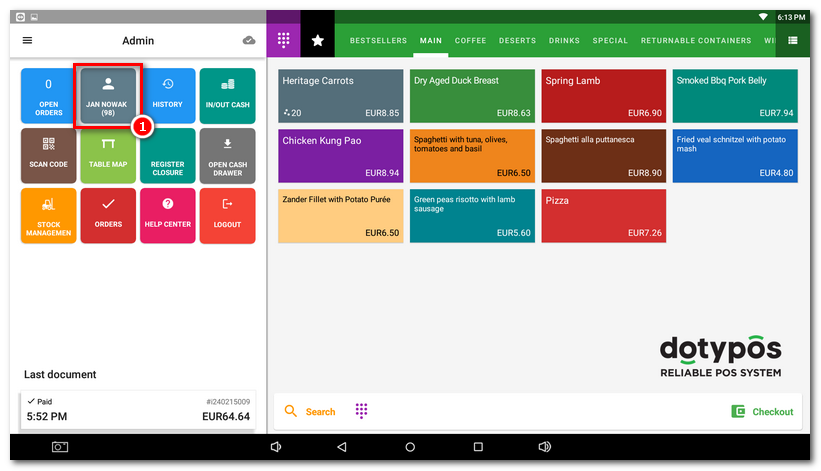
|
By default, charge the products that will be listed on the invoice, then tap Checkout |
 .
. 
|
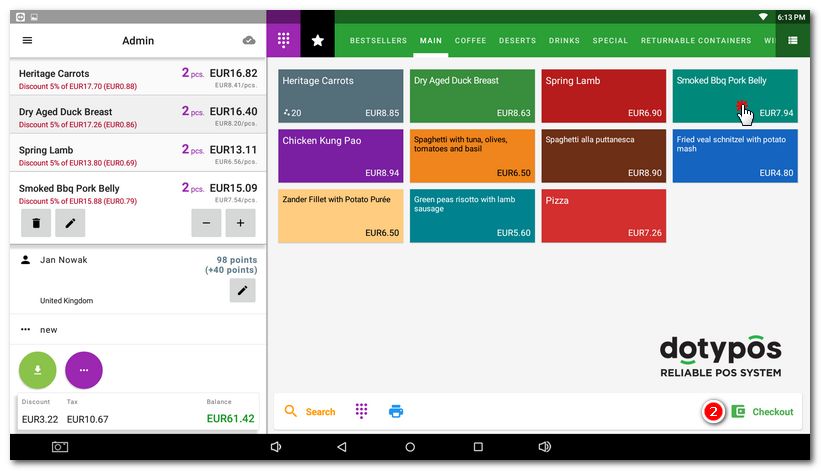
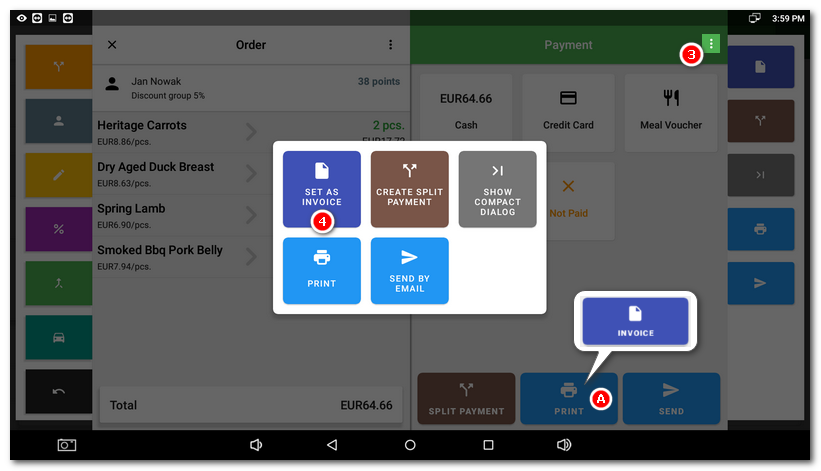
In the payment dialog, tap on the Advanced payment options icon |
 . A dialog with additional options will appear, from which select
|
If you have not entered your company details in the Application settings » Invoices, you will now receive a warning. Tap CONTINUE to be redirected to the appropriate settings. There, fill in the required data, save it by tapping OK and return to the payment dialog. |
|
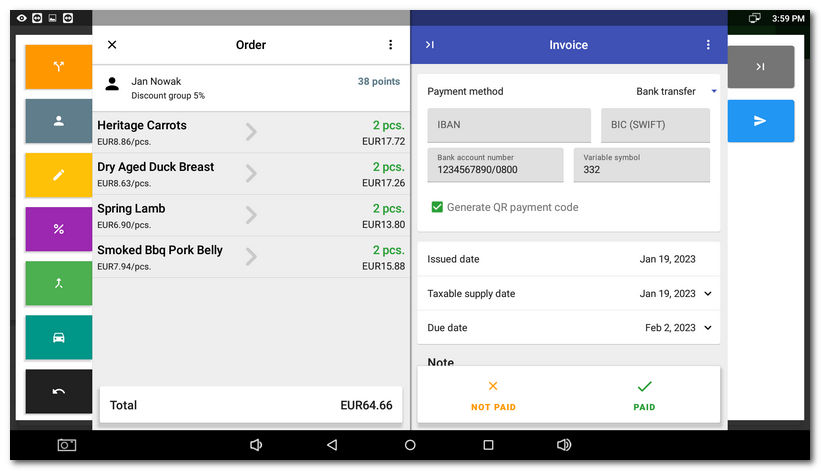
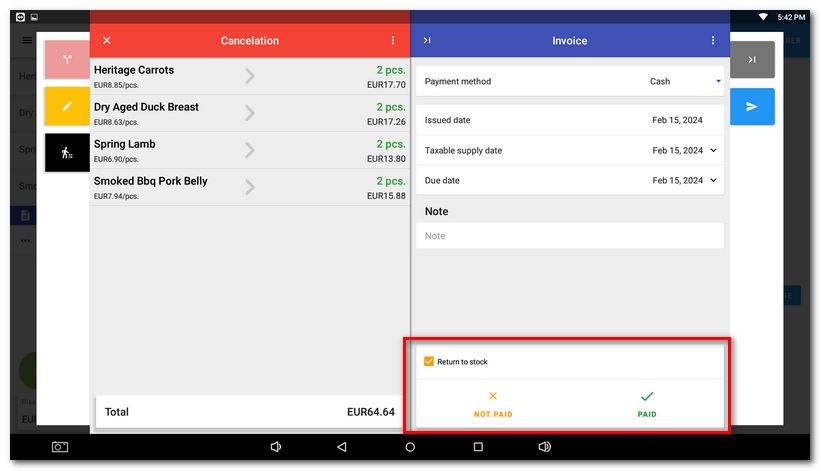
On page Invoice you can select the payment method (cash, credit card, bank transfer), date of the taxable transaction, the maturity date and make a note. The note you enter will appear below the total amount on the invoice. If you select the method cash or debit/credit card, the maturity date will be set to the current date. If you enabled a separate numerical series for invoice numbering, this document number will be automatically used as the variable symbol for the invoice settled by bank transfer. Continue and click on PAID. By tapping the menu |
|
If you choose to pay by bank transfer and add an account number with a maximum 10-digit variable symbol to the invoice, the generated invoice will automatically include a QR code for quick payment. |
|
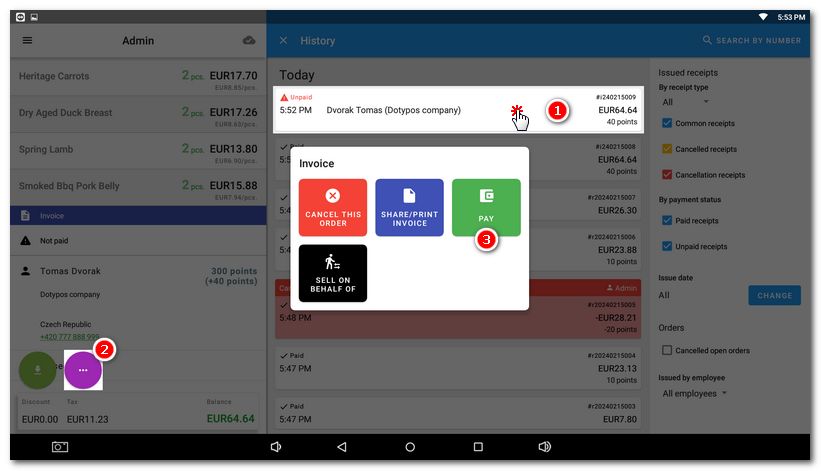
If you mark an invoice as unpaid, you can pay it later in History. Here, select the invoice and mark it as paid via the button |
|
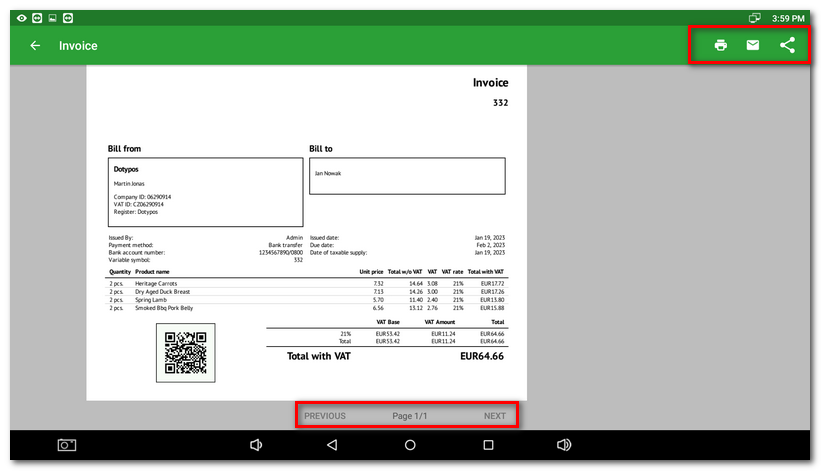
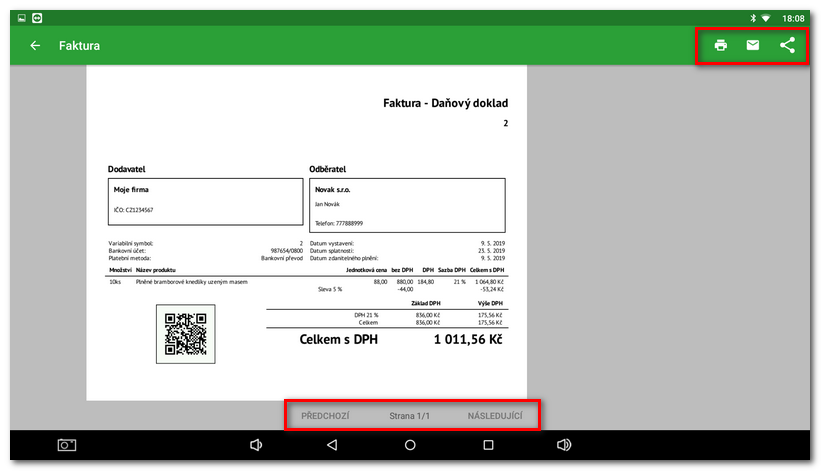
The invoice preview will be displayed. In the upper right corner you can find icons to print the invoice out, send it directly to the entered email address, or use the opportunity to share and insert it into any application. Printing on a conventional printer is possible e.g. using the Mopria application via Wifi network. Use the two-finger touch gesture to zoom in/out on the printer. If the invoice has more pages, it has a link to move to the next page on the bottom. |

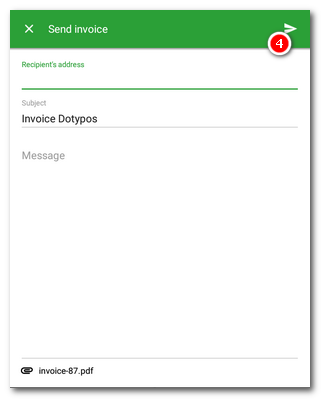
If you select to send the invoice directly by email, a dialog with the message preferences appears. In this dialog, you fill out the recipient's email address. Also, you can change the topic or even the message itself in the field Text. The invoice is attached to the message as an attachment in .pdf format. Use the button  then send the message. All invoices generated in .pdf format can also be found directly in the internal memory (Internal Memory) of the cash register, in the folder DotykackaPdf.
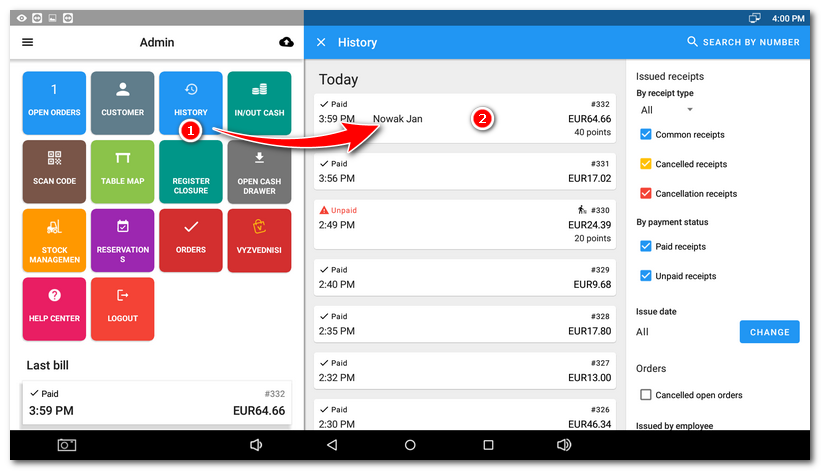
How to display a copy of an invoice, modify it afterwards or cancel it?
|
In the tile menu select HISTORY |
|
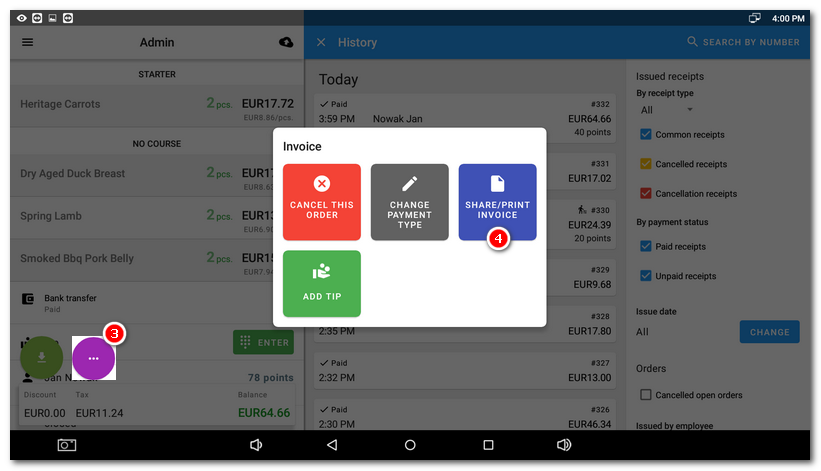
Click on the icon for other options |
|
In case of cancellation, you will be redirected to the payment dialog where you will confirm the return of the goods to the warehouse and receive the amount back. A corrected tax document will then be created and displayed. For more information on how to cancel receipts in Dotypos, see the Order cancellation chapter. By tapping the |
|
The invoice preview will be displayed and you can print, send or share it using the icons in the top right corner. |
|
By selecting PARTIALLY UPDATE INVOICE, you will open a dialog for making additional changes to an issued invoice. |

|
In Dotypos Cloud, the type of payment by invoice will be indicated on the document in individual cash register operations. |