The application layout may change according to the display size of the device on which you run Dotypos. On devices having display smaller than 8" Dotypos switches to the so-called mobile view. This view is optimized for small displays and portrait orientation.
Adjustment of order items and payment
|
|

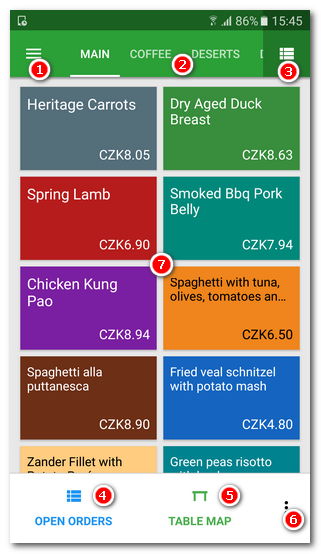
The main screen in mobile view
 |
 |
|
Side menu - Click to display the Side menu. |
|
Panel of categories - Displays created categories of products. You can move this strip horizontally using your finger. |
|
Category list icon - If you have a large quantity of categories, this icon displays them as a transparent tile. Long tap on the icon to switch it into search mode. Then you can use it to search for products in the cash register. |
|
Open orders - After clicking, you will see a list of open orders that are not yet closed or settled. |
|
Table map - click to display Table map. If the Table Map is not enabled, you will see the option Customer displayed for operations with customer orders. |
|
Tile menu - Contains the buttons for basic cash register operations. A description of individual buttons can be found in this chapter. |
|
Panel of products - Clicking on the selected category displays the products belonging to this category in this section. Clicking on the product records it. If you have activated the Table map, it is displayed here and the products will not be displayed until the specific table is selected. As soon as a product has been recorded, it will be displayed below as an item in the order |
|
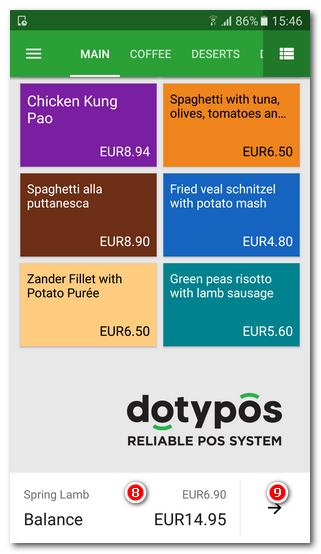
Information about the current bill and payment - As soon as you charge any products, you will see information here about the total bill total, together with the last charged item. After clicking on this area the items in the bill can be adjusted and then the order paid. |

 . Clicking on the items in the order lets you adjust their properties and quantities.
|
By default, the searching icon is displayed on the main screen only in landscape mode. In portrait mode the search is hidden under the icon for the list of categories. Long tap on this icon to switch between access to the list of categories and search. 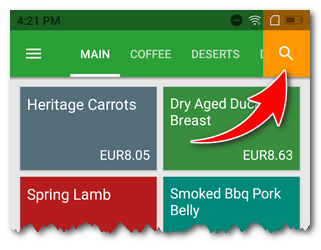 |
Adjustment of order items and payment
|
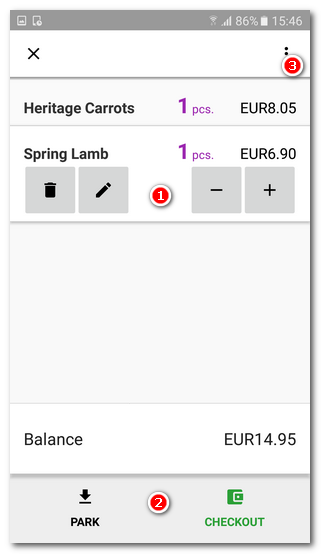
Adjusting an item in the order - If you click on a charged item in the order, it can be adjusted or deleted with the buttons that appears next to the item. |
|
Parking or settling an order - Use these buttons to either park the order or go to the Payment dialog (option Issue order) and pay the order. |
|
Advanced order options - clicking on this icon displays advanced order options where you can assign a customer, provide a discount or divide items into several orders. |
Payment dialog
 |
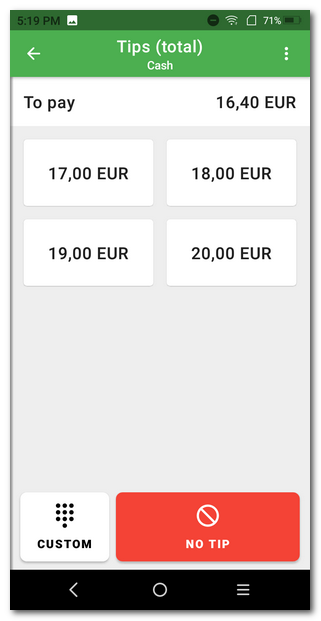 |
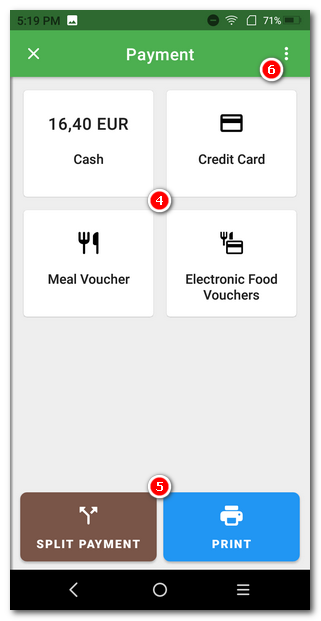
Tap the payment method of your choice  to pay your order. Depending on your settings, a dialog may also be displayed to enter the amount received from the customer or the tip.You can then use the buttons at the
  bottom of to print a receipt, send a receipt to email or split the payment between multiple payment methods. To be able to print a receipt, a Printing receipts job must be added to the printer in the Print settings.
To split a payment, simply enter the amount received from the customer less than the total amount after selecting the payment method . In a second step, you then select another payment method to pay the balance. In order to enter the cash received from the customer, the Use Paid, To return screen for cash payment method must be enabled in the general payment settings.
The Not paid button in section will close the order without payment. The transaction will be marked as unpaid in the History and you will be notified of this unpaid bill when you close the cash register.
Tap the  icon to view advanced payment options.
Item management
 |
 |
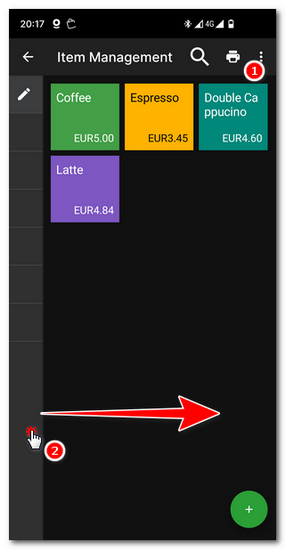
Tap on the icon  to display the menu for creating new categories or products. Or you can create a new product with the button
  .
.
To display the existing categories drag your finger from left to right  . The list of categories will be pulled out. The same operation (pull out from left to right) also displays items when editing products.
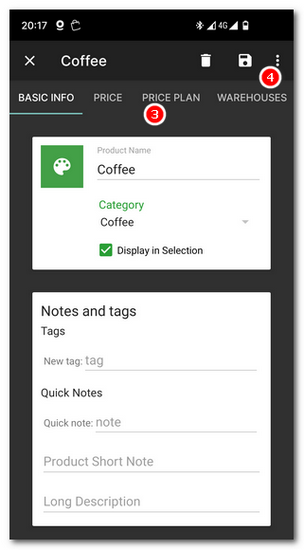
If you create a new product, only its basic properties will be displayed (Prices, Packaging and unit and Bar codes). To display all product properties that are divided into horizontal tabs  , the new product has to be saved and reopened. You can find this option by tapping on the three dot icon in the heading .