» Available only in Dotypos FULL and higher. « |
|---|
How to perform a batch stockup of products
Description of import file columns
How to display a list of corrections?
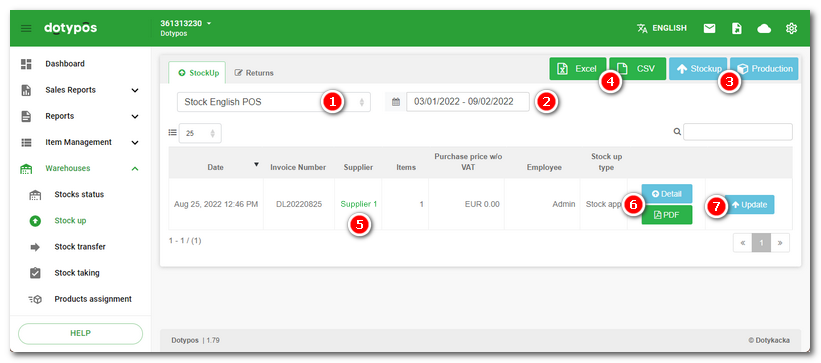
On the Warehouses » Stock up tab you will find an overview of completed manual stock-ins, corrections, or confirmed stock-ins and received remittances via the EDI service, sorted by date by default. Stock corrections are also displayed among the completed stock-ins (stock-in with a negative quantity). In stocking in Dotypos, the displayed purchase prices are averaged based on all completed stock additions for the given product.
If you have made an incorrect stock addition, see this chapter, which shows how to correct an incorrect stock addition.
By clicking the drop-down menu  you can select the warehouse where you want to perform stock-in. You can then stock in or manufacture products using the buttons
  . With the buttons
  you can view the details of each completed warehouse operation and save them as a .pdf file. A warehouse operation can be either a purchase or a correction.
With the Update  button you can stock in additional products under a previous stock-in. With the
  button, you can limit the stock-in overview to a selected date or time range. For instructions to set the time range, see this chapter.
You can export the complete overview using the buttons  to an Excel table or .csv file. For each stock-in, by tapping the supplier
  you will go to its properties.
|
•The stocking in the Warehouse application in the cash register is described here. •You can also perform a batch stocking by importing an electronic delivery note. You can find more information about this option in this chapter. •The stocking supports the addition of EAN weighted products where the quantity defined in the barcode is also added. |
How to stock in products
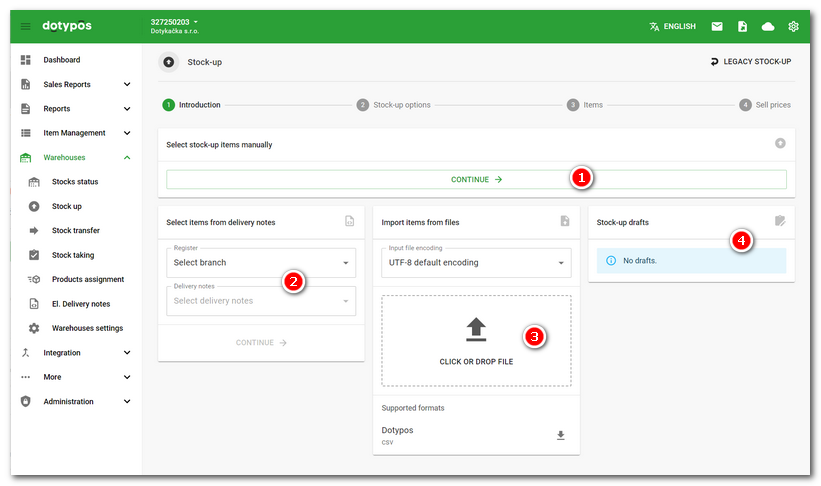
On the Warehouses » Stock up tab, tap the Stockup button (see image above). You have several options to choose from for stacking (see image below). Manual with product selection for stacking from the cash register , stacking products via an Electronic Delivery Invoice (EDI) or stacking from Dotypos or supported suppliers file . Each stacking can be saved and opened in and completed at any later time. At the same time, the ongoing stocking is also saved automatically at regular intervals.
|
Work-in-progress warehousing is automatically saved locally to your browser’s memory. Therefore, you must continue with the warehousing process later using the same browser on the same computer, and do not clear your browser history in the meantime! |
•Manual stocking up
Click on the CONTINUE button under section , the stacking process described below will begin.
•Stocking up from electronic delivery notes
Once you have received the e-delivery note from the supplier, you will be able to select it in the section after selecting the cash register to which you want to stock the products. The CONTINUE button will then start the stacking process, which is described below.
•Importing products from a file
You can import products for stocking from the supported vendors or Dotypos files in the section . To select a file to import, click in the section and select the file or drag it into this section from another window, such as Windows Explorer. The products in the file will then be added to the inventory. The CONTINUE button will then start the stacking process described below.
Stocking up procedure
|
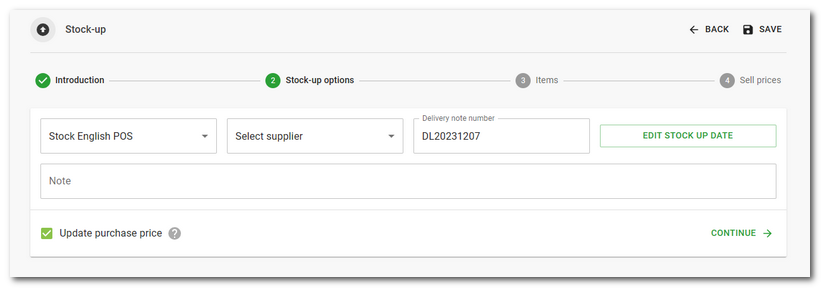
When you start any type of stacking, a page appears where you specify the basic properties of the stacking. Select the warehouse, supplier, custom delivery note number, edit the stacking date and add a custom note. You can also choose whether you want to adjust the purchase or sale price of the products you are stocking. Then tap the CONTINUE button to move to the next step. You can also stacking up products with a date and time in the past. However, there must not be more recent inventory for backdated products. If you select a custom date, it will be displayed in the header at each step of the process. |
|
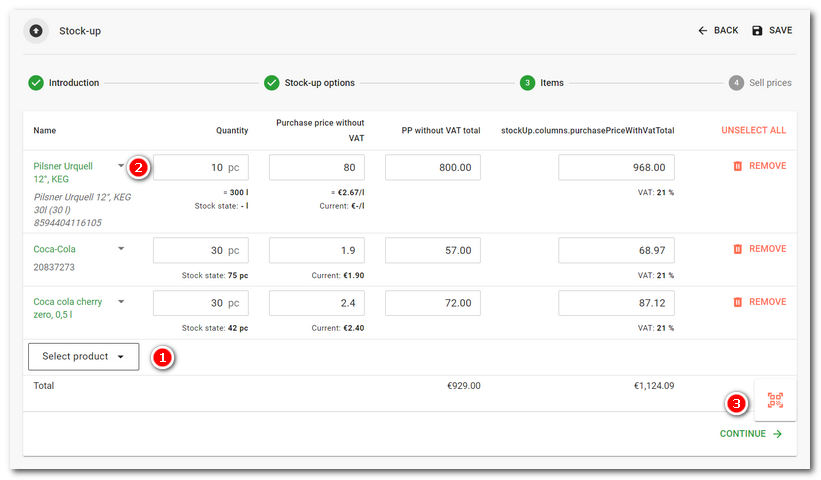
You will now see the products for stocking loaded from a file or an e-delivery note. For manual stocking, add products by clicking in the field If you add products one by one using the + button, the add product dialog For each product, specify the quantity to be stocked and, if applicable, the current purchase price. If you enter a negative quantity for stocking (e.g. -10), a correction is made and the quantity of the product in stock is reduced by the number entered. In this case, the purchase price excluding VAT is replaced by the average purchase price from previous stock receipts. By purchase price we mean the purchase price of the product per unit sold. For units where you stock e.g. 10 bottles of wine of 1 litre each, it is simple, you stock the price for 1 bottle (1 litre). However, if you are stocking a 0.7 litre bottle, you must enter the purchase price converted to 1 litre. You don't need to recalculate the purchase price if you create a stock packaging in the product properties that contains specific quantities/contents and units. Use the arrow next to You can move between fields / products using the TAB key. The ENTER key will then always take you to the A summary line is displayed at the bottom. If you are stocking products with different units, the quantity for each unit will also be shown here. After adding the products, continue with the CONTINUE button. |

|
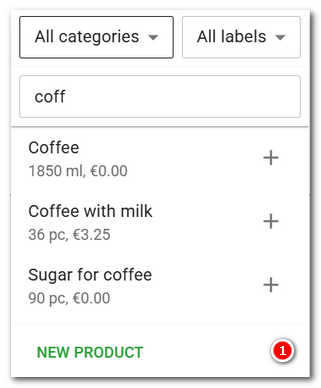
You can also use the keyboard for quick product addition. Type the first few characters, use the arrow keys to select from the suggested products, and press the ENTER key to add the product to the list and enter the quantity. By pressing the ENTER key again, you will return to the product addition dialog and can continue adding more products. |
|
How Dotypos calculates the purchase price?  Note: Dotypos does not use FIFO to calculate the purchase price. |
|
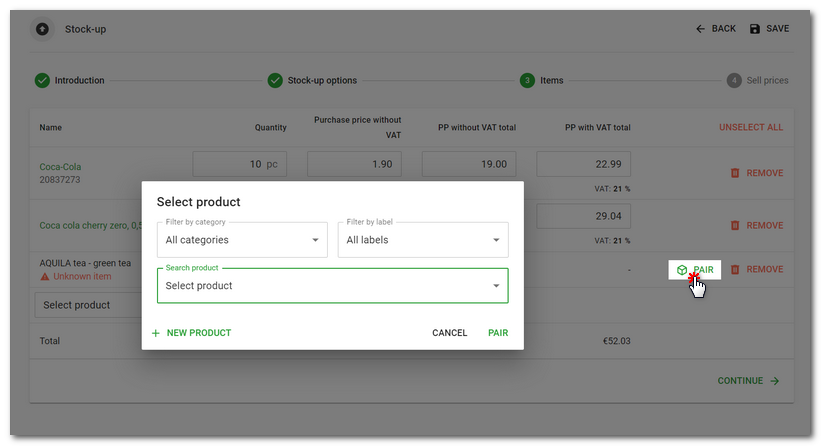
If you stack unknown products, you can use the PAIR button to assign each unknown product to an already created product or stock packaging in the cash register, or create a new product in the cash register and pair it. |
|
When stacking, products are paired with those in the cash register primarily based on productid (internal product code). If no productid is found, the externalid is searched, then the EAN and finally the PLU code. |
|
In the final step, a summary of the received products will be displayed, with the option to adjust their purchase or sales price (if you enabled this change in the first step). Based on the entered sales and purchase prices, the margin (profit) calculated according to the weighted average will be shown for each sales product. The displayed minimum margin also reflects the set minimum margin for the category. However, the margin set for the product always takes precedence. Arrows indicate whether the margin and profit are higher, the same, or lower compared to the original values. If the margin and profit are lower, you can click the displayed button in the notification to recalculate the sales price so that it matches the set margin for the product. You can find more information in the chapter Setting and using margins. You receive products into stock by pressing the STOCK UP button. This completes the stocking process. Within a few moments, the change will also appear in the cash register. |

|
•You can also stock in directly on the page with the product overview. You can find this sequence in this chapter. •You can easily continue with the stock entry later. By continuing the stock entry, the same supplier and invoice number will be preset, so that the entered items are added to the same stock entry report. |
|
If there is a discrepancy in the stock value, it may be caused by a correction (negative stock entry), after which an incorrect purchase price was entered. It is necessary to respect Dotypos behavior, which averages the purchase prices during stock entry. During procurement (stock entry), the average purchase price is recalculated, so the product has a certain value in stock. If we create a correction for the same quantity of a product at the same purchase price as the original stock entry, we will indeed reconcile the specific delivery note (specific stock entry), but we will disrupt the stock value. Therefore, corrections must always be made at the current average purchase price. More information can be found in the chapter How to correct an incorrect stock addition? |
How to perform a batch stockup of products
Dotypos also allows the stocking in of products in bulk using the import file. Electronic delivery notes from more suppliers are also supported.
|
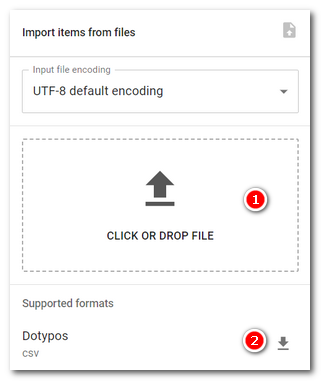
Select the import file with the products to be stocked by clicking in the section In case you want to use the import file of Dotypos, first download the import template from section |
|
Once you select or drag the file, the products specified in the file will be added to the stock. If an error occurs while importing the stock file, you will be notified by a bubble at the bottom of the page. Continue with the standard stacking process described above. If for some reason the file is not detected correctly and the supported vendor cannot be determined, a dialog will be displayed with the option to select the vendor. In this case, manually select the supplier who created the delivery note (file) from the displayed options. |
|
For the recommended procedure on how to resolve incorrectly performed stock entries, see the chapter How to correct an incorrect stock addition? |
Description of import file columns
When importing stock in, the products in the cash register are paired on the basis of ean, plu, externalid or productid. So when a product is found in the cash register by one of these criteria, it will be stocked in using data in the next columns of the import file.
The stock in import checks duplicate items. When a duplicate item in the import file is found, an error message will be displayed.
Import file for batch stockup of products |
|
ean |
product code |
plu |
product code |
externalId |
external product ID (selected by the customer, can be found in product details). |
productId |
product ID (system-generated, can be found in product details). |
price |
Unit purchase price excluding tax |
priceSum |
Total purchase price excluding tax according to the entered quantity |
priceSell |
Sales price including tax |
quantity |
Product quantity |
productName |
The product name used when creating a new product from stock. It is displayed in this dialog. |
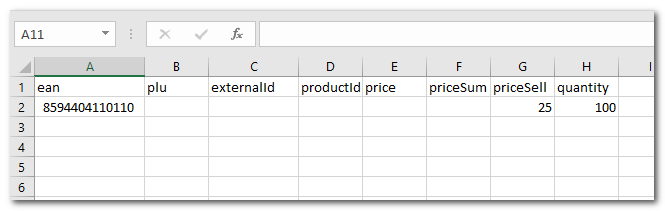
The required items are marked in bold, other items (data) are optional. The only mandatory field is either ean, plu, externalId or productId. If the product cannot be found by ean, it is looked for by plu, then by externalId and productId.
The import file can look like this:
|
Please remember that products cannot be imported with the disabled option Deduct from stock. 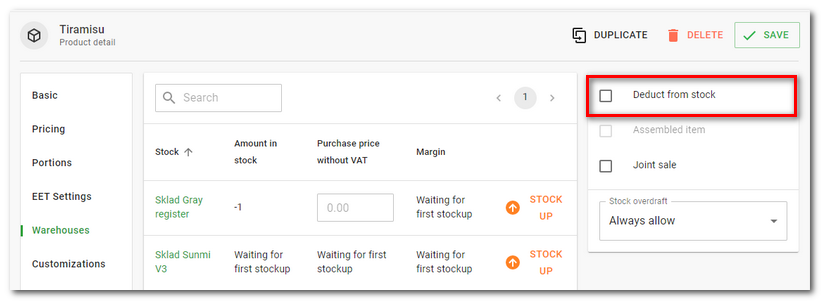 |
|
The guide on how to correctly import a .CSV file into MS Excel can be found here. |
How to display a list of corrections?
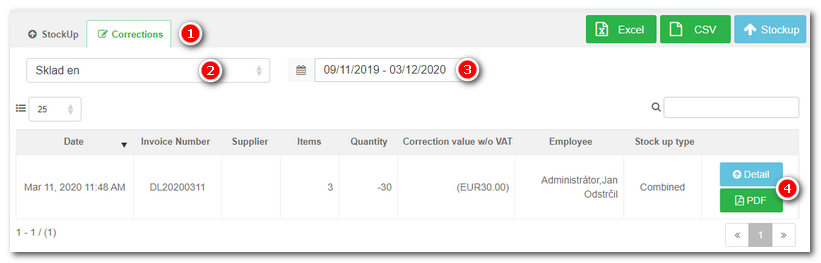
The warehouse correction list (write-offs) displays the total value of written-off items. In the upper bar, select Corrections and after selecting a warehouse and setting the time frame the list of the performed corrections will be displayed. If you want to display the details of the selected correction, click on the button Detail . The selected correction can be saved in a .pdf file.
|
Warehouse corrections are also displayed in the warehouse report Stock movements. |