![]()
» Available only in Dotypos FULL and higher. « |
|---|
Adding more products to the work in progress inventory
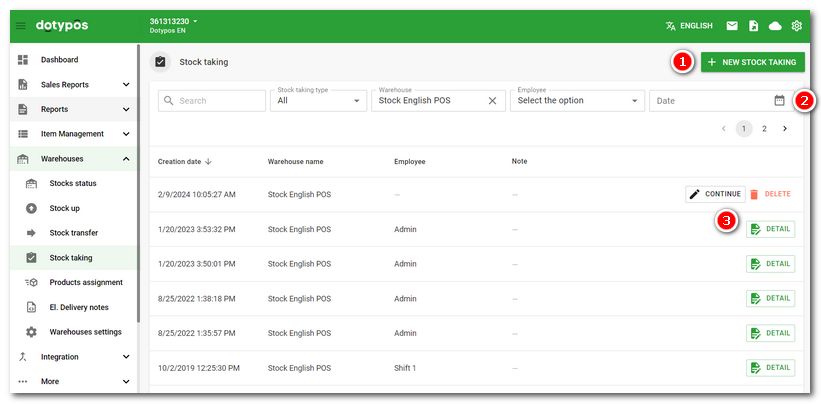
On the tab Warehouses » Stock taking you will find an overview of all inventories (in progress and completed) sorted by date. By inventory we mean the determination of the current stock (quantity in stock) for each product.
Click  to start a new inventory. Use the menus
  to limit the overview of completed or in-progress inventories to only selected parameters. For a completed inventory, use the DETAIL button
  to display its details, i.e. the report from the inventory, including the original quantity of goods before the inventory. Open the incomplete inventory with the CONTINUE button and you can complete it. It can also be deleted, of course. For each completed inventory, you can open the FINANCIAL REPORT, which shows the financial difference between the original warehouse stock and the entered stock from the selected inventory. This report can be used as a basis for the so-called mirror.
|
You can also carry out stock-taking directly in the cash register found in the Warehouse application. You can find more information in this chapter. |
Inventory options
|
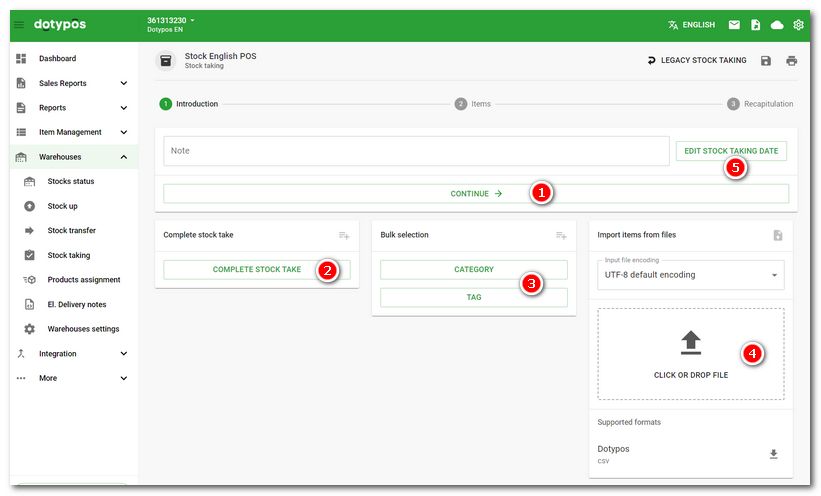
On the Stock taking tab, use the + NEW STOCK TAKING button to start a new inventory. The page for taking an inventory will be displayed. Here you have 4 options how to perform it: 1.Inventory only selected products 2.Complete inventory of all products 3.Partial inventory of products in selected categories or with selected tags |
|
You can start the inventory of only selected products by clicking on the CONTINUE button To start a complete manual inventory, click on the COMPLETE STOCK TAKE button If you only want to do the product Inventory in selected categories or with specific tags, use the buttons You can also import the inventory by importing a .csv file with information about the stock quantity of each product. To select the file to import, click on The inventory can also be backdated. Simply select the date |
 or drag and drop it in from the file explorer. To download a sample file that you can add your own products to, click on the arrow icon under
  before running a specific inventory. However, backward inventory is only possible for products for which there is no newer inventory than the date you have just entered.
|
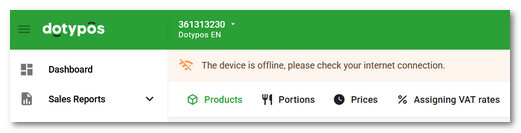
If the warning message The device is offline, please check your internet connection is displayed in the page header, keep the current page open in the browser, do not close the browser and do not perform any other operations until you have resolved the cause of the outage and the warning disappears. Otherwise, you may lose your work in progress.
|
We take inventory...
|
Once you start the selected inventory, a page will open with an overview of all or only selected products or a blank page. This depends on whether you selected a full or partial inventory in the previous step. In the overview, you can see the current stock quantity for each product. Always add a new quantity for each product, positive or negative, in the Add products to the inventory by clicking in the Select product field in the footer On the product overview page you will also find a search box. You can search for products in the inventory by their name, EAN and PLU code or External identifiers. Changes to the inventory are saved in real time, which is indicated by the floppy disk icon appearing in the header. In the header you will also find a button Click on the menu icon By clicking on the beak In this step, you can use the printer icon Click on the column name |
 .
. to print a list of goods to be inventoried without the stock quantity filled in and hand it over to employees for replenishment, for example. You can then complete the inventory later. You can save the current status using the button with the diskette icon, which also closes the inventory. Incomplete inventory is displayed on the inventory page in the
  to activate the sorting of the products in the report according to this column.
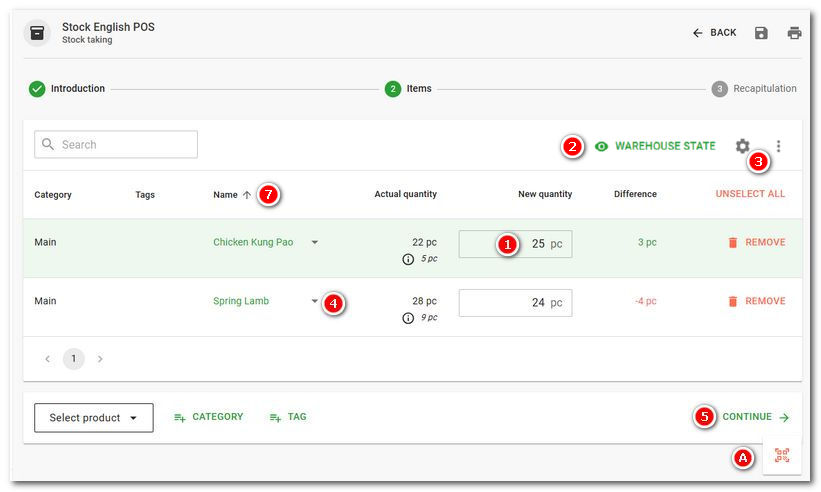
|
When you have completed the quantities for all products, tap the CONTINUE button If you need to add more products to your inventory, use the options at the bottom of the page. |
|
In the next step, save the new stock quantity using the COMPLETE button If a product is part of an open (parked) order, the icon |
 , which also closes the inventory. The completed inventory is displayed on the inventory
  will be displayed next to it, which will show the current number of
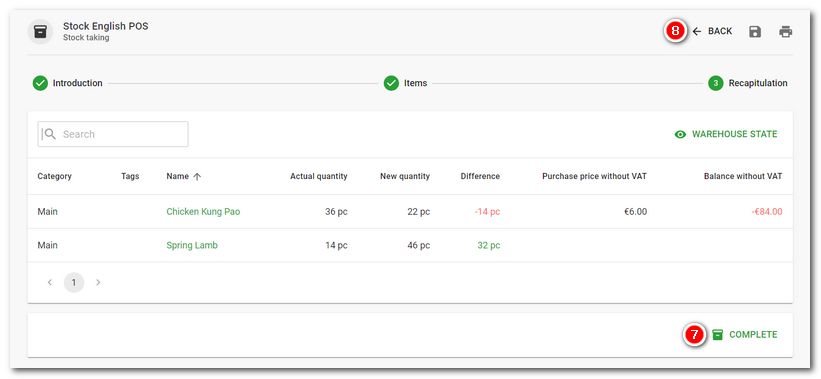
|
Elaborate inventory Error while opening or executing |
Adding more products to the work in progress inventory
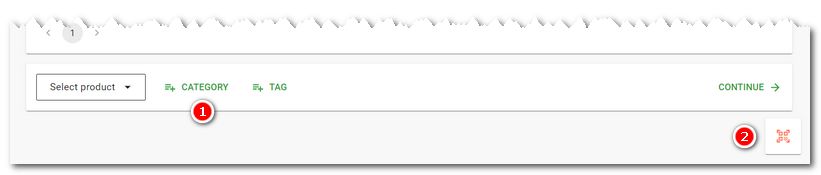
At the bottom of the work-in-progress inventory screen you will find options to add additional products. Products can be added by searching for them based on their name and EAN/PLU code or External identifiers. You can also add all products from a selected category or all products with a specific tags.
Use the button in the bottom right corner of the page to add a product to the inventory simply by scanning the barcode with a scanner. Assuming that the corresponding product actually exists. The number of times the barcode is scanned is the number of items added to the inventory.
|
For the barcode reader connected to your computer to work properly, set the keyboard layout to English. Otherwise, after scanning the code, the accented characters that correspond to the top row of number keys on the standard keyboard will be displayed. |
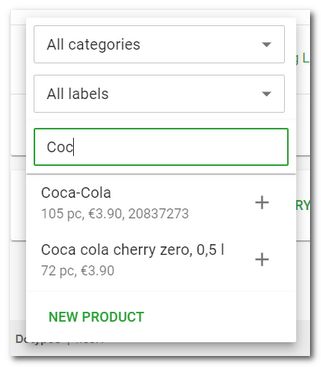
Click on the Select Product menu in the section to open the menu for searching and manually adding products. Click directly on the found product to add it to the inventory and close the dialog. To add multiple products, search for them and then use the + button next to each product to add them. This will not close the dialog and multiple products can be added to the inventory at once. The dialog remembers the last entry and the selected category or tag.
|
You can also use the keyboard for quick product addition. Type the first few characters, use the arrow keys to select from the suggested products, and press the ENTER key to add the product to the list and enter the quantity. By pressing the ENTER key again, you will return to the product addition dialog and can continue adding more products. |